

A CHRISTMAS STOCKING TUTORIAL:
Firstly, you will need to gather your supplies!
To make one stocking you will need:

- A fat quarter for the bottom (main) part of the stocking
- A piece of fabric measuring 7'' x 16 1/2'' for the stocking 'flap'
- Gold bead trim (I cant give a specific length because each letter takes up a different amount) *I should mention, you can TOTALLY omit this, its completely up to you!)
- Pins, Thread, marking pen/chalk, scissors
- AND a sewing machine! (or a lot of patience and know-how with a needle and thread)
***Please look carefully at the photos in this tutorial, as they form part of the instructions!(probably the more coherent part!)***
Ok, now you have all that together, print these pictures, which i have put together FOR YOU, (seriously, feel special, this took me hours to figure out). To print, right click each photo below, then select 'save image as'. Save the photos to your computer then print. Make sure the box 'fit to page' is unchecked.


Join it all up, and voila, stocking pattern. I tried to get all the pattern downloads in the one place, but couldn't figure it out, so make sure you download all three.
*If you have trouble, let me know*


Join it all up, and voila, stocking pattern. I tried to get all the pattern downloads in the one place, but couldn't figure it out, so make sure you download all three.
*If you have trouble, let me know*
Fold your fat quarter in half with RIGHT sides together, and lay out your pattern on the WRONG SIDE of your fabric. CUT.

(Please note, I didn't have that pattern when I made mine, I just drew the shape, so I am cutting around on I have already made, and including a seam allowance. YOURS ALREADY HAS THE ALLOWANCE INCLUDED, so cut around the pattern shape.)

Now remove the paper, and pin your two stocking shapes RIGHT side together. Sew them together using a 1/2'' seam. (please don't sew the top closed!)

Now snip little triangles out of your fabric at the curves like so. BE CAREFUL not to snip too close to your seam, otherwise you will have a hole in your stocking.


Now, join the two 7'' sides together with the RIGHT sides together, and sew, to make a tube.

Fold your tube in half, (in on itself, see below) and Press. You should have the right side of the fabric on the outside with the seam on the inside of the tube.
Have a good look at this photo, if your unsure.

Now, Put the tube inside the stocking, matching up the raw edges of the stocking with the raw edges of the tube. Still with me? Pin.

You should have something like this. (Hopefully)

Good, Now sew around the top of your stocking, attaching the tube to the stocking. I find it easier to sew on the inside of the stocking. Please look at the photo below.

DONE! Turn the tube out to the right side of the stocking and press.
You can leave it here, or you can follow me through to the end, either way, you have a beautiful stocking!
Ok, so for those who want to keep going, basically all I have done is stitch the bead trim on where I want it.
I stitched it on around the bottom of the gold sleeve, and then the letter on the front of the stocking. (see photos)
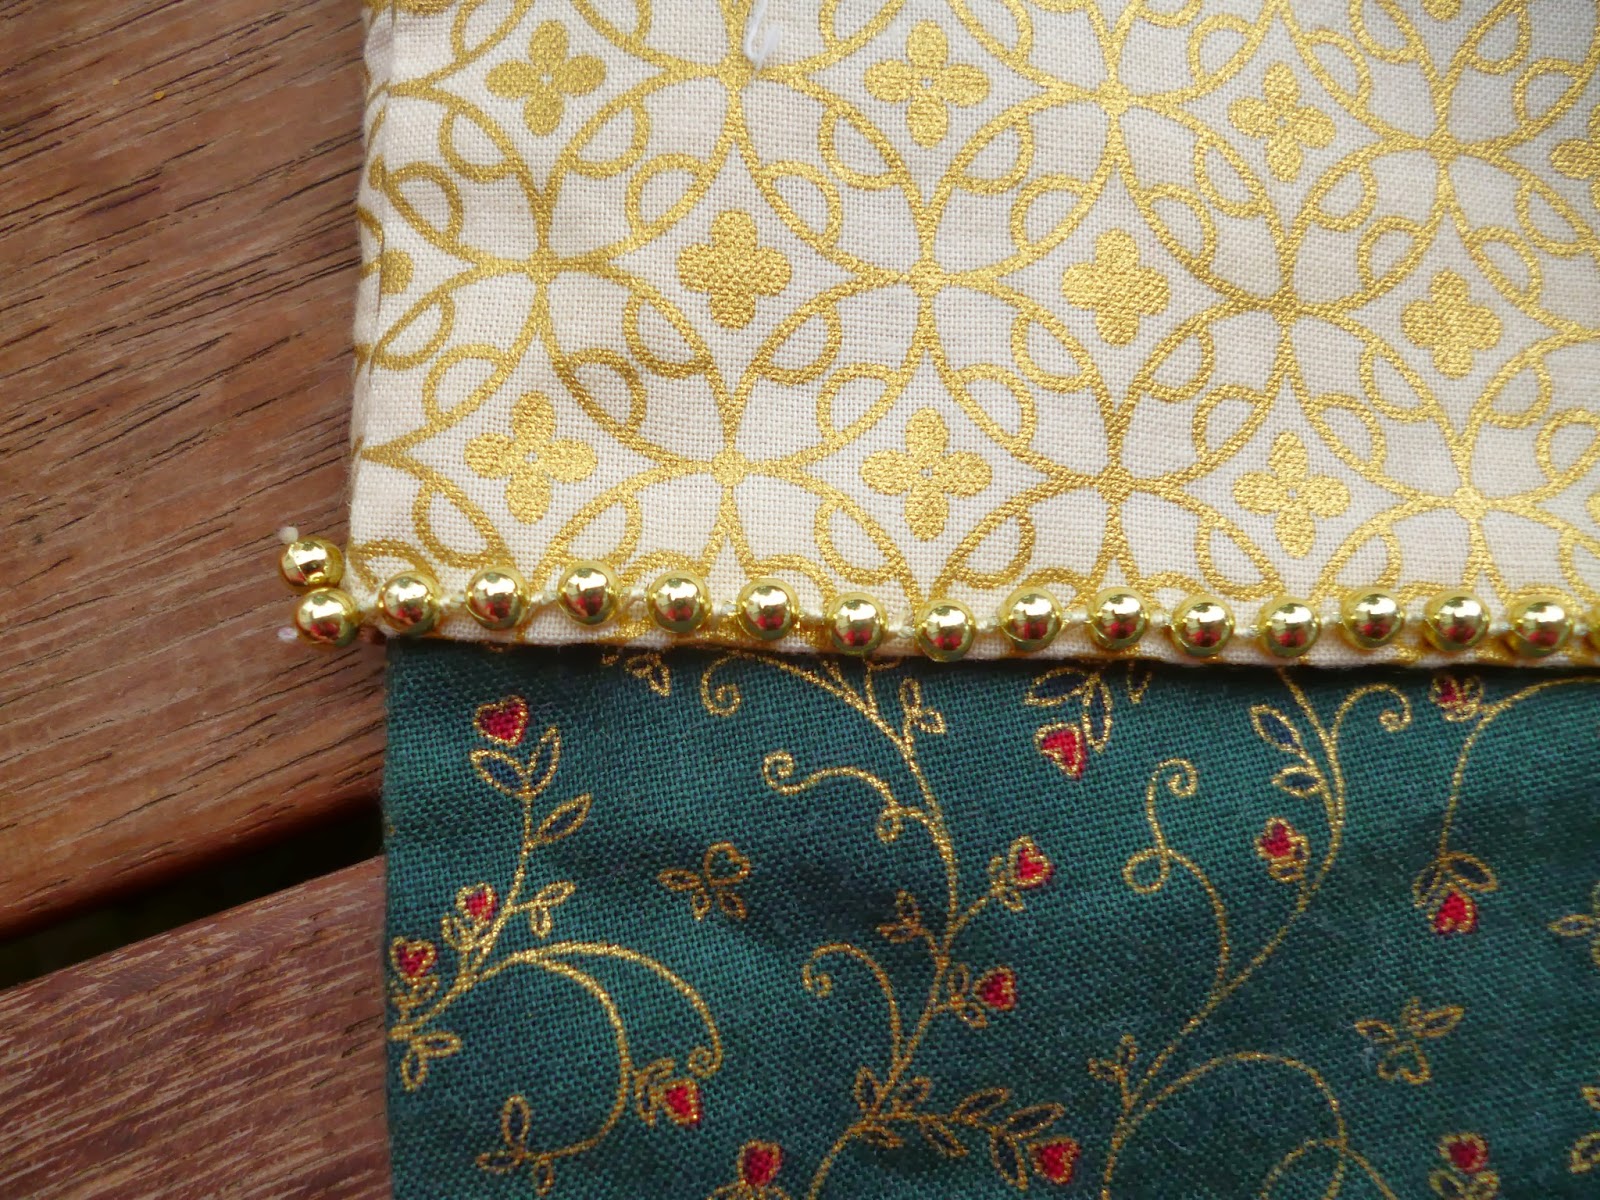
I found it stayed in place better if you stitch in between every ball. I tried doing every second ball, but it moves around and sags too much.

I also made a small tag to hang the stocking by. It was pretty easy to make, and then I hand stitched it to the corner of the stocking.

(I can't wait till our extension is done and I have someone more exciting to hang these stocking then just on the kids toy-box!)
Hope this was helpful. If you have any questions either leave a comment, or email me via the 'contact me' tab.
Jessica
Thanks a heap for doing this tutorial- I can't wait to make our Christmas stockings this year!!
ReplyDeleteThis is really cute, Jessica. Your family must be super excited about what they'll find in there on Christmas morning. I pinned it on my Pinterest board :)
ReplyDeleteThose stockings are super cute :)
ReplyDelete