I have always admired pretty Christmas wreaths on front doors.
I decided that this Christmas I would make one. When I envisioned it in my head I imagined Christmas balls, tinsel, and lots of other Christmas-y things on it, but when I was in spotlight, I thought some red flowers would be nice.
However when I saw the pink and white ones, I changed my mind, and got them instead!
You can really let your imagination go wild when decorating your wreath, but this is mine....
(If someone knows how to get rid of smudges from a camera lens, please let me know! I've tried lint-free wipes and other things but nothing seems to work!)
To make this wreath you will need:
- A Wreath
- Decorations (I used fake flowers and some hessian material)
- A hot glue gun
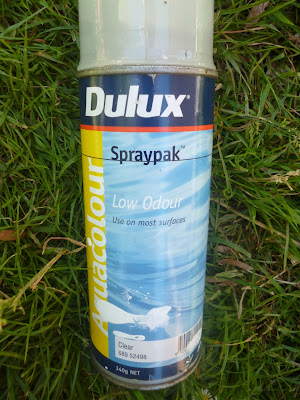
- Some clear sealing spray (Optional)
To start with, I decided that I wanted to put some sealing spray stuff onto my wreath. Our front door is under a verandah, and never really gets wet, but I didn't want it to get damaged by the weather, or start to go mouldy.
So this step is completely optional. You could even paint your wreath a colour, which would offer protection, and look awesome too.
1. Following the directions on the can, spray your wreath.
This is the spray I used. It has been in my shed for years and years, so I don't know if you can even get it anymore, but I am SURE that there will be something similar at your local paint or hardware store.
I started off spraying the wreath on some newspaper, but then I couldn't spray the back of it, so I found hanging the wreath on the bush worked really well for me. I gave my wreath two coats, then left it to dry completely for 2 days. As I mentioned before, this step is completely optional, and I'm sure it would work just as well using this wreath without anything on it.
2. The next step is the fun part! Decorating your wreath! You can do this however you want, with whatever you want. For mine I threaded the flower stems through the wreath until I had an arrangement that I was happy with.
Basically just keep adding and experimenting until you have something that looks good.
I also had some hessian fabric that i wanted to make into a sweet bow, so I used my handy-dandy overlocker, to overlock the sides of my fabric. When I was overlocking, I tapered in the middle section of the bow so there wasn't a big bulky knot when I tied it (sorry I didn't take a photo of that part, but it shouldn't be too hard to figure out).
3. Once you have everything the way you like it, get your hot-glue gun and glue it into place. I used heaps of glue on mine, as I didn't want curious fingers to be able to pluck flowers from it once it was hanging.
4. Then using some scissors you don't care if you wreak, or a pair of wire cutting scissors, trim all the stems, putting more hot glue where needed.
5. Put a small screw, nail or whatever takes your fancy into your front door and hang your wreath!

6. Finally, take one step backward and admire your handiwork!
I really like this wreath. It was so much fun making it too! I may leave it up all year! It doesn't really look as Christmas-y as I was planning, but hey, its a wreath and I love it, Mr Handsome thinks its OK too, so it stays!
Jessica
(Step 7. Clean ones camera so photos don't look all smudgy....seriously, any tips would be most welcome!)


