Showing posts with label Children Sewing. Show all posts

Saturday, 6 February 2016

Penguin Backpack : :

Little Mr I started 3 year old kindergarten this week! (seriously will you *please* stop growing!) So, obviously, he needed a backpack to commemorate the occasion!

I own the book "Oliver + S Little things to sew", and if you have read my blog at all, you would probably have noticed I have a slight, ahem, obsession, LOVE for anything Oliver + S!

So it was a no-brainer for me to use the backpack pattern found in this book!
Now, just so you know I'm not completely bias, I have made kids backpacks before, and while those patterns where OK, this one is great!!

Whenever I sew with Oliver + S, I follow the instructions to the tee, because I'm always bound to learn something.For this pattern it was the zipper insertion method! I wasn't entirely sure what I was meant to be doing, but I just follow the pattern and it always turns out great!

Internal Dialog: "why would i want to do that? It looks like your adding a whole load more steps onto something that should be easy liesl!!

Then it clicks why I had to do all those seemingly annoying steps, Que me calling my husband over "come and look at how amazing my sewing is!!"
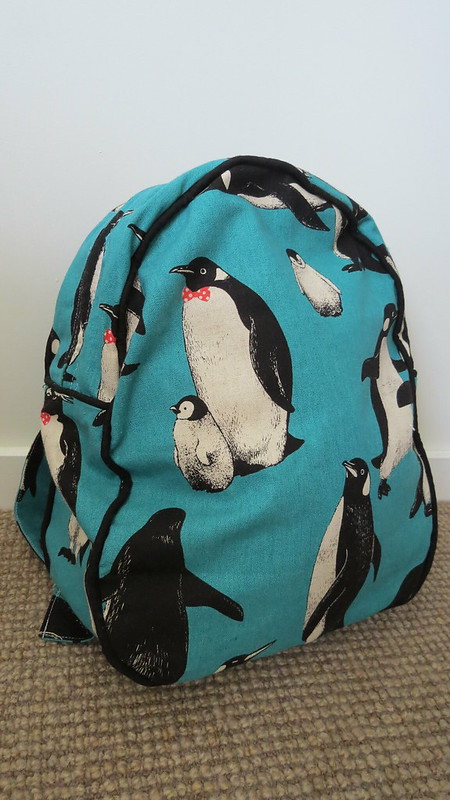

IMG_2016 

How cute are those penguins?! 

After I finished the outside of the bag, I noticed it was quite floppy. I wanted the bag to hold its shape, and it did cross my mind to put some heavy weight interfacing in it to really stiffen it up, but I decided to go for more of a softer feel and put in some fusible fleece interfacing instead. 
It helps it hold its shape, but also keeps that lovely soft feel as well, which I love.
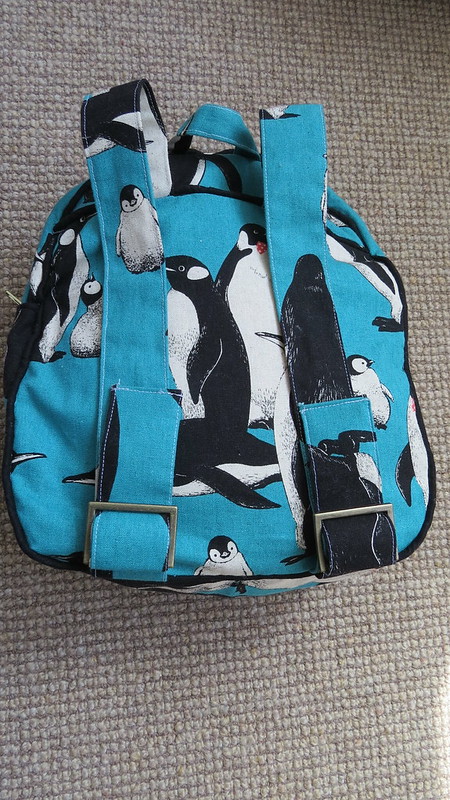


IMG_2017 

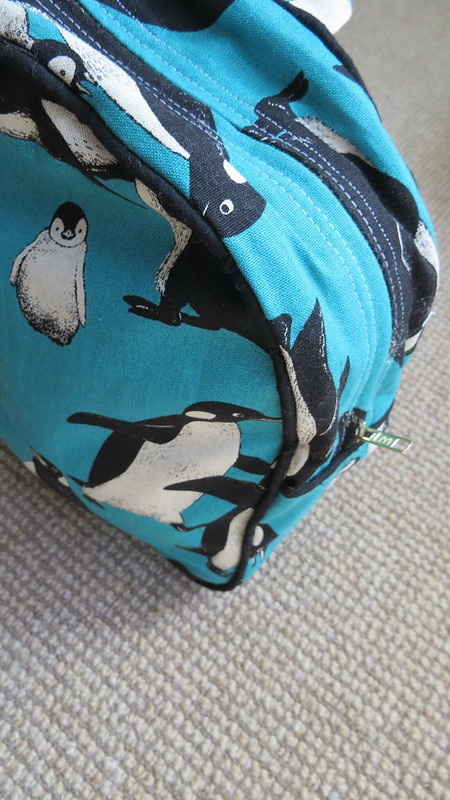
 Other changes I made to the pattern: I make some black pipping and added it on all the seams of the backpack except on the straps. I think it just gives the back a bit more definition, especially as I was using the same fabric for the whole bag.  (I also just love pipping on a bag and will add it whenever I can!)

IMG_2018


I added two rows of top stitching along the zipper as you can see above (pattern calls for one). Don't really have a reason for that change, other than it took my fancy at the time!


And lastly, I also obviously omitted turning the backpack into a penguin (the pattern adds beaks and wings etc to make a penguin backpack). I really wanted to just let the fabric shine without all the extra embellishments, so I simply skipped over the bits I didn't want and just used the basic backpack pattern.

IMG_2020

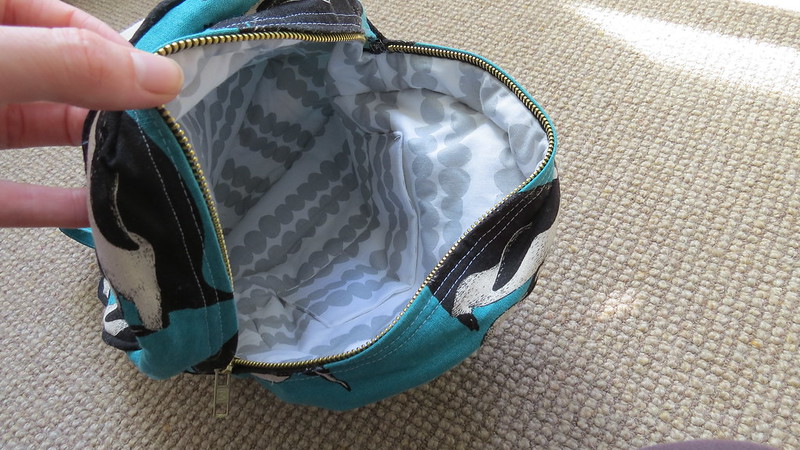
The insides are from lotta jansdotter, I didn't want it to be too busy in there, so I picked a lovely basic fabric. There is also a small pocket inside. Its quite small. I'm not quite sure what its there for, but I added it anyway as I'd already cut it out.

So there you have it! Mr I has been carrying it around on his back constantly since I finished it! The teacher tried to get him to put it in the locker when we got to kinder,  he wasn't too impressed with that, and did so reluctantly! I guess there's no better compliment he could give me really.

Just for an update, because its been 5 ish months since I last blogged. Lots of things have been going on, I didn't plan on having a long break, but life just happens I guess. Mr handsome has got accepted into University studying Mechanical Engineering and starts in 16 days!! We're really excited about that, but also a bit nervous! Its a 4 year degree and while I know were in for the hard slog, I just feel so excited and blessed that he has this amazing opportunity.

The twins, miss E and miss I are back at school as of last week. We had a lovely summer holiday with them, and even managed to get away to Eden for 10 days camping. (Its a beautiful part of Australia right on gorgeous beaches if you ever get the chance to go!)

AND Little miss S, (who is turning 1 later on in the month), started crawling today!! Shes been up on her knees rocking and trying to crawl for a week or two now, but she saw my embroidery thread box, and crawled to it!!  (girl after my own heart!)

I have loads of projects to catch up on, so keep an eye out for them!!

Jessica

Monday, 31 August 2015

The Nappy Bag NOT from heaven: :

This bag was definitely not from heaven (I'll leave it up to you to figure out where its from).  Although I must say the finished result is pretty heavenly!

One of my good friends is having a baby this October. She is also a sewer (seamstress?) and so of course she is churning out lots of goodies in anticipation of number 5 (!).
Everything I decided to make for her, she's already making! Seriously! My first thought was a quilt (no surprises there) but I think she is currently onto quilt number five at the moment. Then I thought a stool...yup she's made one of those too, and the list goes on.

So I thought I was getting out of it easy when I volunteered to put her nappy bag together.

I was wrong!

This sucker was sooo thick I broke at least 6 needles!! Yes, yes, some of you may question my needle choice, they were just universal needles...and maybe a few quilting needles (What? I was getting desperate!), but the craft store isn't open Mondays, and well, today being Monday....you see my problem?

Anyway, lets look at some photos


IMG_1509 

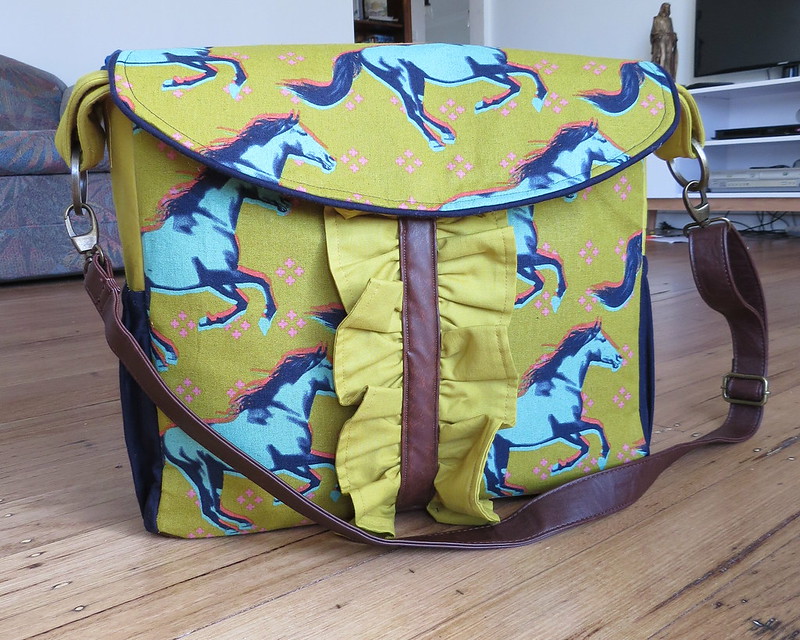
The fabric is all from fabric.com, and is mostly Cotton and steel. The outer, horse fabric is canvas, with some fake leather accents on the bottom and in the middle of the ruffle. My friend picked the pattern, and to be honest I'm not 100% sold on the ruffle and I was tempted to leave it off, but I reminded myself that its not my bag and put it on there.
Its probably one of the things she loves most about the pattern :)


IMG_1513


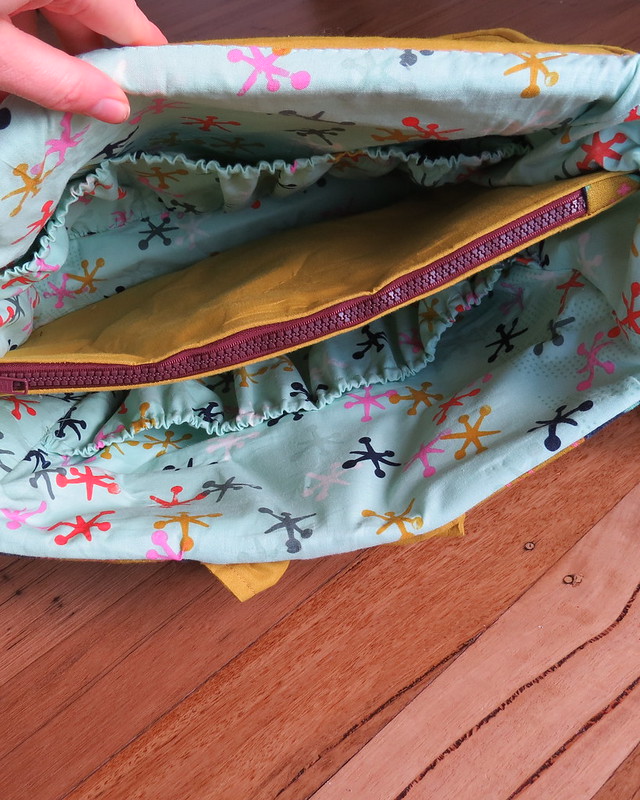
It has loads of storage, as every good nappy bag should.

IMG_1516


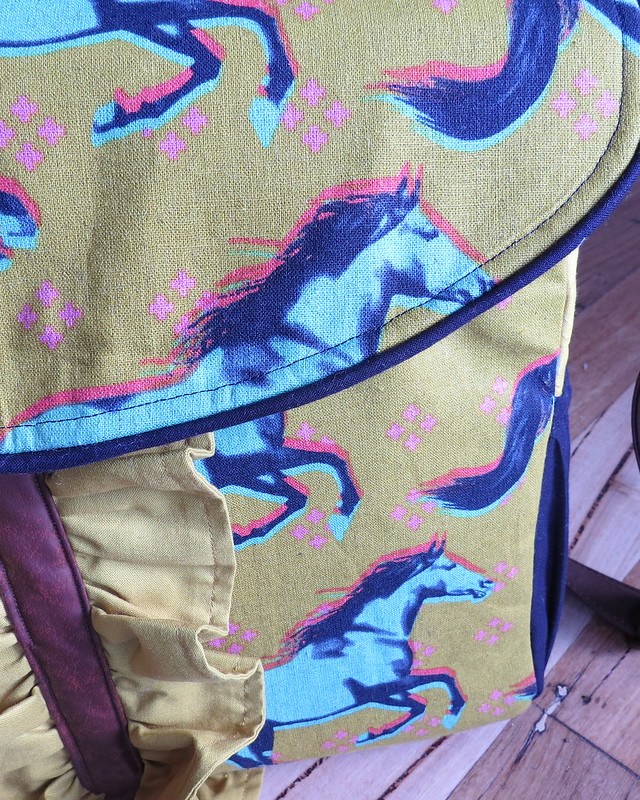
I added the blue pipping around the lid.


IMG_1518


 (See that baby block? That's me styling! Yeah! I'm doing it!)...that's me being sarcastic if you couldn't tell.
When I was cutting the bag I really stewed over pattern placement, especially on the lid. I knew I wanted a whole horse on the lid, but didn't want it to be smack-bang in the centre. I could've fit two horses on the lid but it looked silly, so after lots of internal debating, I settled on one horse off-centre.

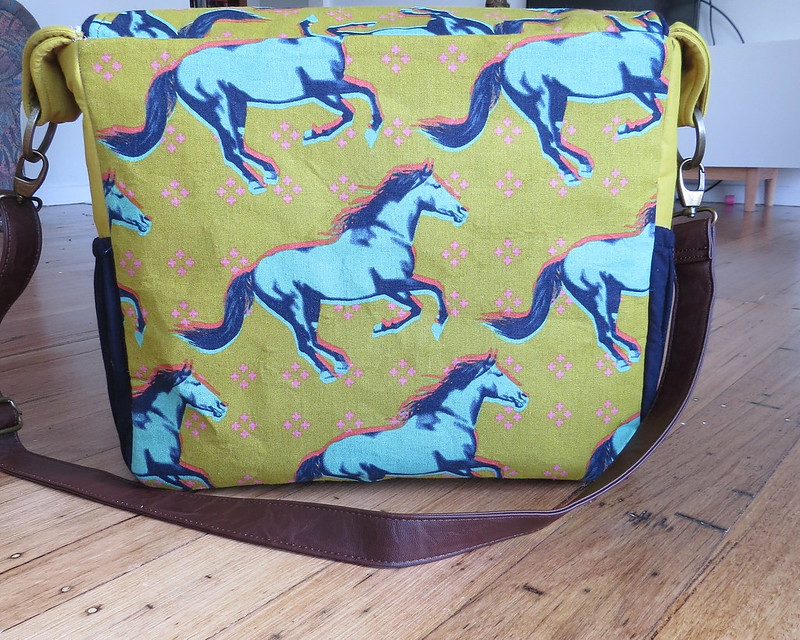
I also *tried* to match up the pattern on the lid with the front of the bag, but it didn't turn out too well, so lets just pretend that I didn't and it just happened like that.

IMG_1511


The last step in the pattern was to top stitch all around the top of the bag. I tried...I really did, but I came to the conclusion that its physically impossible without an industrial sewing machine, so I unpicked my poor, poor effort and left it.  (I don't think I'll mention that to my friend either).

The pattern is called 'The Lola Bea Diaper Bag', Im *pretty* sure it came from Etsy. Check it out if you like it.
You may notice that I omitted the strap and went for a pre-made leather strap from a previous bag. The side ring-holders (don't know what they're called!) were made by me and my ingenious brain! (and therefore are not part of the original pattern.)

Its always hard to sew for a fellow sewer, as they can pick mistakes, but all in all I'm pretty happy with how it turned out!

Next time though...I think I'll just stick to quilts :)

Jessica

Monday, 24 August 2015

Oliver + S Garden Party Dress : :

Ever since I made Miss I a new Sunday dress, Miss E has been pestering me for hers.  Usually they ask for the same dress.
I often will make them the same dress but in different fabric...or same fabric but different colour. But I decided to make Miss E a different dress this time around.

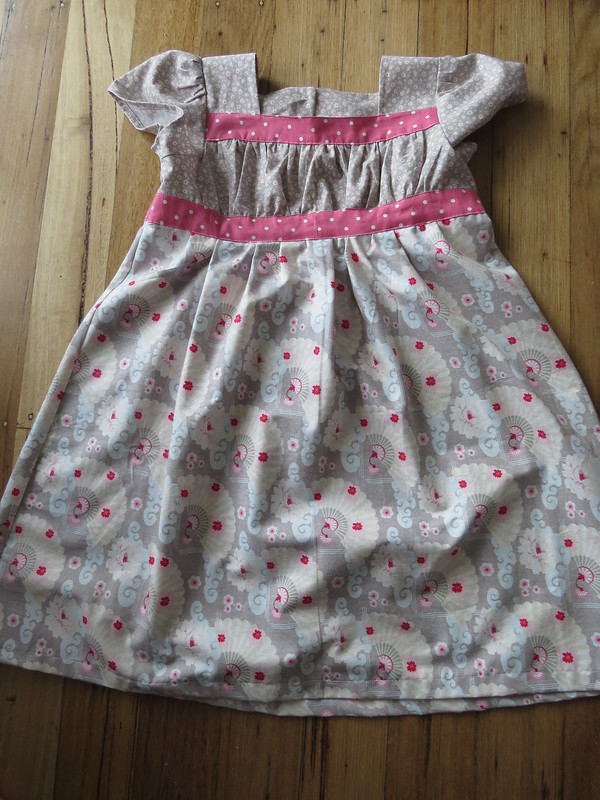
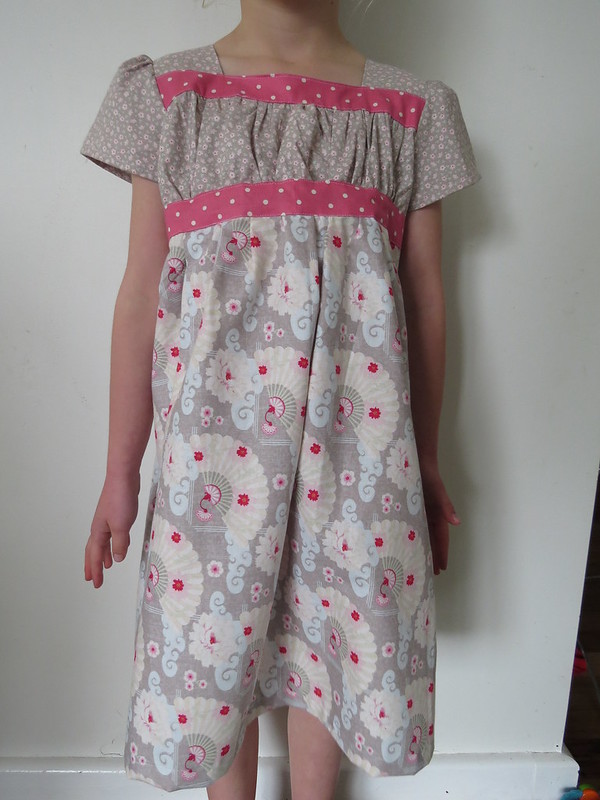
I settled on the Oliver + S Garden Party Dress. This is a sweet little dress with a shirred front bodice.
Lets just get right into photos shall we?

IMG_1456


I sewed a straight size 7 for Miss E who is 6 (as they are quite tall), however looking at the photos, I think I could have sewed a smaller size as she is quite slender. But never mind. Who ever complained about room to grow?? (that will teach me for not measuring!!)


IMG_1457


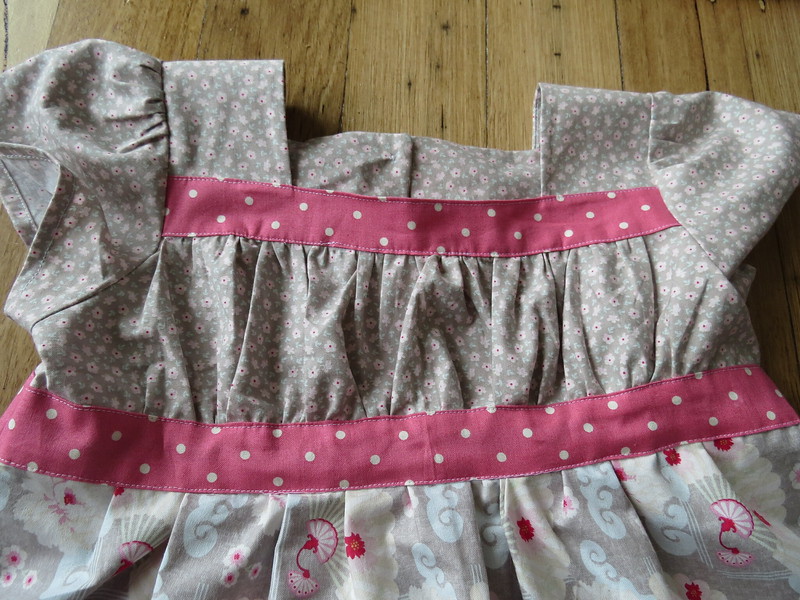
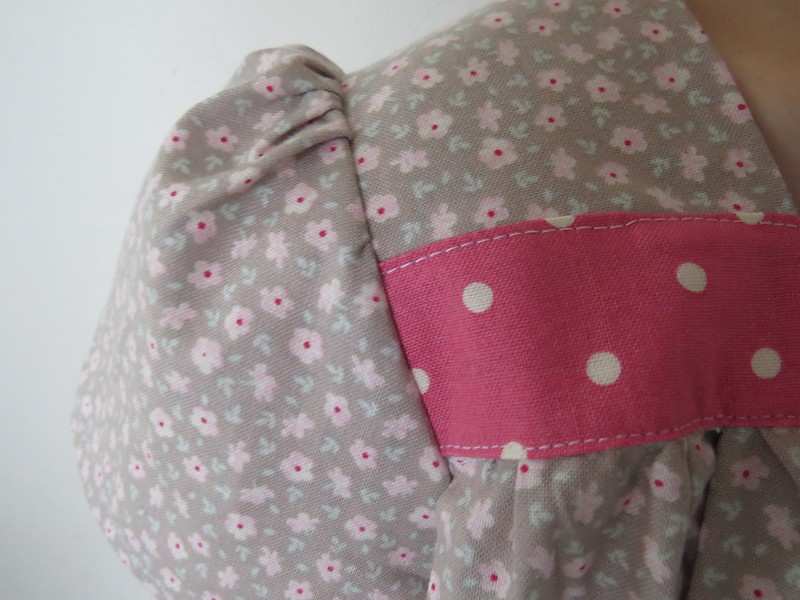
I changed the pattern up a little by having a different fabric for the bodice. I had this oriental-fan fabric (skirt) in my stash, but I didn't have enough. (Its Tilda for those who want to know). So I went back to the store to buy some more, but alas they had run out. So I matched it with the small floral print (also Tilda) and used it for the bodice. It ended up being a bit more work for me as the front pattern piece is one piece with the bands overlaid on top, but it wasn't too difficult.


IMG_1449


I actually love it even more with the contrasting bodice.
This pattern would be so much fun to use for a really fancy dress. I love how Oliver + S Patterns are so easy to customise...and I honestly feel like I learn something every time I sew with one!! It feels like I'm taking dress-making courses!


IMG_1451

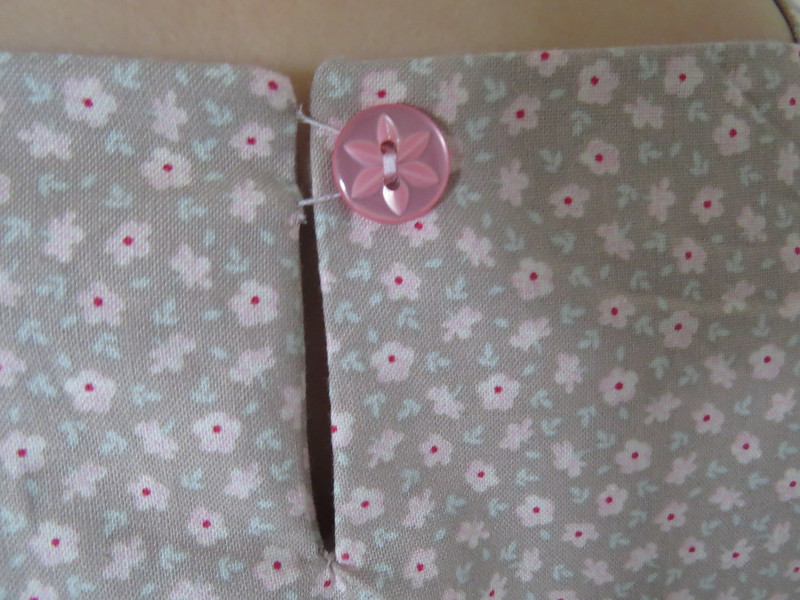
I also loved the button closure. I have never made a thread chain loop, and I really like how delicate it looks, while also being very functional!! I can see myself using this for other things as well, not just button closures. 


IMG_1448 

Needless to say Miss E loved it. I told her she looks very pretty in it, which she followed up quickly with a "I know".


Jessica

Friday, 14 August 2015

Sew Bossy..or should I say "Sew lazy!!" : :

Ok ok!! So I'm incredibly lazy!! This 'sew bossy' project has been on my to-do list for such a long time!!
For those of you who don't know what it is, have a quick read of my previous posts here, and here and to see what Mary sent me, check it out here.  *ahem* please ignore the dates (2013!!...yep this has been looooong overdue!)

But in my defence, I DID finish this project about 5 months ago and I just haven't got around to blogging about it yet.

This was such a fun project. It was sooooo fun shopping for Mary, and seeing her make what I picked into a really cute little cape for her daughter! You can read about what I sent her right here at her blog.

What was even more fun was receiving her lovely package in the mail!! Honestly...if anyone wants to do this with me....I'm totally up for it!! Just leave me a comment or send me an email :)

So, as you may have already read in one for the above links, we decided to swap Oliver + S patterns because we both love them, and seriously, you just cant go wrong with any of them!

Mary sent me the Art Museum vest and trouser pattern!! I was so excited that she picked that pattern! (I may or may not have hinted a little in our emails that I really liked it ha ha)

So here is what I made....

IMG_1433

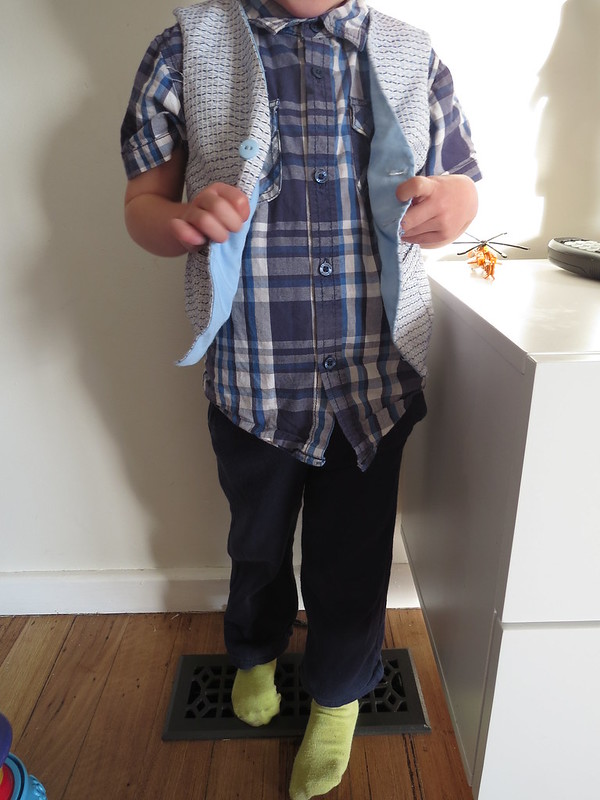
I made the vest and trousers, so please ignore the slightly wrinkled plaid shirt and lovely neon green socks for the moment.  

It was also really had to get decent photos as my 'model' (Mr Z) was very uncooperative! He just wanted to get back to playing with his new helicopter (that you can see in the photos!).

I LOVE the material that Mary choose for the vest. Its sooo classy! I loved it so much that instead of using the material she sent for the back of the vest I decided to use it for the whole exterior. 

Mr Z loves the pants!! I just realised I didn't get a really good shot of my lovely welt pockets on the pants, but they are there, trust me. ....and they look fab! (if I do say so myself)

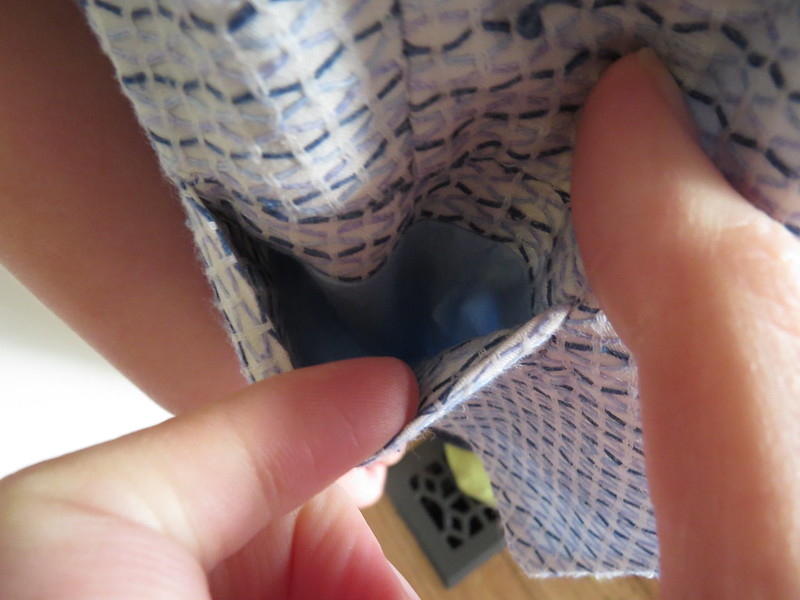
If you don't believe me...just check out the welt pockets I did on the vest...which i did manage to photograph!

IMG_1434 


Cute! These pockets usually hold a matchbox car each for during church. Mr Z is really loving pockets lately, and I usually find all-sorts of "treasures" when I'm washing his clothes!

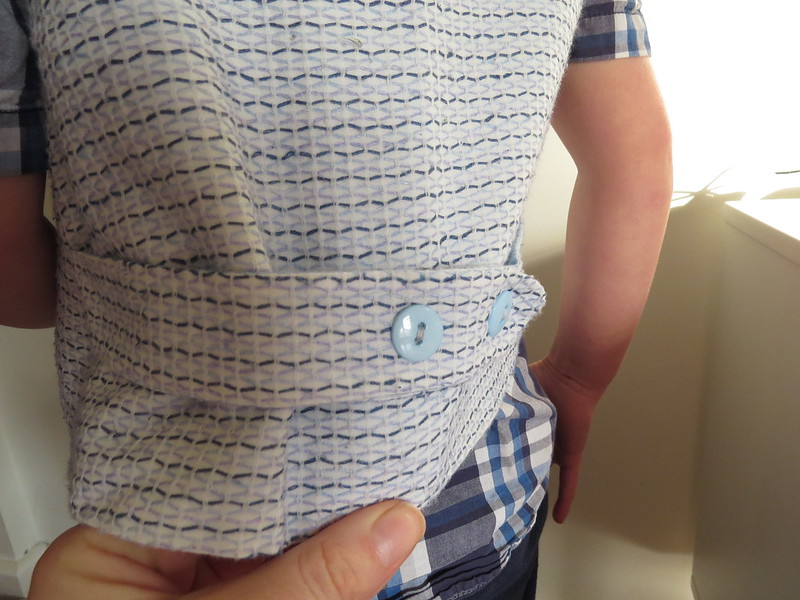
The back has a lovely belt with button detail. This pattern is the real deal. You could seriously make a professional-looking suit from this for you little man (and for a fraction of the cost!)


IMG_1435


I definitely want to use this pattern again! I already have two more projects lined up for it. I love the lovely soft material Mary chose for the pants (sorry I didn't get a better shot of it). Mr Z for some reason is getting really picky about his pants lately. He wont wear jeans, or anything that isn't comfortable...so mostly he wears track pants everyday. I'm glad that getting these on him isn't a struggle.

However when Mr Z out grows these I want to try making the pants with something a little more stiffer, perhaps some blended wool? I think it would really help the pants to look like suit pants, and give them that crisp suit-pant look.

Thanks Mary again for so much fun. I really appreciate everything you sent me and your lovely letter! I really enjoyed sewing this!


Jessica
Wednesday, 1 July 2015

Oliver + S Library Dress : :

It's been a while since I made Little Miss I a new dress, and her dresses seem to be rapidly shrinking in the wash...or is she really growing that fast?

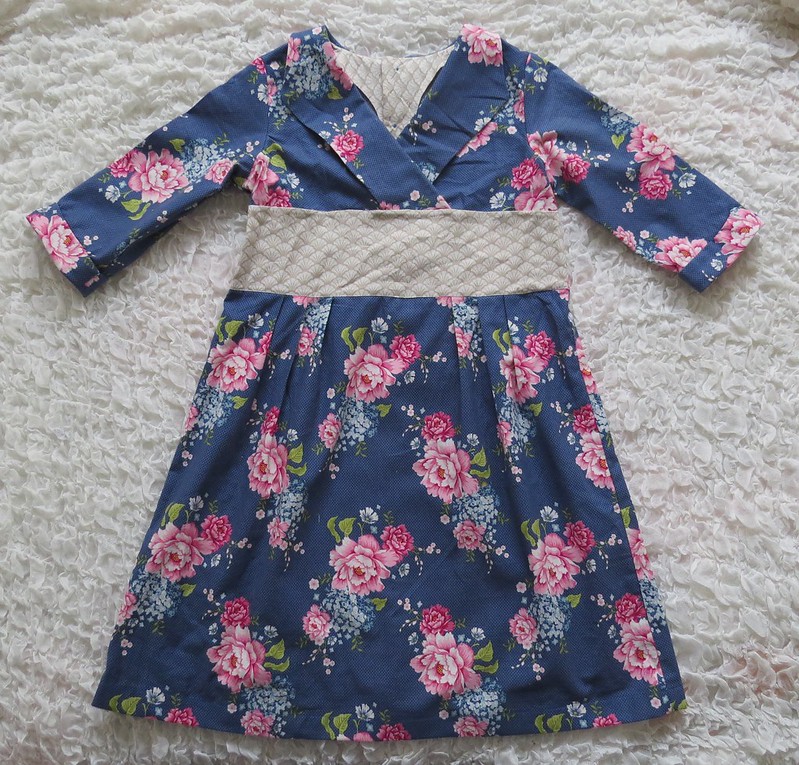
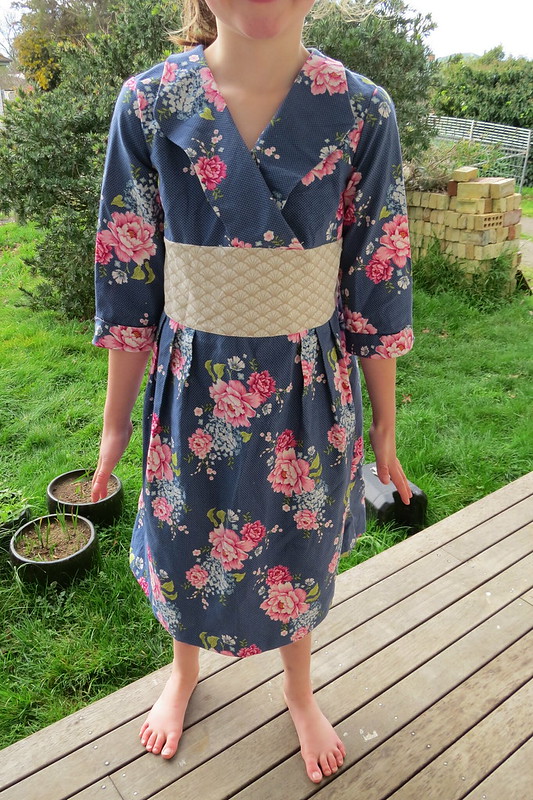
I decided to make her an Oliver + S Library Dress. I know I've said it before, and I'll probably say it again....but I LOVE Oliver + S patterns. They are the best!! The whole time I was sewing this dress I was thinking "I'm such a good sewer!" "look at this, its amazing"...yup sewing with Oliver + S is definitely a confidence booster because their patterns create such professional results!! (You can see my other Oliver + S makes here, here, here, here, here and here)


Oliver + S Library Dress


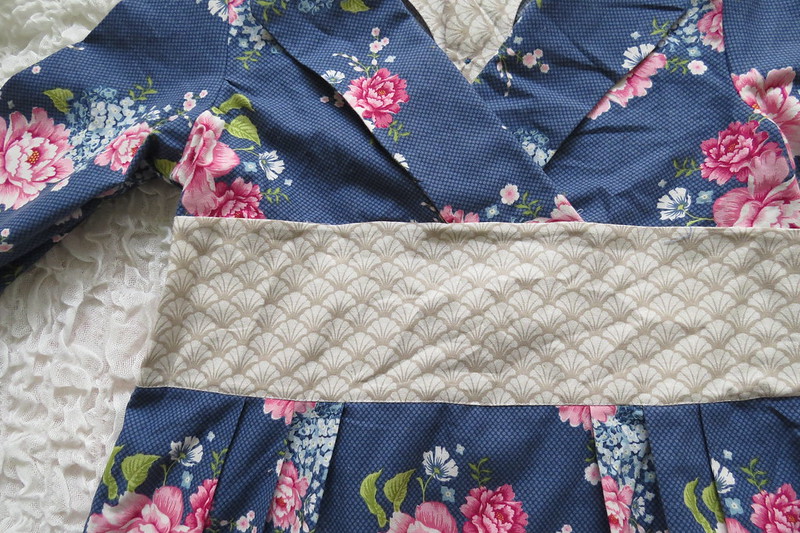
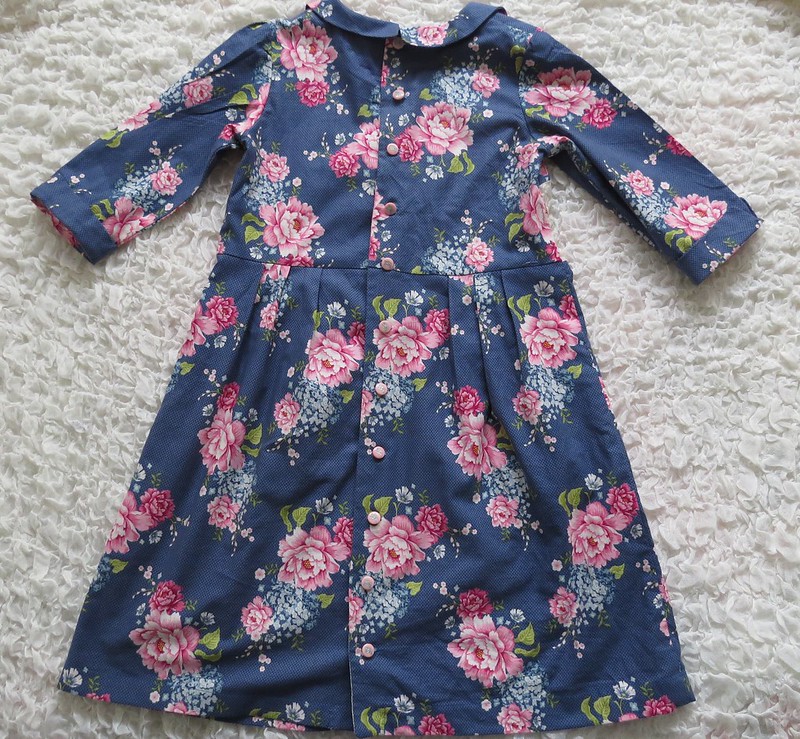
I had stashed away some lovely Tilda fabric that my local craft store stocks. Its so pretty and feminine. I used it for the main part of the dress, the waist band was just another random fabric that I found.


IMG_1327

I made version B with the long sleeves (because we are currently in the depths of an Australia winder (ie. its cold with the sun shining!), and I omitted the pipping option because I wanted a 'classier' dress......and because, lets face it, piping is extra work, and I'm lazy :)

I didn't realise it until Little Miss I put it on, but it kinda reminds me of a kimono? Ha ha, I'm sure that is what its meant to look like, and I'm just a bit slow on the uptake.
I'd love to get some authentic Japanese fabric to use for this pattern.....or maybe even some quirky, fun Japanese fabric...hmmmm, decisions, decisions.

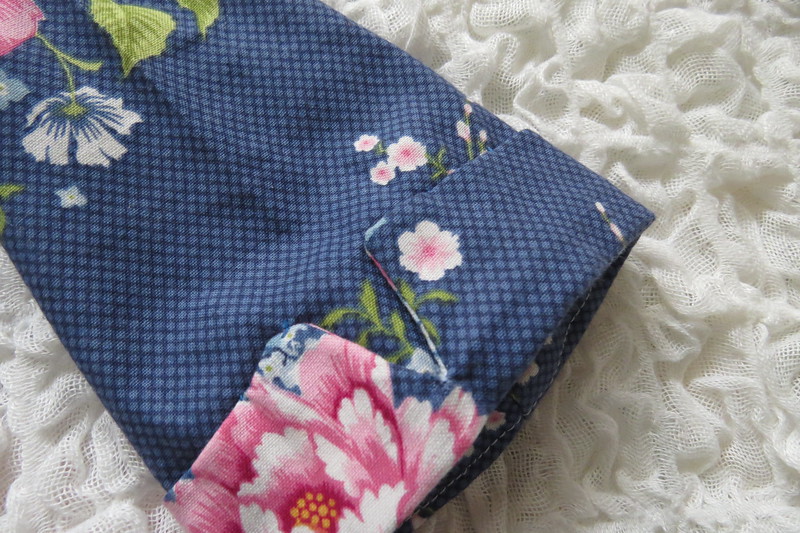
IMG_1329

 I love that sleeve detail!

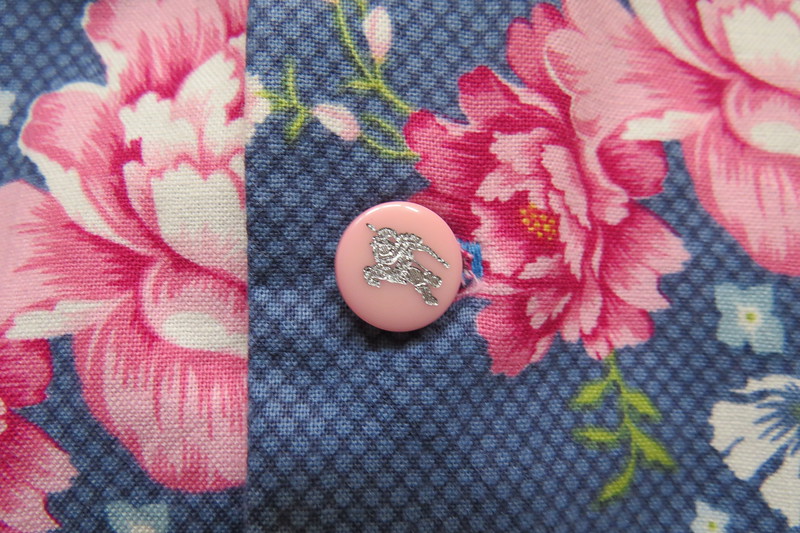
The only thing I changed from the pattern, was I used more buttons than the pattern stated. I only did that because I didn't have any 1/2 inch buttons on hand, and Little Miss I picked out these lovely little pink buttons with the silver detail.

Little Miss I and I spend about 5 mins trying to figure out what the picture on the buttons was? I thought it was someone riding a horse, and if you turn it around, Little Miss I thought it was someone stabbing something!? I decided a man riding a horse was the safer bet, so that's the way I sewed them!

IMG_1331

I decided to position them a little more close together, and continue all the way to the bottom of the dress. It reminded me of a wedding dress with all those small buttons.


Oliver + S Library Dress Back


Little Miss I is 6, but I made a size 8, only for the length. I wanted it to be below her knee...I have a real thing about wearing clothes below the knee.


When I make it again, I will definitely make it in a smaller size, because all my kiddos are quite slender, and just use a size 8 back lining, and lengthen the skirt pieces to get the length I need to satisfy my prude-ness. More is definitely more in regards to clothing :)

I'm so so happy with how it turned out. Its so cute, and to say Little Miss I loves it is a huge understatement!!


IMG_1346


Now I have to make another dress for Little Miss E, because her clothes seem to be shrinking too......that's one of the things about having twins....I need double of everything!! I'm thinking of maybe making a Garden Party Dress for her??

Jessica

Monday, 29 June 2015

Cute Baby Shoes : :

Last year when Little Miss E & I where at kinder their kinder teacher was really worried about their lack of clear speech and how they would cope at school.
Going back to when they were bubs they didn't talk much (well...they didn't talk much english! They were always babbling to each other), and as a result they were behind the eight ball with their alphabet and numbers when starting school this year.

They are now half way through the year and they know their numbers up to, and backwards from 20, their alphabet and are even reading now!!
Their teacher has been so great! She loves to teach and gets excited when her students learn something new. She's a fantastic teacher.

Anyway, the point of all this is she has been so excited that her first grandchild was born, a girl called Isla, and I wanted to make her something smallish for the new bub.

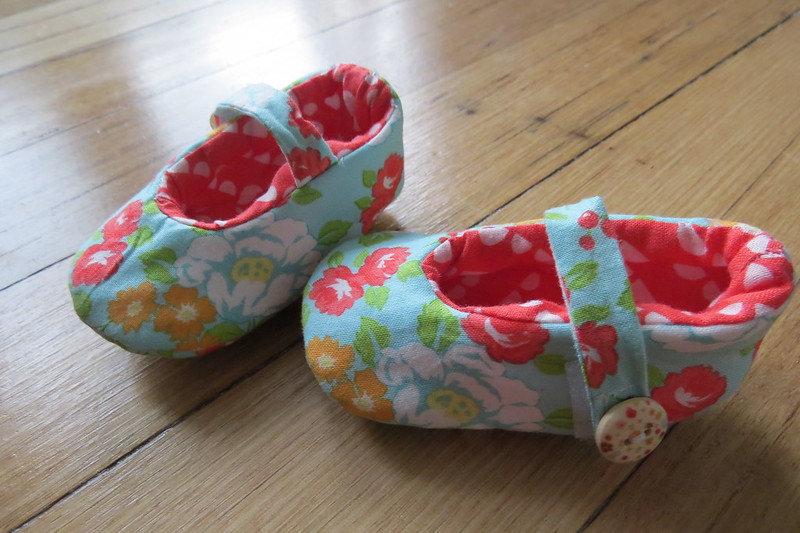
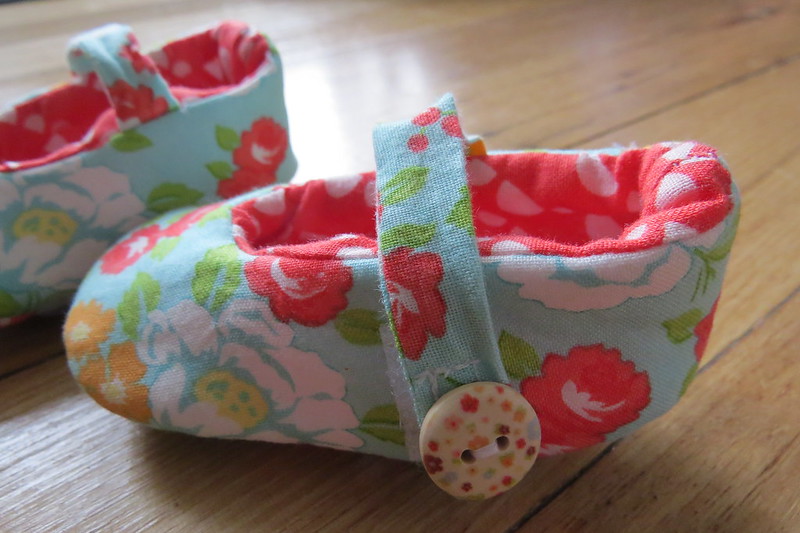
I decided to try and make some baby shoes...


IMG_1323


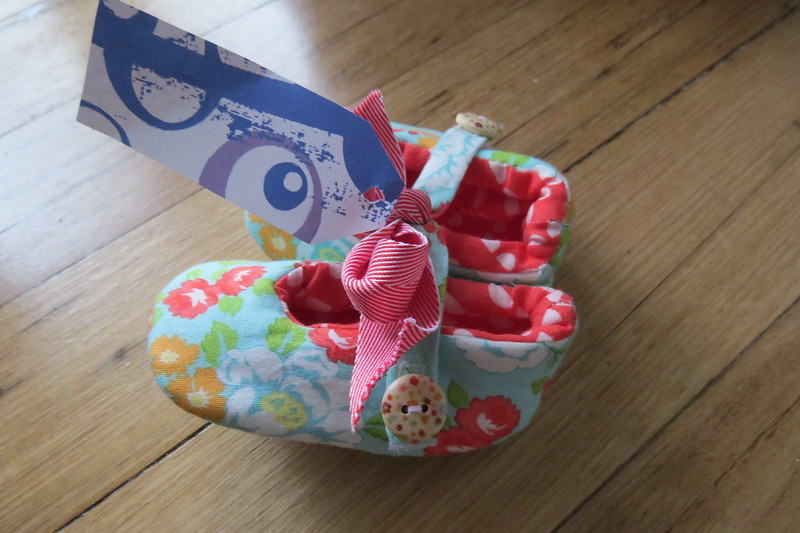
EEP! Aren't they just sooo cute!!

These went together super quick, although some parts where a bit fiddly. I was planning on making them a bit bigger, about a 3-6 month size, but they ended up smaller than I intended, pretty much for 0-3 months, which was fine because the baby is only about 1 week old, I'll just have to remember for next time to make them bigger.


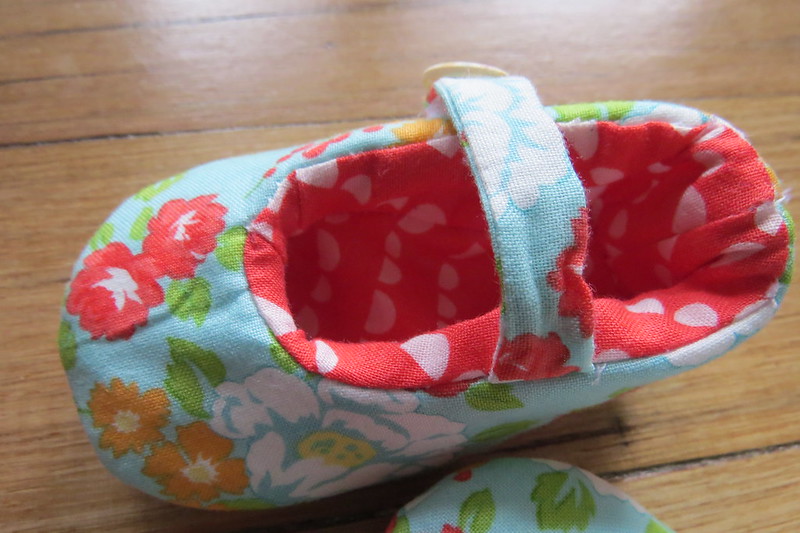
IMG_1324


I think they turned out really sweet!! I'm going to make Little Miss S a few pairs to wear for church!


IMG_1322


I sewed a button onto the top of each closure using these little wooden buttons I got from a craft show a few years ago. If I was making these shoes for an older baby, one who is putting things in their mouth, I would definitely leave this off, just in case they managed to find their way into little mouths.


IMG_1321


The fabric I used was "Happy go lucky" (Love it!), and I put some thick fusible fleece lining on the insides to keep those little toes toasty during winter!

These shoes have already been given and hopefully they are getting loads of wear!

Jessica
Thursday, 18 June 2015

Baby Play Gym : :

I wanted to make Little Miss S something to play with as she is now just about 4 months old (where did that time go?). She is just hitting that really fun stage where everything looks tasty and it all goes straight into her mouth!

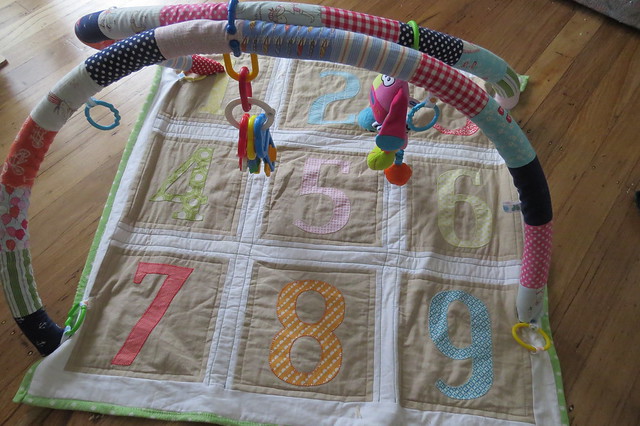
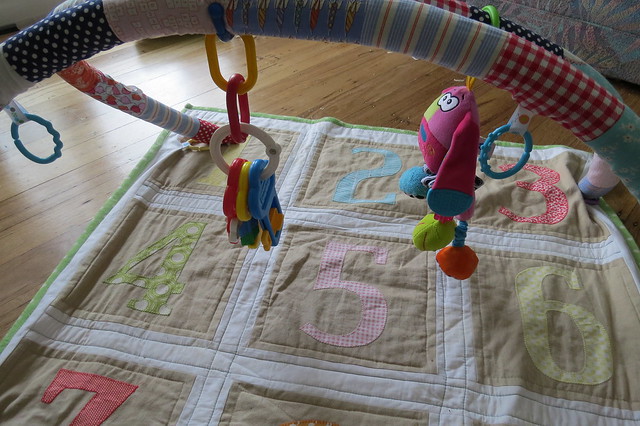
I decided to make a baby gym for her as I've never owned one, but I did lend one from a friend and know how much babies like them.  I used the pattern from the book "Sew Modern Baby" by Angela Yosten, which I picked it up on a whim at spotlight ages ago.

However...if I had a crystal ball and could have known how much trouble it was going to give me, I definitely wouldn't of bothered!! 

I'll get to that bit later....first onto the quilt part, the mat!

I appliquéd!!!......AND I didn't hate it!! 
I honestly think this is the first quilt I have ever appliquéd something that looks half decent. 


IMG_1309

(Let me just cut in here to say...i did it on my Bernina...not by hand. That's a hurdle for anther day!)


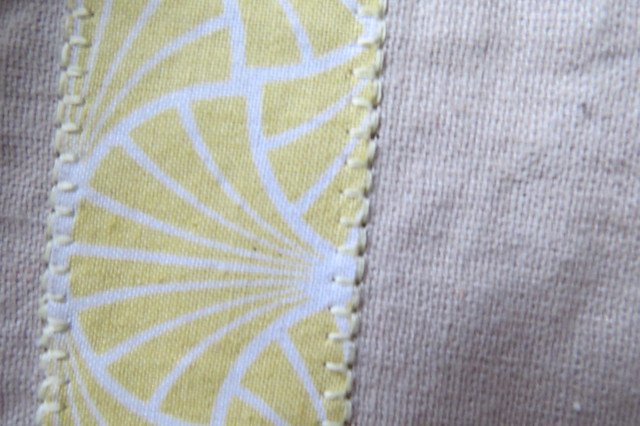
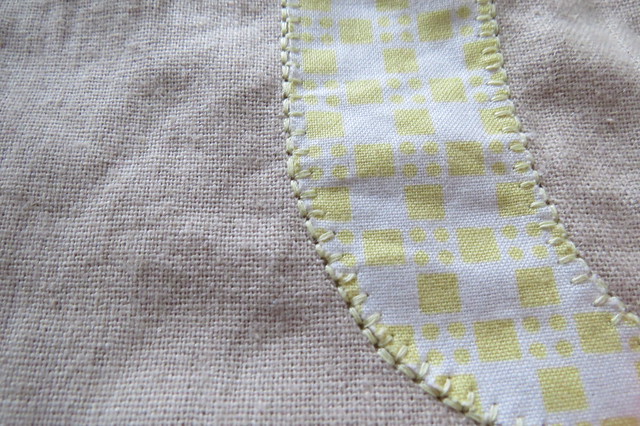
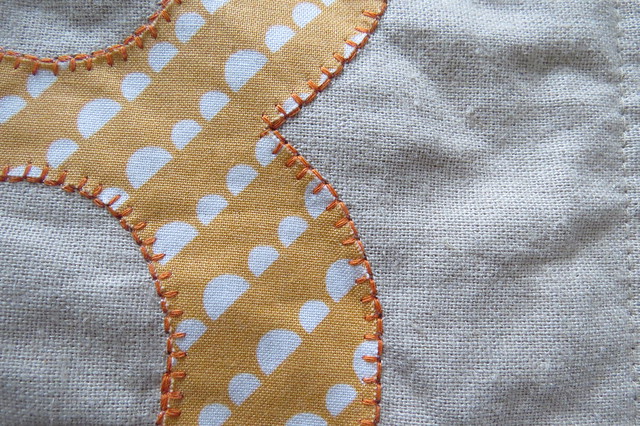
There are two types of blanket stitches on my Bernina 440QE (number 45 and 46 for those who want to know).

They are both the same, but 46 is double thickness. I decided to the thicker stitch, and while it definitely ate through my thread stash quicker than I would've liked, it looks so much better than the thinner one!! 

I mean, just look at that stitching!!


IMG_1311


And again...


IMG_1308

 
And again....


IMG_1307


Yup, I think I can definitely say I'm more than a little proud of myself!!

Now onto the stuff that seriously gave me nightmares! The arches!! *shudder*
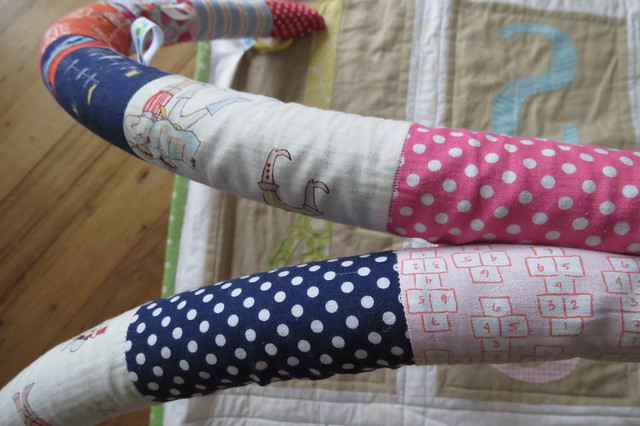
I sewed up the 'tubes' of fabric from my Sarah Jane stash (which is seeming never ending at the moment!! No matter how much I use, there is still just sooo much!).


IMG_1310  

That part was simple enough, but threading the black pipe insulation through the tubes took me hours and hours and hours!! 
Then after I finally had them threaded and sewn together I connected it to the quilt with baby links (like the patterns states) the whole thing just flopped over. (que me chucking a bit of a tantrum and refusing to look at it again for about a week!)

If anyone is planning on making this project take note...this book is American..so the materials listed aren't exactly the same as the materials I found in the hardware store here in Australia!!

After leaving it all in a corner for a few days, I decided to give it one more go and got my husband to go to my parents farm and get me a few lengths on fencing wire. 
I then cut them to length and wrapped the sharp ends in duct tape so they wouldn't poke through my fabric. 

After unpicking, threading then re-sewing, I can finally say that it works!! *happy dance*

And the best bit? Little miss S Loves it...which I guess makes it worth it in the end!! 


IMG_1312

She is seriously happy under this thing. I love how I can change up her toys as well so she gets a bit of spice in her baby-life.

Jessica

Tuesday, 16 June 2015

Beautiful Bow Quilt : :

Have you ever had a project that you just wanted to be perfect?
Most times when I quilt I do try for perfection..perfect seams, perfect quilting but I don't get too carried away if things are a teeny-tiny bit off.
But for my kids I wanted to make them all a special quilt each. The type that they can give to their children when they're all grown up (not yet please!)

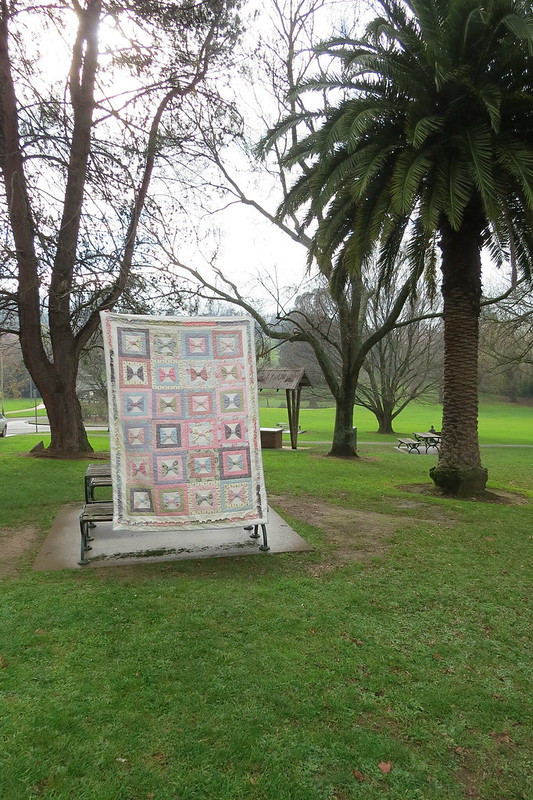
Well I FINALLY finished the first one. I wont tell you how long I've been working on this quilt (but I will say it would be measured in years, not months!). Its for Little Miss I. I chose the fabric randomly, instead of using fabrics from one line of fabric (which is what I usually do), and I think its perfect for a little girl!!

I wanted it to be a little bit vintage (and one or two of the fabrics I used are definitely vintage as they were given to me from an older lady who had had them for years and years!)

I also didn't go with all quilting cotton, I threw in a bit of eyelet fabric for added texture and to make it look more vintage-like, as obviously quilts were originally made of left overs and the 'good bits' of worn through items.

This is without a doubt my all-time favourite quilt.


IMG_1299  

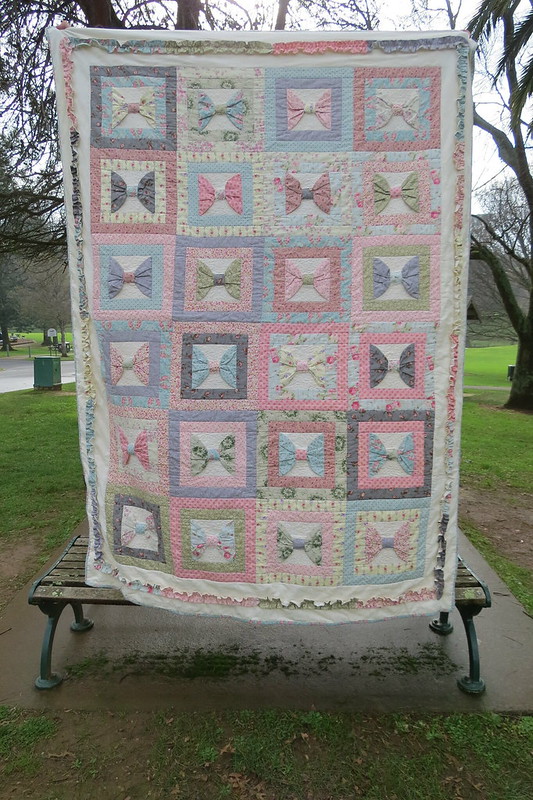
 I. love. this. quilt!!

When I was looking for fabric, I pretty much just picked anything that was floral and pretty. I also tried not to introduce too many clashing colours, but at the same time tried to keeping them miss-matched enough that it looked vintage.

I nailed it :)

IMG_1300


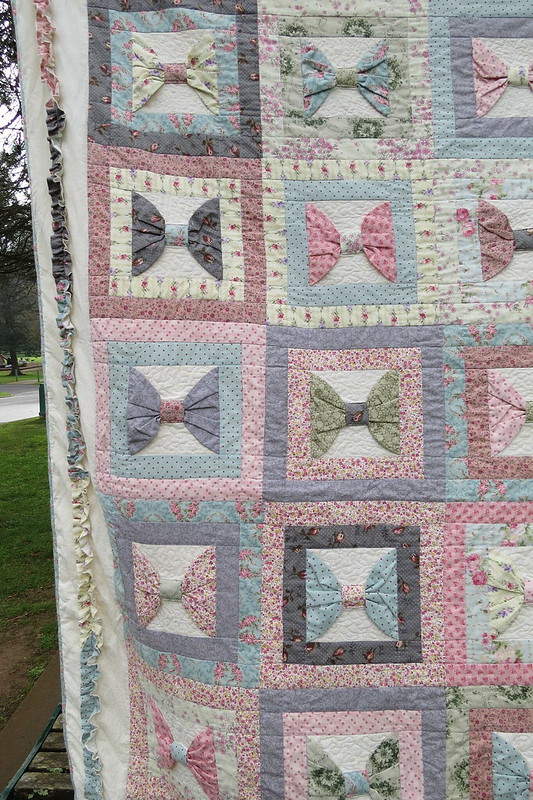
All the way around the edge is a super cute ruffle. I've never added any type of 3D accent to my quilts, but I'm really loving how it turned out.
The bows are 'free' as well, and by that I mean that they can move. They are obviously sewn into the seams on the edges but the rest has been fed through the middle square that was sewn onto the cream fabric.


IMG_1302

Its just so pretty. 


IMG_1300

 To quilt it I stippled in the cream background behind the bow, then stitched in the ditch along the seams, continuing from one block to another. The pattern is supposed to be quilt-as-you-go (QAYG), and I have made a QAYG quilt before, but I used a different method last time, and the way the pattern tried to explain it I just found it too complicated and fiddly (which probably says more about me than it does the pattern), so I just sewed all the front together and quilted it like normal. I find that the extra throat space with my Bernina really does help when quilting quilts this size.

I used some lovely floral blue fabric for the binding. I usually cut my binding 2 1/2 inches, but I decided to make a wider binding for this quilt. Its not too much wider than normal, I cut 2 3/4'' strips, but I do like just that little bit extra thickness around the edges.

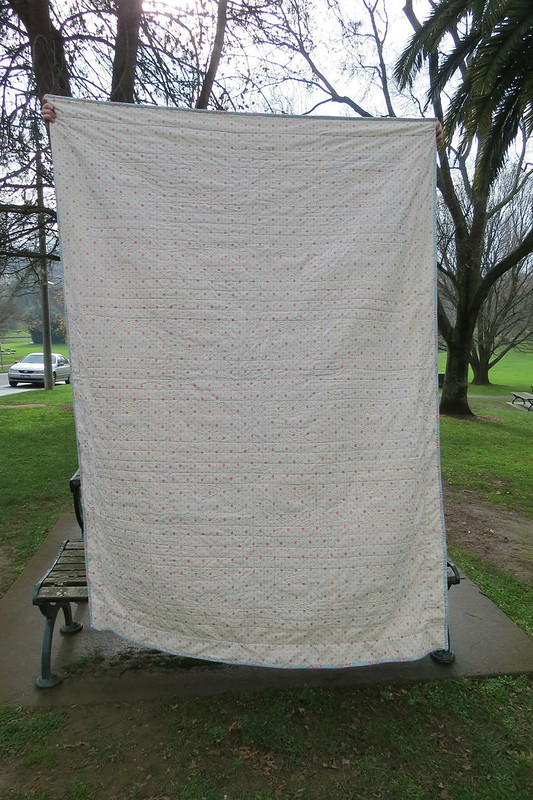
For the back I used some strawberry-print cotton that I've been hoarding for years in anticipation of finishing this quilt!


IMG_1303  

I think it goes really well. You can also see the quilting easier in this photo.

 For some reason I've never really been into the whole pieced quilt backs (maybe I'll join that party extremely late...like I do with pretty much all trends!). For now I prefer to have a nice uniform back! I also pinned this quilt extra carefully and it really paid off....look!! No puckers!!

Quilt Details:
Pattern: Beautiful Bows by MoonShine Designs
Fabric: Random finds from about 3 different stores, and some old vintage fabric
Size: 60'' x 84'' (or 152cm by 215cm)
Blocks: 24

Little Miss I adores this quilt! She has been waiting and waiting for me to finish it for quilt some time (only about half her life!!).

Now that its finally done I can move onto something else!! Little Miss E (Little Miss I and E are twins) of course wants one...but I'm thinking of designing my own quilt this time!! She wants princesses..but I'm thinking strawberries? 
I'm thinking about making a matching quilt with the same fabric, and same block size, but different pattern. 

We'll see :)

Jessica


Monday, 20 April 2015

Nappy (Diaper) Bag : :

When I was pregnant with Little Miss S (she's 7 weeks old now), I was on the hunt for that perfect nappy bag. One that would be big enough to carry everything I needed, be happy to carry around for the next year or so AND that didn't cost the earth. Asking much? Apparently I was!!

I couldn't find one anywhere that I liked, except for a couple of really cute leather ones that were way too expensive. (Seriously, for a $700 nappy bay I could pay someone else to carry the nappies!)

My friend had a few bag books that I borrowed and I found the perfect nappy bag pattern in this book...


This book has some really cute bag patterns, but to be honest, the only ones I would be tempted to make would be the nappy bag pattern (the one I made) and perhaps that cute bike bag on the front page. But that's probably more of a refection on me, who doesn't need or even want a bag for every occasion, than the book.
 Ha Ha, just give me one big bag that I can use for everything and Ill be fine!

Like this one....


Let me just say that I.LOVE.THIS.BAG!!! Really love it. The pattern called for laminated cotton, but after searching high and low for a print that I liked (and not finding one), I decided to make it out of canvas and linen.

Believe it or not but I had the grey linen and blue canvas hidden away in my cupboard, and I'd completely forgotten about them! Both were purchased from a craft show several years ago. The canvas (by birch) was going to be used for a pillow, and the linen, a quilt.

The only two things I had to purchase was a little bit of fabric for the lining and the metal O-rings.
I'm really loving not buying fabric...did I just say that? Shopping in my stash is really satisfying!!

I was going to make the strap from fabric as well (as the pattern says to) but I found this awesome leather strap that I'd saved from a bag (that's long dead).I found that in the depths of my wardrobe during some spring autumn (?) cleaning, and it was a perfect match for my bag!

The thing I love most about this bag (apart from its superior good looks and *ahem* quality sewing) is all the pockets!!


Seriously, this baby has a space for everything!! If I need to carry it...there's a pocket for it!


Of course that doesn't mean that I don't just throw everything in when I'm in a rush in the mornings.....but if I *wanted* to be organised, I could be. That's what important right? Right!


My favourite pockets on the bag is the two on the front with the valcro flaps. It makes finding my keys, wallet and phone sooo much easier because I just keep all three in one of those. The other one I use for a small packet of baby wipes, mostly for my 2 year old son, and cleaning faces as the twins get out of the car for school in the morning (honestly, some mornings they have everything from toothpaste around their mouths to Milo on their foreheads).

I honestly will never buy another nappy bag again. When this one wears out, I will just make another. Its that good!!
(Did I mention that I love it?)

Jessica


Thursday, 9 April 2015

New Baby and Baby Mobile : :

To see my balloons in the 'parade', click here http://craftschmaft.com/2015/04/09/the-balloonalong-parade/

Well after a crazy 9 months I'm back!!
Little Miss S made her entry to the world on Feb 24th 2015 (10 days overdue!!). She weighed just over 4 kgs (or 9lbs in old money).

She is now 6 weeks old and everyone loves her to bits. She's a really good baby, and after a little scare during the first week she is home and settling into the family routine (if you can call it that!)

One of my favourite things is when all 4 of them are happy and getting along with each other. I love watching the others sing to and play with their little sister!!  When Little Miss S starts crying, Little miss I is usually straight there singing her a song and talking to her. So cute!

So....onto what I've made! One of the first things I have made for Little Miss S is a baby mobile! This pattern is from Craft Schmaft (love that name) and you can get your own copy here.

I have wanted to make this pattern for a VERY long time but as we didn't know whether bubs was a pink or blue one I held out so everything she owned wouldn't be gender neutral.

Here it is... (please excuse my open wardrobe!!)


This pattern was so fun to make!! I loved everything from choosing the fabric to sewing those cute little baskets and clouds together. 

It was also a really quick make, which is important at the moment as my sewing time is limited to teeny-tiny snatches here and there, especially with Little Miss E and I on school holidays at the moment (yes they started school this year..where has the last 5 years gone? *sob*)


The fabric I used was pulled from my still-very-large stash!! (Still overflowing even though I haven't added to it since beginning my stash diet a loooong time ago...) Its really satisfying making things from my stash.....I really do have a lot of nice fabric in there...it just takes the time to dig it out and match it up.


I have to admit I love everything about this mobile, and it seems Little Miss S does too. Its really handy when I have a shower or go to the loo as it will give me 5-10 mins to myself *bliss!*

Nothing worse than a screaming child when your on the toilet...and yes I have been known to take her with me...and I'm sure I'm not the first mother to do it either!! (well I'd better not be!)

In keeping with my spend-no-money (or as least as possible) moto (which I'm carrying on into this year by the way), I found some sticks from my garden and spent the afternoon sanding them back until they were lovely and smooth instead of buying some dowel. I used them to hang the balloons from and I admit I love the look of it. I have decided to incorporate as much 'natural' material as possible into my kids rooms. Just adds that little bit of texture and nature!


Well I'm off. I have a kitchen to clean that I neglected last night (woops)!

Jessica