Showing posts with label clothes making. Show all posts

Monday, 21 March 2016

Pattern Runway : Kimono Dress

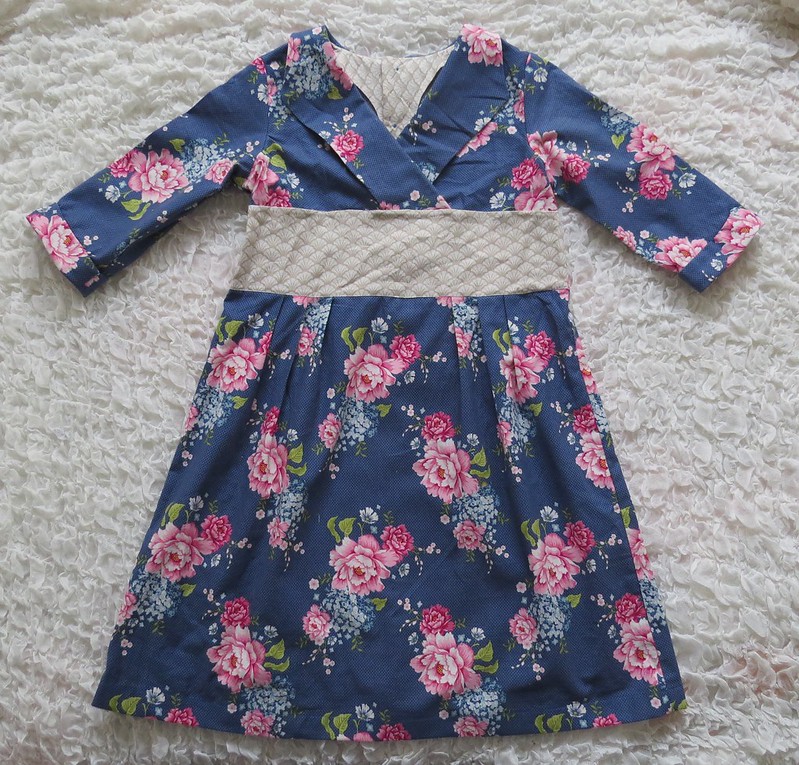
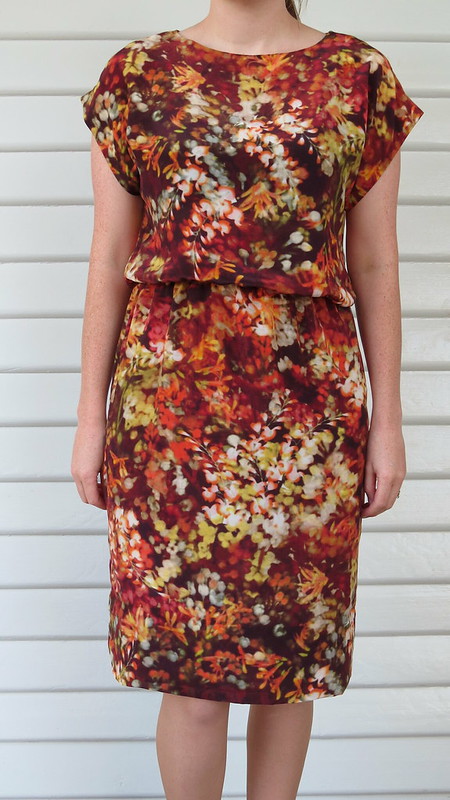
I have had my eyes on the Kimono Dress pattern by Pattern Runway for a while now.
I was just waiting for fabric-inspiration to strike.

Then Tessuti announced on their blog that they were running a competition, with silk crepe-de-chine!!! As soon as I saw this autumn inspired print, I was sold! (and there's still some left at the discounted price!!)

It arrived only 2 days after I ordered it, all wrapped up like Christmas present in an old pattern and tied with a sting. I know it shouldn't matter how its packaged, but to me it totally does!

I unwrapped it eagerly and got sewing! This dress is relatively easy to make, but it took me a looooong time! Many hours went into sewing this dress.

IMG_2108 

To make it special I wanted to make sure it was finished as professionally inside, as it was outside.

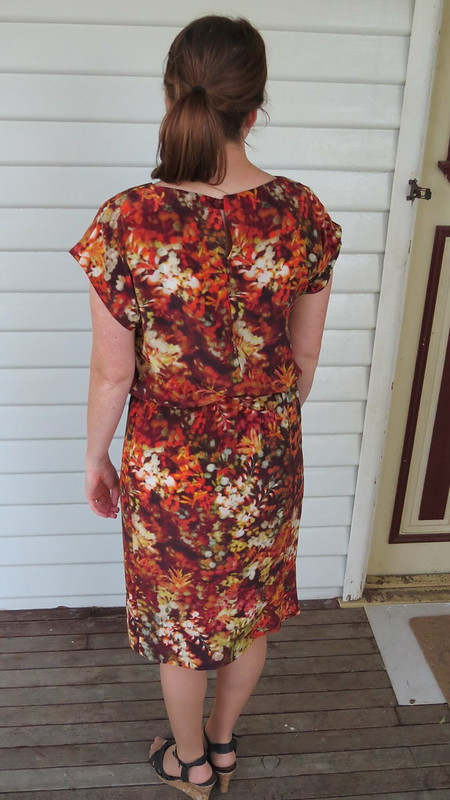
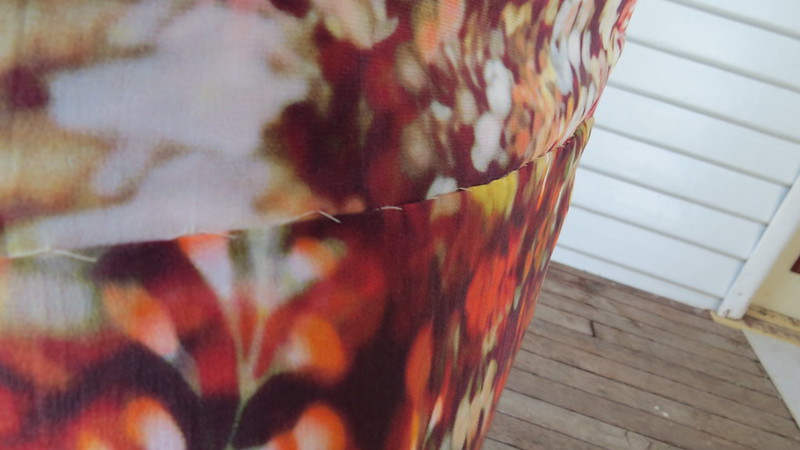
Pattern Alterations: I lengthened the bodice by 3 inches. I originally thought I wanted a nice, big "pouf" over the elastic waist, but after I had sewn it, it was way too much pouf. Yes there is such a thing. It gave me a boxy, really unflattering silhouette. So I painstakingly unpicked the elastic waste and my french seam (believe me silk hates unpicking as much as I do!), and shortened the bodice by 1.25 inches. (so overall my bodice was lengthened by 1.75 inches).

IMG_2103


I also lengthened the skirt by 5 inches as I wanted it to hit my knee, and still have a deep hem.

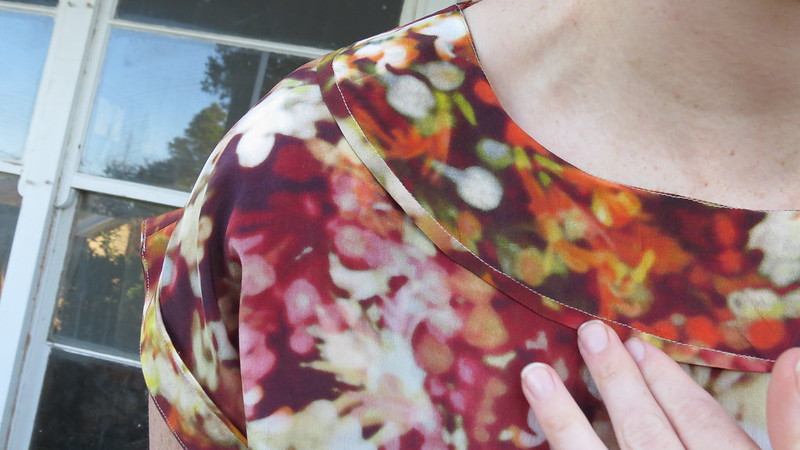
I used french seams where I could, and Hong Kong seams where I couldn't, and to finish off the edges of my facings.
IMG_2116

(Just incase you were wondering, yes I'm wearing it inside out, just to show of how nice the innards are!)

I made it up in a size M, grading out to a L at the hips (pear shape). I would definitely recommend grading up a size if your in between or just over sizes at the hips as its quite a slim fit.


I also did a blind hem (by hand I might add!!), and finished it all off with a fabric covered button.
IMG_2119

I L.O.V.E. this dress!! x a million!

It feels sooo fancy. I cant wait for someone to have a wedding because I know what I'm wearing!!

This dress contained a few 'firsts' for me. First time Ive hand stitched a hem. First fabric covered button (not hard) and first time doing Hong Kong seams!!

I'm so proud of it! I feel like I'm wearing something from a super expensive designer boutique!

I'm definitely going to use this pattern again. I also want to eliminate the skirt and make a kimono top!

Jessica

Friday, 14 August 2015

Sew Bossy..or should I say "Sew lazy!!" : :

Ok ok!! So I'm incredibly lazy!! This 'sew bossy' project has been on my to-do list for such a long time!!
For those of you who don't know what it is, have a quick read of my previous posts here, and here and to see what Mary sent me, check it out here.  *ahem* please ignore the dates (2013!!...yep this has been looooong overdue!)

But in my defence, I DID finish this project about 5 months ago and I just haven't got around to blogging about it yet.

This was such a fun project. It was sooooo fun shopping for Mary, and seeing her make what I picked into a really cute little cape for her daughter! You can read about what I sent her right here at her blog.

What was even more fun was receiving her lovely package in the mail!! Honestly...if anyone wants to do this with me....I'm totally up for it!! Just leave me a comment or send me an email :)

So, as you may have already read in one for the above links, we decided to swap Oliver + S patterns because we both love them, and seriously, you just cant go wrong with any of them!

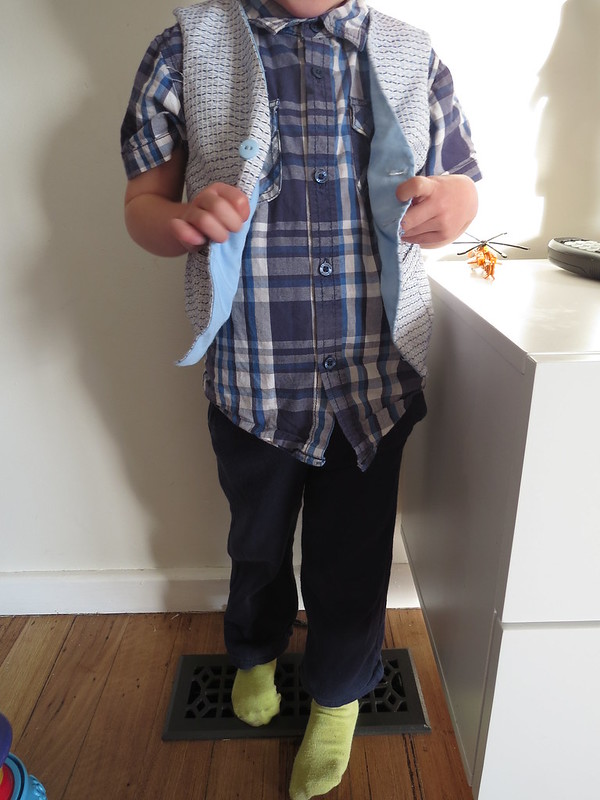
Mary sent me the Art Museum vest and trouser pattern!! I was so excited that she picked that pattern! (I may or may not have hinted a little in our emails that I really liked it ha ha)

So here is what I made....

IMG_1433

I made the vest and trousers, so please ignore the slightly wrinkled plaid shirt and lovely neon green socks for the moment.  

It was also really had to get decent photos as my 'model' (Mr Z) was very uncooperative! He just wanted to get back to playing with his new helicopter (that you can see in the photos!).

I LOVE the material that Mary choose for the vest. Its sooo classy! I loved it so much that instead of using the material she sent for the back of the vest I decided to use it for the whole exterior. 

Mr Z loves the pants!! I just realised I didn't get a really good shot of my lovely welt pockets on the pants, but they are there, trust me. ....and they look fab! (if I do say so myself)

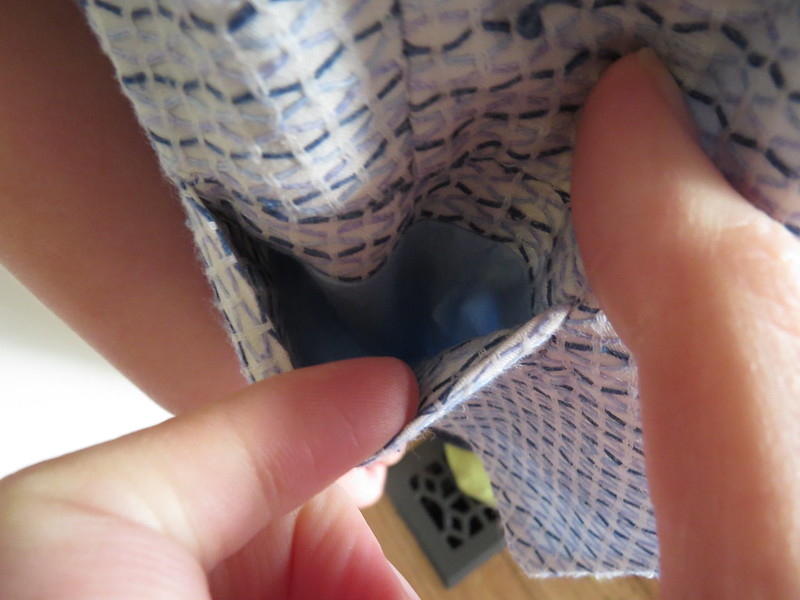
If you don't believe me...just check out the welt pockets I did on the vest...which i did manage to photograph!

IMG_1434 


Cute! These pockets usually hold a matchbox car each for during church. Mr Z is really loving pockets lately, and I usually find all-sorts of "treasures" when I'm washing his clothes!

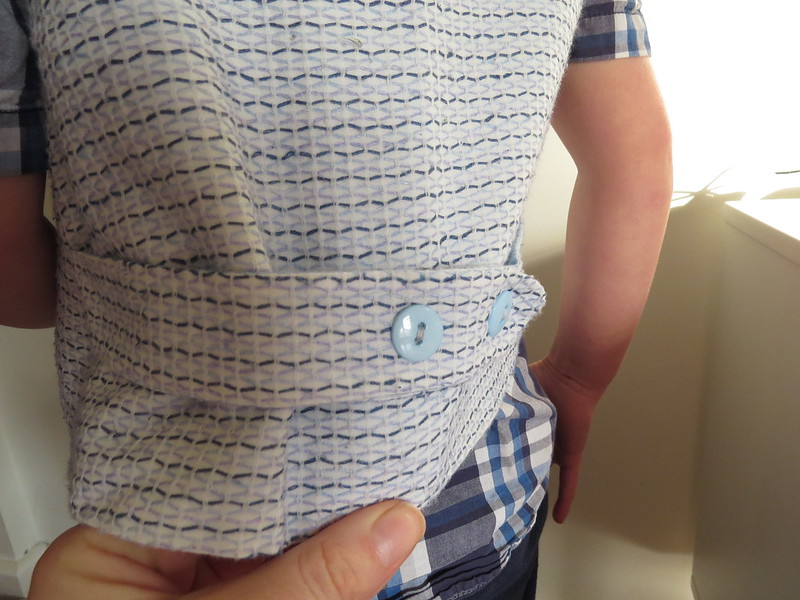
The back has a lovely belt with button detail. This pattern is the real deal. You could seriously make a professional-looking suit from this for you little man (and for a fraction of the cost!)


IMG_1435


I definitely want to use this pattern again! I already have two more projects lined up for it. I love the lovely soft material Mary chose for the pants (sorry I didn't get a better shot of it). Mr Z for some reason is getting really picky about his pants lately. He wont wear jeans, or anything that isn't comfortable...so mostly he wears track pants everyday. I'm glad that getting these on him isn't a struggle.

However when Mr Z out grows these I want to try making the pants with something a little more stiffer, perhaps some blended wool? I think it would really help the pants to look like suit pants, and give them that crisp suit-pant look.

Thanks Mary again for so much fun. I really appreciate everything you sent me and your lovely letter! I really enjoyed sewing this!


Jessica

Wednesday, 1 July 2015

Oliver + S Library Dress : :

It's been a while since I made Little Miss I a new dress, and her dresses seem to be rapidly shrinking in the wash...or is she really growing that fast?

I decided to make her an Oliver + S Library Dress. I know I've said it before, and I'll probably say it again....but I LOVE Oliver + S patterns. They are the best!! The whole time I was sewing this dress I was thinking "I'm such a good sewer!" "look at this, its amazing"...yup sewing with Oliver + S is definitely a confidence booster because their patterns create such professional results!! (You can see my other Oliver + S makes here, here, here, here, here and here)


Oliver + S Library Dress


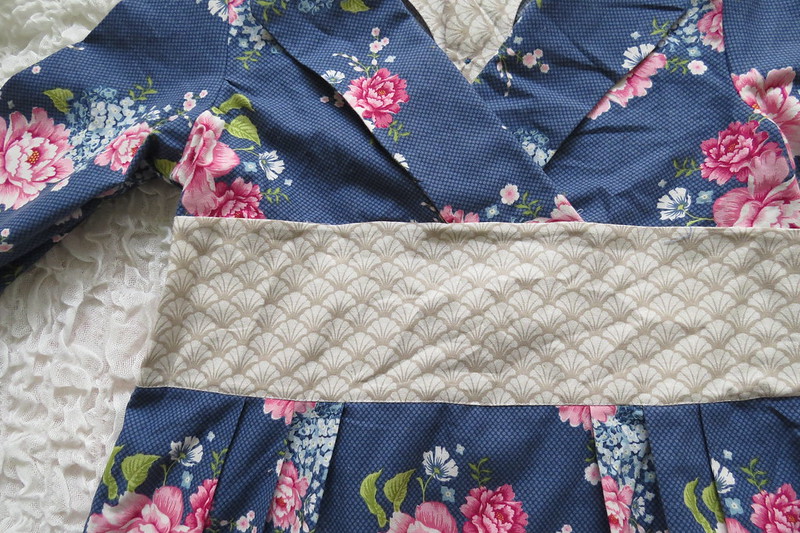
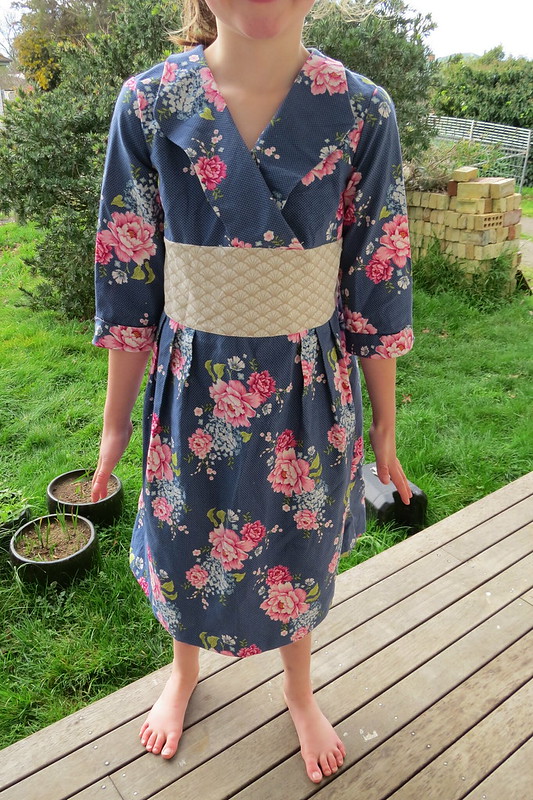
I had stashed away some lovely Tilda fabric that my local craft store stocks. Its so pretty and feminine. I used it for the main part of the dress, the waist band was just another random fabric that I found.


IMG_1327

I made version B with the long sleeves (because we are currently in the depths of an Australia winder (ie. its cold with the sun shining!), and I omitted the pipping option because I wanted a 'classier' dress......and because, lets face it, piping is extra work, and I'm lazy :)

I didn't realise it until Little Miss I put it on, but it kinda reminds me of a kimono? Ha ha, I'm sure that is what its meant to look like, and I'm just a bit slow on the uptake.
I'd love to get some authentic Japanese fabric to use for this pattern.....or maybe even some quirky, fun Japanese fabric...hmmmm, decisions, decisions.

IMG_1329

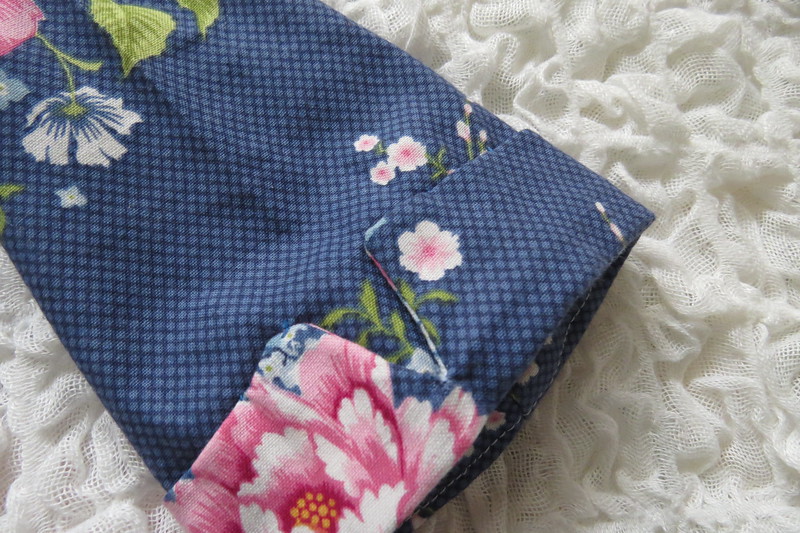
 I love that sleeve detail!

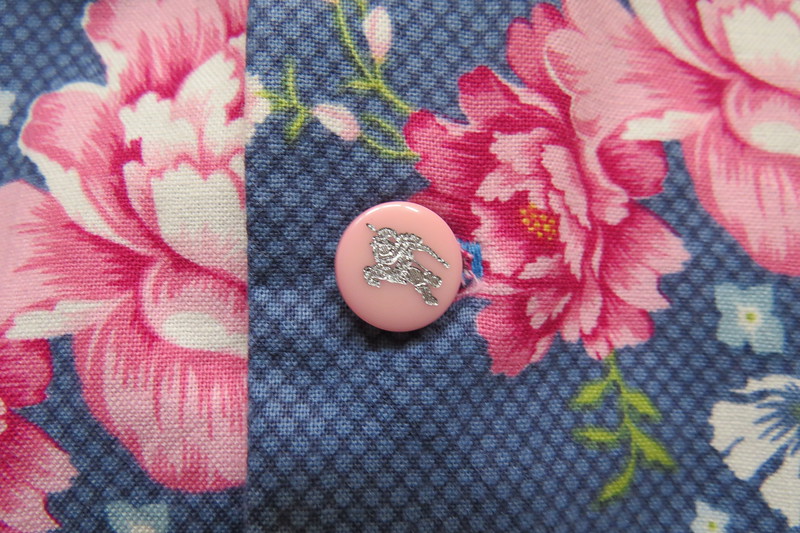
The only thing I changed from the pattern, was I used more buttons than the pattern stated. I only did that because I didn't have any 1/2 inch buttons on hand, and Little Miss I picked out these lovely little pink buttons with the silver detail.

Little Miss I and I spend about 5 mins trying to figure out what the picture on the buttons was? I thought it was someone riding a horse, and if you turn it around, Little Miss I thought it was someone stabbing something!? I decided a man riding a horse was the safer bet, so that's the way I sewed them!

IMG_1331

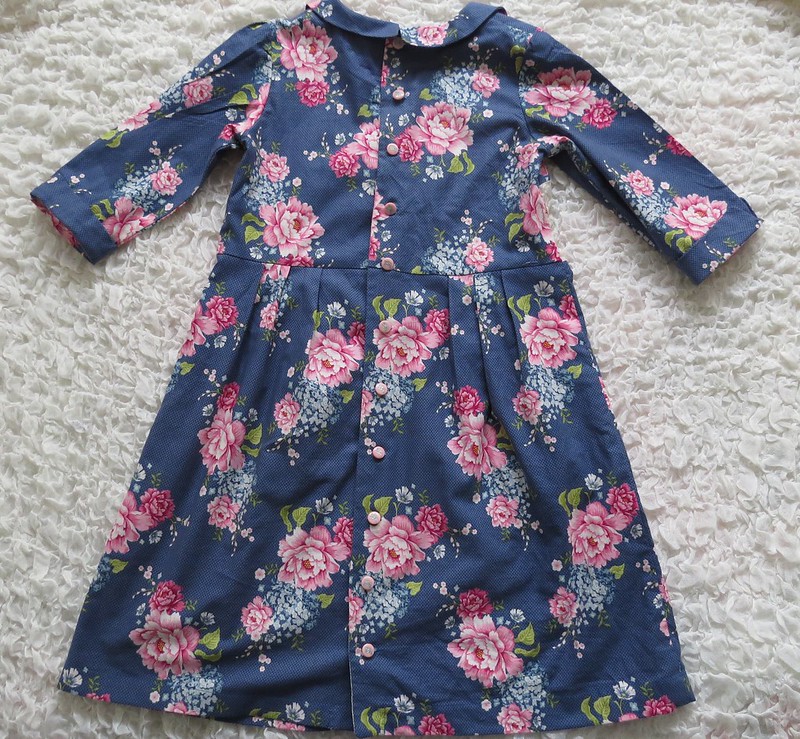
I decided to position them a little more close together, and continue all the way to the bottom of the dress. It reminded me of a wedding dress with all those small buttons.


Oliver + S Library Dress Back


Little Miss I is 6, but I made a size 8, only for the length. I wanted it to be below her knee...I have a real thing about wearing clothes below the knee.


When I make it again, I will definitely make it in a smaller size, because all my kiddos are quite slender, and just use a size 8 back lining, and lengthen the skirt pieces to get the length I need to satisfy my prude-ness. More is definitely more in regards to clothing :)

I'm so so happy with how it turned out. Its so cute, and to say Little Miss I loves it is a huge understatement!!


IMG_1346


Now I have to make another dress for Little Miss E, because her clothes seem to be shrinking too......that's one of the things about having twins....I need double of everything!! I'm thinking of maybe making a Garden Party Dress for her??

Jessica


Monday, 29 June 2015

Cute Baby Shoes : :

Last year when Little Miss E & I where at kinder their kinder teacher was really worried about their lack of clear speech and how they would cope at school.
Going back to when they were bubs they didn't talk much (well...they didn't talk much english! They were always babbling to each other), and as a result they were behind the eight ball with their alphabet and numbers when starting school this year.

They are now half way through the year and they know their numbers up to, and backwards from 20, their alphabet and are even reading now!!
Their teacher has been so great! She loves to teach and gets excited when her students learn something new. She's a fantastic teacher.

Anyway, the point of all this is she has been so excited that her first grandchild was born, a girl called Isla, and I wanted to make her something smallish for the new bub.

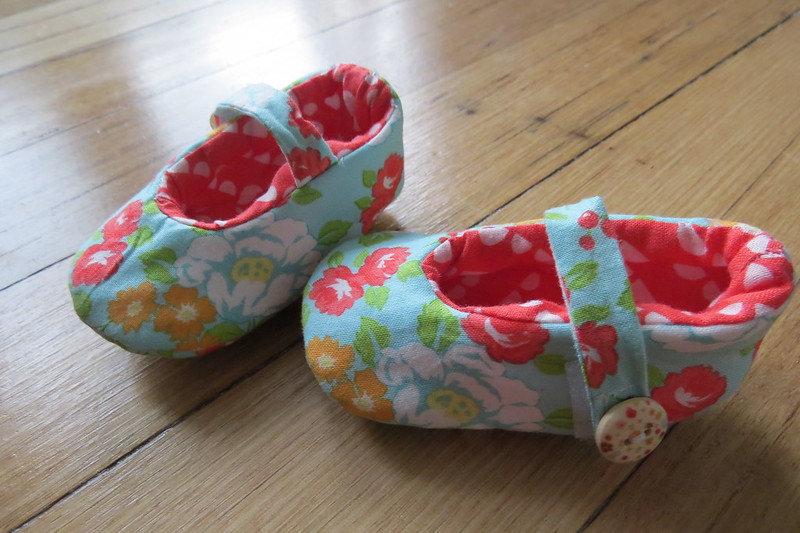
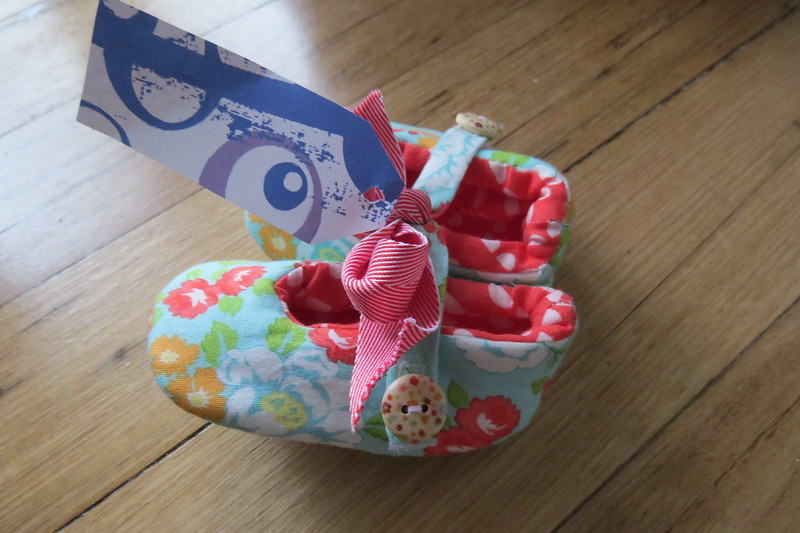
I decided to try and make some baby shoes...


IMG_1323


EEP! Aren't they just sooo cute!!

These went together super quick, although some parts where a bit fiddly. I was planning on making them a bit bigger, about a 3-6 month size, but they ended up smaller than I intended, pretty much for 0-3 months, which was fine because the baby is only about 1 week old, I'll just have to remember for next time to make them bigger.


IMG_1324


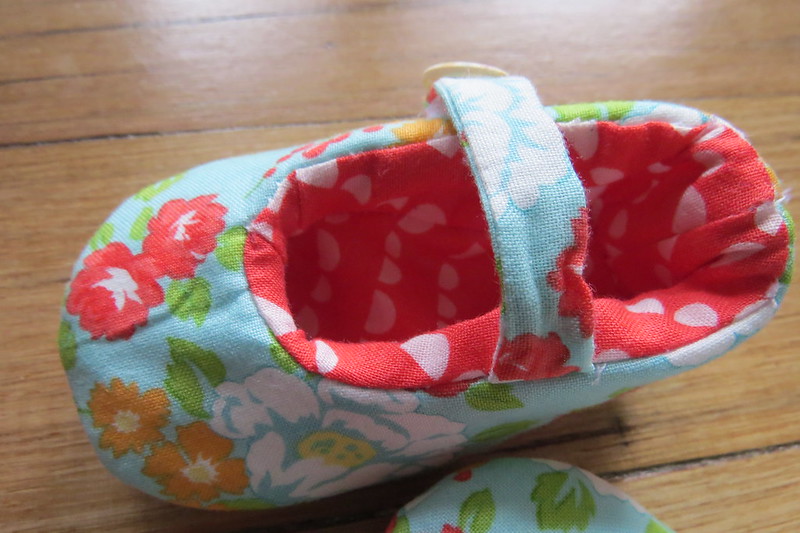
I think they turned out really sweet!! I'm going to make Little Miss S a few pairs to wear for church!


IMG_1322


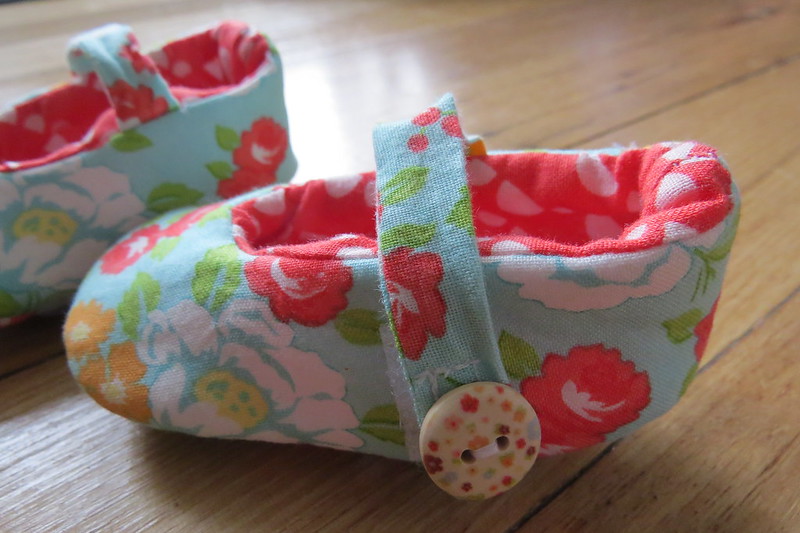
I sewed a button onto the top of each closure using these little wooden buttons I got from a craft show a few years ago. If I was making these shoes for an older baby, one who is putting things in their mouth, I would definitely leave this off, just in case they managed to find their way into little mouths.


IMG_1321


The fabric I used was "Happy go lucky" (Love it!), and I put some thick fusible fleece lining on the insides to keep those little toes toasty during winter!

These shoes have already been given and hopefully they are getting loads of wear!

Jessica

Saturday, 15 March 2014

Amy Butler Little Splashes : :

After a VERY loooong hot summer its finally getting cooler (well the nights are anyway!). So now I'm moving into winter sewing as the winters in Gippsland can be very long and cold!

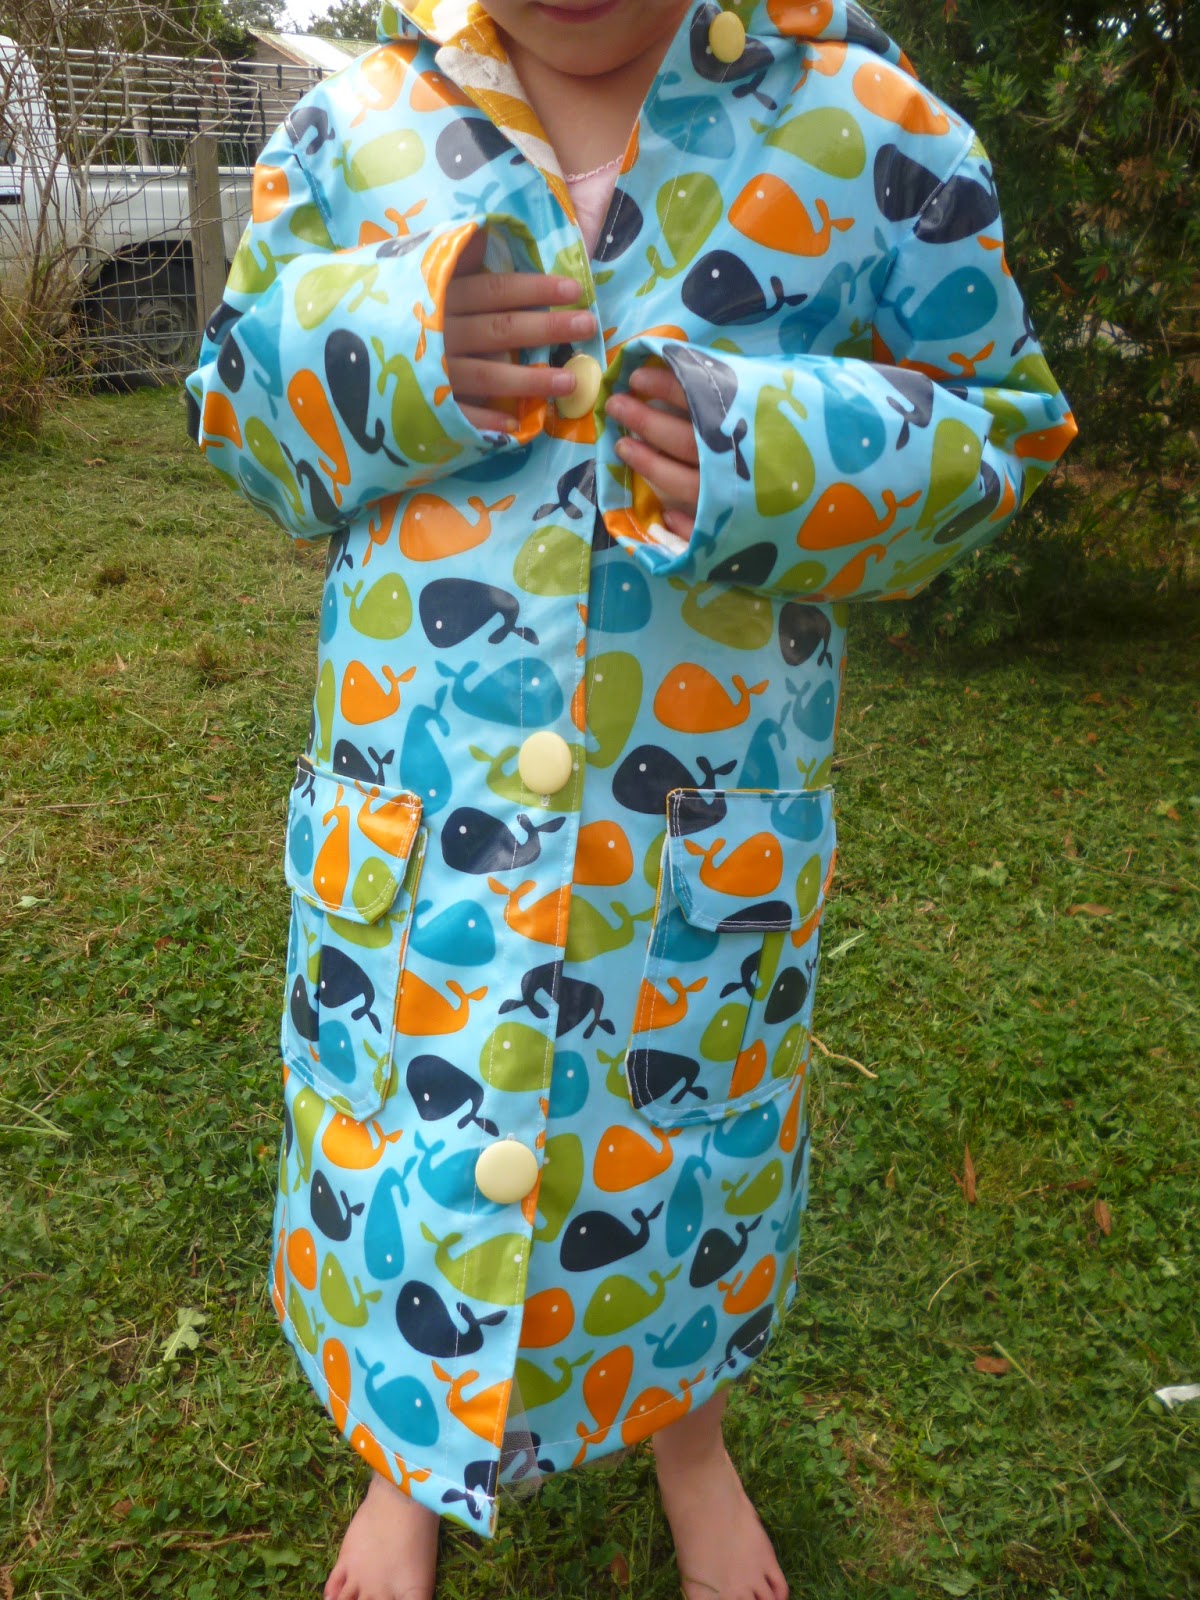
About a year ago (or possibly more, whose counting right?) I ordered 3 different types of laminated fabric and the Amy Butler sewing pattern Little Splashes.


I let the girls each choose which fabric they wanted, Little Miss E choose a zoology fabric by Robert Kaufman in whales, and Little Miss I chose a cute strawberry laminate.


Wednesday, 5 February 2014

Reversible Oliver + S Bucket hats : :

One thing that I cant stand about getting the kids ready is looking for things. Hats, shoes, sunglasses, clothes, you name it. On a hot sunny day its nothing short of a miracle if when we leave the house everyone has a hat, sunglasses and thongs.

So as the twins are starting 4 year old kinder this year (where is the world did the first 4 years go?), I decided to save myself the stress of looking for hats and make them a second! If they have two hats each, then Ive just doubled my chances of finding one when I need it, right? fingers crossed...


Yes, my kids are in their pj's. I have been doing loads of sewing lately but not much blogging, so last night I decided to remedy that and got all three of them on the verandah for a few quick snaps.

These hats are super great for children! They have a wide brim and are reversible, which is fun for matching outfits, but lets face it, its also great for turning it the other-way out if they get one side dirty while out and about (which they do).

To make these hats I used the free pattern found here :

Monday, 9 December 2013

Oliver & S Lazy Days Skirt : :

Summer.
Just this word makes me think of the beach, ice-creams, seagulls and thongs (the kind you wear on your feet!).

The girls need some new summer clothes, and I'm in the process of making them some new skirts, shorts, and dresses.

I've had my eye on the free Oliver & S pattern, Lazy Days Skirt for a while. (I love free things!)
So I let the girls choose some fabric from my cupboard, and we whipped them up.
These were SO quick! Seriously, 1 hour later and I had two cute skirts made.


The fabric they picked was Michael Miller's Bella Butterfly. Its been in my cupboard for a while, and these skirts take so little fabric, I still have heaps left!


Little Miss E wanted to help me sew, and since these skirts are easy-peasy, I let her sit on my lap and help me feed the fabric and press the reverse button.  Then of course Little Miss I wanted to do the same thing...

Instead of adding the ribbon around the hem like suggested in the pattern, I used a strip of fabric that I double folded. I didn't have any ribbon but I really liked the contrast around the hem.


I also found some 1/4'' crochet trim to add around the bottom, then I got creative with a few decorative stitches on my sewing machine.

I really liked how quick these skirts came together. The inside seams don't even need any finishing as you just use the selvedges to save time!

They are perfect for lazy hot summer days.

Jessica

P.S Some exciting other news is we have picked the colour paint for the outside of our house! We are renovating, as you can probably tell, and I cant wait till our house looks beautiful from the outside at least! (Still a few more walls to pull down on the inside!)
We are picking the paint up tomorrow! Ill be sure to take a before and after picture!


Thursday, 21 November 2013

The Newest Member Of The Family : :

Here she is, my new Bernina 1150mda overlocker.


I now consider myself the proud mother of four, my 3 kids, and a Bernina!


I have been thinking about getting an overlocker for a while. Up until now when ever I make clothes, to finish the seams I run a zigzag stitch over them, which is fine, but nothing really compares to the professional look that you can get from an overlocker.
A while back my grandmother gave me her old Janome  603 overlocker. I finally decided to get it fixed, so I took it to the repair man and he had a look over it for me. Sadly it was a bit rusted inside, and needed a fair amount of work to get her sewing nicely again. He offered to sell me an old brother overlocker for the same amount as fixing the Janome, but the Brother was a 4 thread. I was just going to do that, until I realised I could get a more user-friendly, newer overlocker for the same amount.


 I started looking at reviews and what was available on eBay and gumtree. I decided that I would like either a Janome 644d or a Bernina 800dl. To be honest, I never though I would get a Bernina as they are just too expensive!! To cut a VERY VERY long story short, I ended up buying a Janome 644d for a good price. Pretty much the day I picked it up, someone posted on gumtree a new Bernina 1150mda, for a very reasonable price (still out of my price range however).
I gave her a call, and she was so so nice! We talked for a bit, and I asked her how negotiable her price was. She asked me what I could afford, and I told her (which was quite a bit lower than what she was asking!), and because she liked me (and because she has twin granddaughter's and I have twin daughters), she sold it to me!! I love bonding over twins! Anyone who has never had twins just really doesn't know what hard is! (Hats off to those of you who have had triplets!)
So my mum purchased the Janome from me, and I ended up with this super-fantastic BERNINA!

I only just got it two days ago, but Ive threaded it (and it was so so easy), read the manual and checked it out!
I now understand all the hype about Bernina's! This thing could sew my finger off its so powerful! (Not that I'm planning on doing that anytime soon!)


 It also has the micro thread tension control knob, and a whole ton of other really amazing features!


I have ordered some new Oliver and S patterns, so when they get here, I'm going to put this machine to the test!
After sewing on this machine for a while, when I went back to sewing on my Janome sewing machine (which I DO love), it was like going from a really nice Porsche, to a beat up old Ford! I will eventually upgrade my sewing machine, but I'm in no rush. I've never really been one of those people who always *need* the biggest and best, and my Janome and I will continue to get along for quite a while yet! In saying that however, if anyone has a Bernina 750 they would like a good home for, I'm sure I could accommodate :)


After I have sewn a few items with this baby, I will do a proper review for anyone who is perhaps thinking of buying an overlocker.

Till then

Jessica

Tuesday, 8 October 2013

Bringing back the Culottes!

 Is it a skirt?


Is it some shorts?


 NO! they are Culottes! (and very wrinkly ones too! Oops...forgot to iron!)

I have been really looking forward to using this pattern from Megan Nielsen ever since I got it! I decided to use this polka-dot fabric for a trial run, as I didn't want to cut into the lovely mustard-coloured fabric I have set aside for this! 
In saying that however, I LOVE the polka-dots, and will definitely wear this in the upcoming summer months! Its the perfect pair of culottes for the beach!

As I mentioned in a previous post, I love the nice little booklet that comes with this pattern, especially the variation ideas and the note taking page. However, what I didn't realise is that the pattern is printed on normal paper. I mean, like paper from your printer. I really don't like that!

It meant that I couldn't cut underneath the pattern to the size that I want, which is what I usually do. So I had to make a pattern out of baking paper! It was SOO AWFUL! 
Ha ha, it actually wasn't too bad, but it did take time and effort. 

 I was in between sizes, so I just traced in between the lines. Quite easy actually. I think I may have measured my waist incorrectly, (or I measured on a 'skinny day'..which is one in which I haven't stuffed myself with food) because the waist was a tiny bit tight. The pattern does say that it should be snug, and it was. It wasn't really bad, or cutting off circulation, and I could still bend and move with ease, but I may make my next version just a few centimetres bigger.

Because I'm tall, the crutch in these was a wee bit high (pardon the pun). If I was going to make another high-waited version, I would definitely lengthen that slightly. Again, it wasn't too bad, or even uncomfortable, but it could be more comfortable a little lower.

It was really easy to lengthen this pattern. In fact, it gives you directions on how to do it. The original pattern is way way too short for me. I lengthened this pattern by 6 1/2'' (you'll have to excuse my switching back and forth between imperial and metric), which was as long as I could make it with the amount of fabric I had. I really like this skirt, but its still verging on too short, so I'm thinking of adding some nice cotton lace trim to the hem. I love lace, and I'm of the opinion that it would enhance ANY item of clothing. You can never have too much!

Overall I'm super happy with these. They are comfortable (despite all my complaining) and flattering. One thing I have noticed is that the back hem is about 2'' longer than the front. If you look at the photo below on the left, you can really see it.


However depending on how I stand, sometimes it not noticeable (see the photo above on right). After a quick search through other blogs, it appears to be a common problem, and most people it seams (I'm on a roll with these puns!) have cut the back hem to be level with the front. However, as a pear shape, a bit of extra bum coverage never goes astray! So I am going to leave it as is.

Overall this pattern is a winner! Be warned however, if your planning on making these longer than the pattern, you will need a LOT of fabric. The legs just keep getting wider and wider as the pattern gets longer.


They're fun to twirl in too, and gives peace-of-mind that if there is a bit of wind about, that its not going to fly over your head. Although, you could definitely do a bit of flashing if your not careful as each 'leg' is really quite wide! Just so you know.

I just wanted to make a small mention of an online shop I found here in good ol' Oz. Its called Indie stitches, and the owner is oh-so-nice!


But the best thing about it is, they stock really nice patterns and have free shipping Australia wide! I know I'm always really jealous of the lucky Americans who can get free shipping for practically EVERYTHING, while I have to pay a small fortune. Just thought I'd share.

Well, the kiddies are in bed, and I'm off for a spot of sewing!

Jessica


Monday, 30 September 2013

Second Family Reunion Dress (Oliver + S)

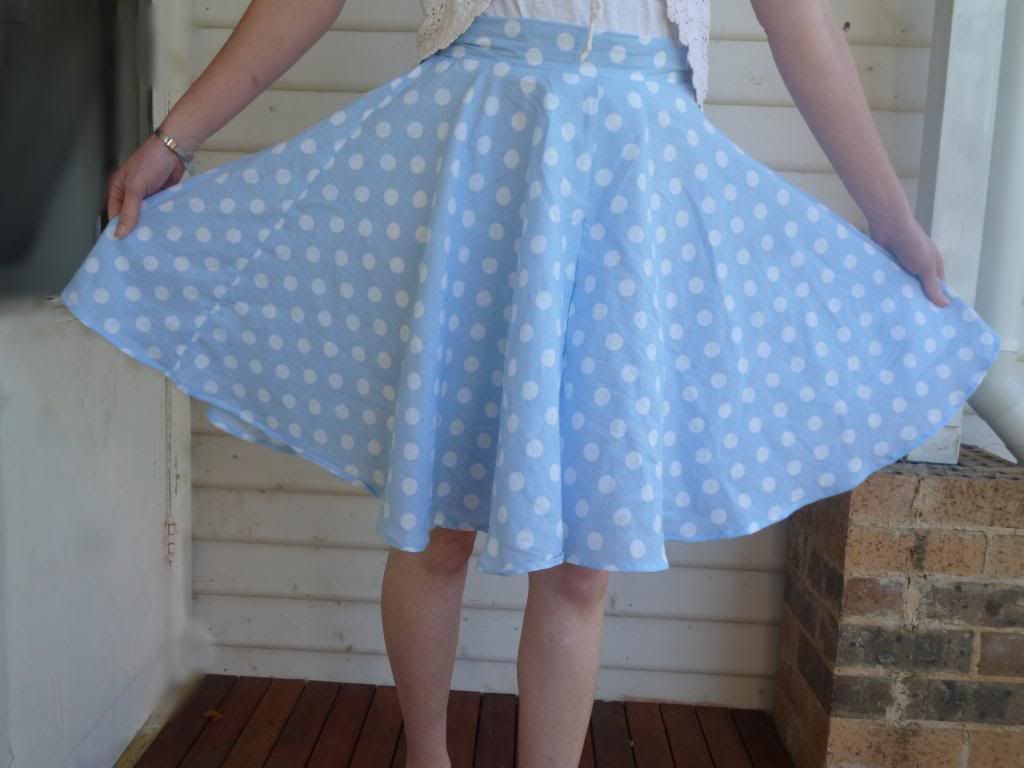
As promised here is the second Oliver + S Family reunion dress. When I made Little Miss I's, Little Miss E wanted hers to be the same. Its funny, some days they want to be dressed exactly the same, and others, they don't want to be anything like each other! Ugh! Twins!

When I went to the fabric store to get the same fabric, I noticed that there was this lovely pink and orange fabric, with the silver threads running through it just like the last one. So I decided to get this instead. I'm glad I did as Little Miss I is slightly taller than her twin, so I lengthened her dress by an inch or two, whereas this one I made to the pattern. I want to be able to tell them apart.


I swear my girls are nothing like me. When ever the camera comes out, they are full off poses. Like this one below. One leg, and one arm in the air? Perfect pose according to my 4 year old!


I put 4 little pink buttons on the front of this one. I love the detail.


For the back I found these awesome orange buttons. They kind of remind me vintage-type buttons (I'm not going to try and guess the era). I almost remember seeing similar buttons on something my mum used to wear....


Lovely button up back. I don't know why, but I love this look :) I also love the pintucks on the front and back.


And here is a close up of the hem. I mentioned this in the last post but forgot to take a photo of it. It adds a nice detail, and a bit of weight as well. 


As usual Oliver + S patterns are great! Instructions are so clear, and the results are so professional. The patterns have mentioned 'French seams' a few times. I have no idea what they are. When I finish a seam, I just zig-zag the raw edge. A French seam sounds a little more classy though...I might have to do a quick google search and find out what it is!

Later Vader,

Jessica

Tuesday, 24 September 2013

Work In Progress

I haven't finished anything for a few days, so here's what I'm currently working on....

Its a terrible photo, but the second Oliver + S family reunion dress is coming along nicely. I should finish this soon (if not tonight).


 Speaking about clothes making. Here is a lovely stack i have in my cupboard for future projects. I really want to finish the above dress so I can get started on some of this!


I have some cute poly-cotton on top for Little Miss E & I's next dresses, which will be the Oliver + S Ice-cream dress. Next is some lovely cream silk shantung. It was expensive at $20 a meter, but oh-so-lovely, so I decided to get some (and I had a discount voucher). I want to make the petal sleeve blouse from the Japanese sewing book 'Feminine Wardrobe'. I wont be doing that for a while yet though, as I don't want to mess it up! I will practice on the twin's clothes first :) The rest is going to be clothes as well, but I'll write more about that soon!

Another sneak preview, but shhh! This is part of Little miss E's Christmas present, and I've thus far managed to hide it from her.........


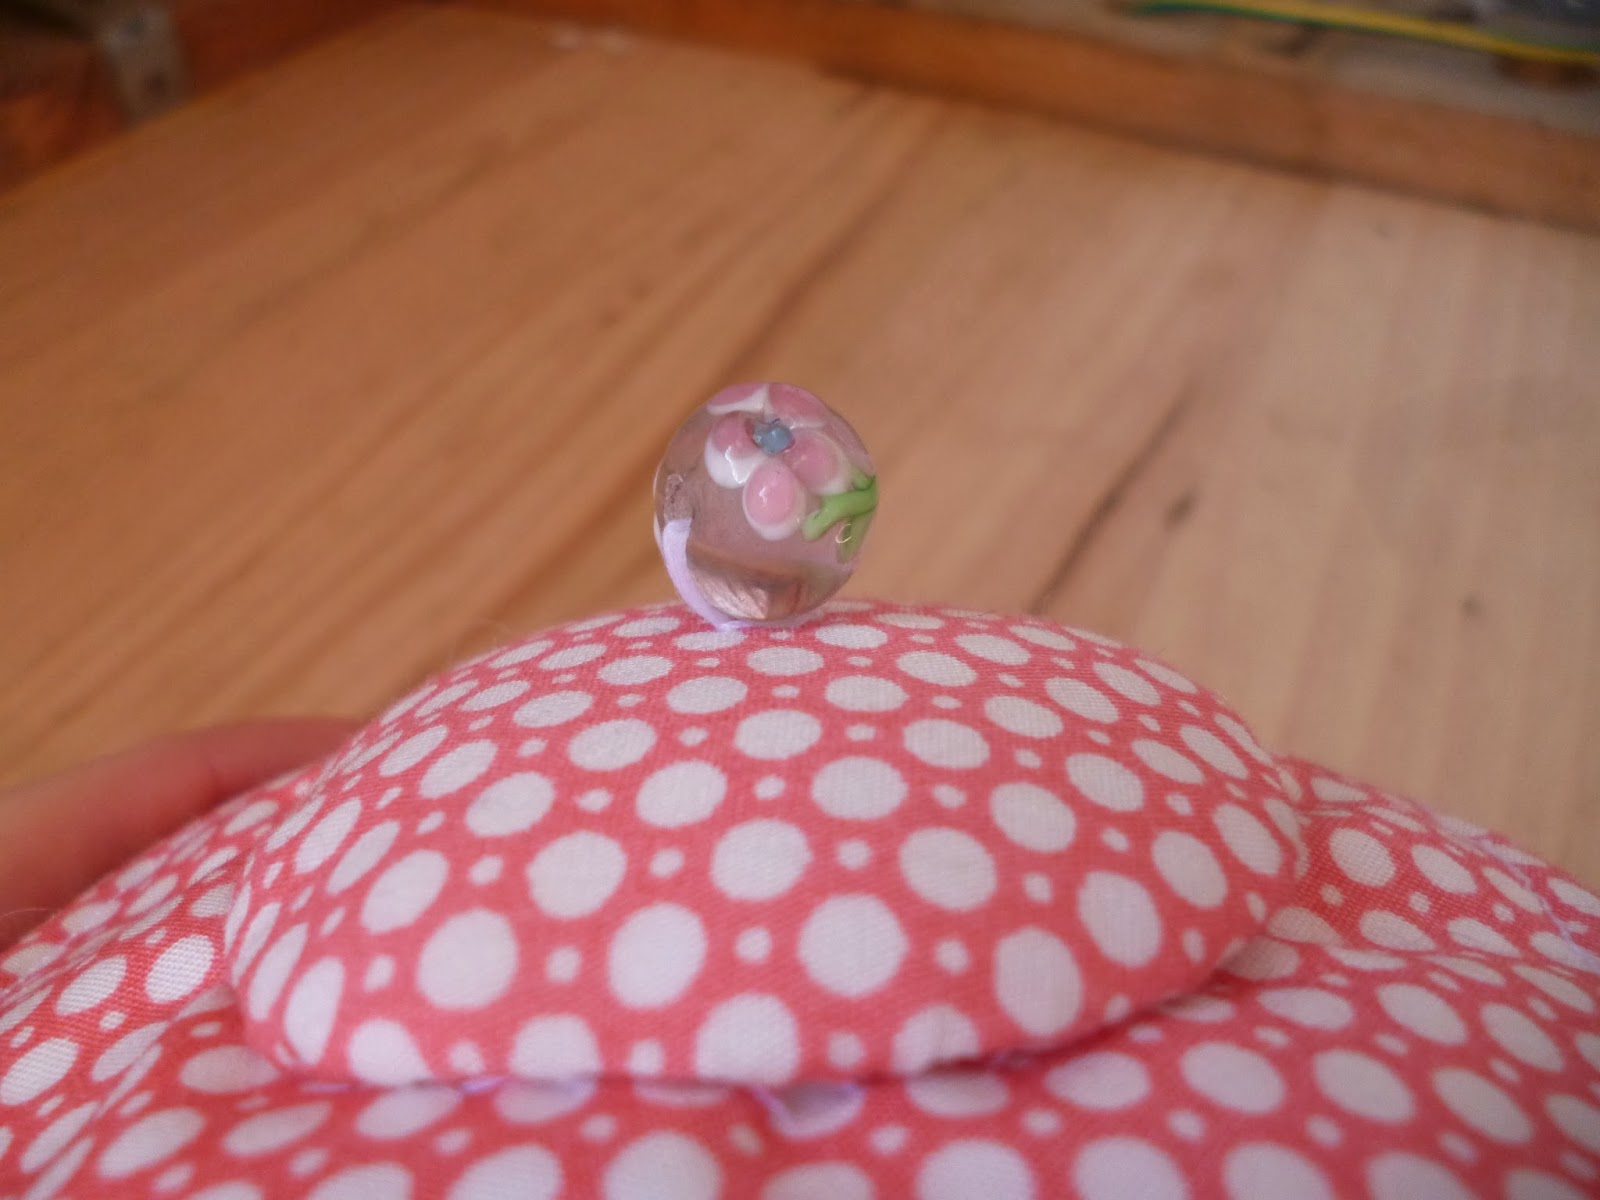
What is it? You ask, well its not finished but it will soon be this....


The picture on the pattern doesn't look terribly exciting, but I saw one made up at the Craft show in Melbourne, it was so cute! The one I saw made up was made from Sarah Jane fabric, using an out of print line. I have about 1 meter of it stashed away, and I was going to make it up exactly the same as the display, but I decided to save it. I have a quilt in mind that I want to use it for instead (and also I figured Little Miss E will probably drag this teapot set around everywhere, including outside, and the other fabric is white).


I did find a really pretty lamp-work bead to go on top though! 

And lastly, I have been thinking about making a christmas stocking for Little Mr Z. I have made one for everyone else, but I just didnt get around to making one for him last year, so I will be making one for him soon!
Here is the one I made for Little Miss E.

I really really love it. I like gold Christmas decor, so all of the stocking I made have the same gold top, and a gold patterned fabric like this one. I used a gold bead trim to line the fold-over and to put the letter on the front. I then also used some gold ribbon attached to the corner for hanging.


To attach the trim I had to hand stitch between every-single-bead! It took forever but looks really good!


The photos don't really do it justice! 
My sister asked me about my Christmas stockings, and as she lives in Queensland, (and is too far away for me to just show her) I'm going to post a tutorial of how I made them shortly!

Come back soon to see these WIP's completed :)

Jessica