Showing posts with label baby. Show all posts

Tuesday, 15 September 2015

Jamming With A Jelly Roll : :

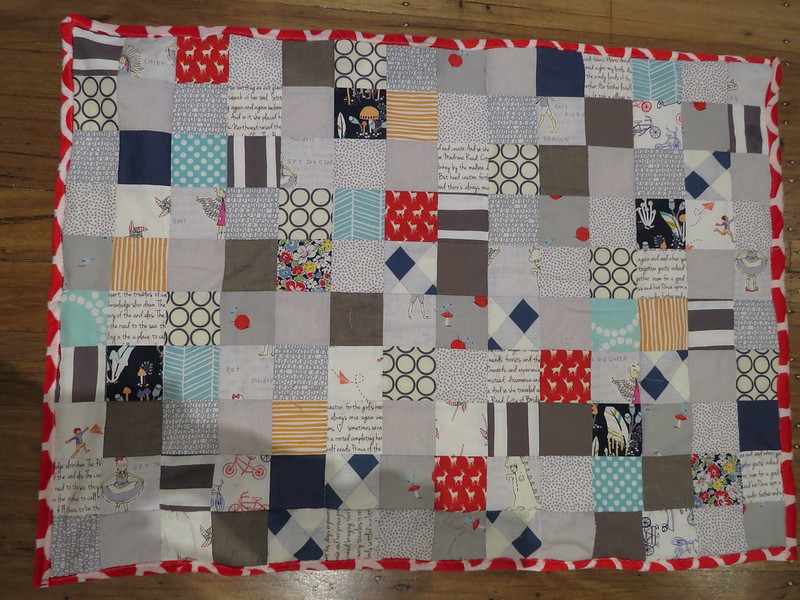
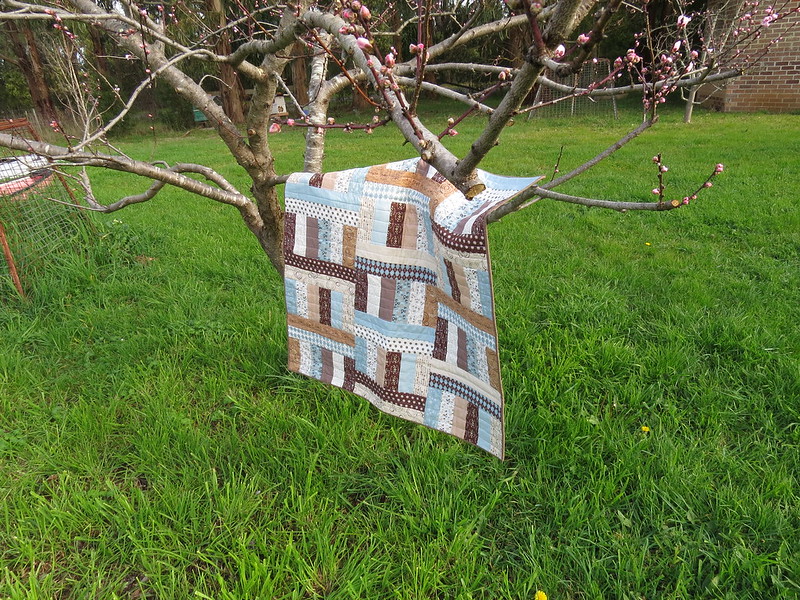
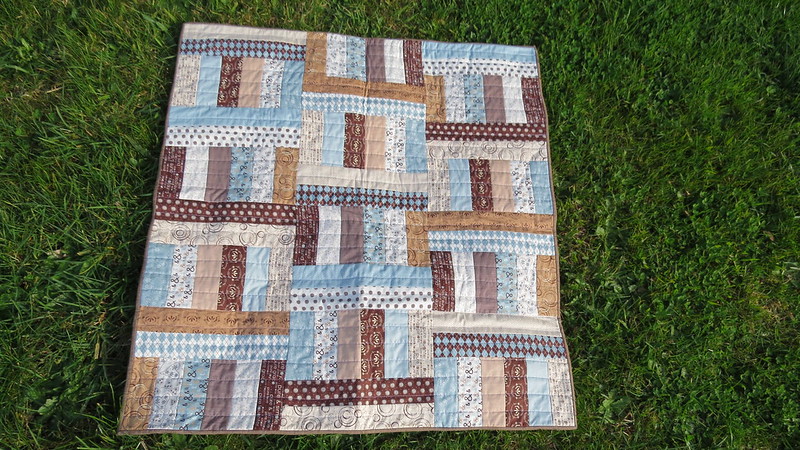
My sister has just recently had her 3rd baby!! She now has 1 girl and 2 boys. So of course I made her a quilt as a present.  (I honestly feel like I write that that line at least once a month!)

Ive been hoarding a jelly roll of Sweet water 'Pure' since Mr Z was born (he just turned 3). If you remember I actually used the same fabric for his baby quilt!

Because it reminds me so much of Little Mr Z when he was a bubba, Ive been really reluctant to use it......but since its for my new nephew, I decided I could part with it. (Well, half of it. The other half I have stashed back away in my cupboard with every intention of keeping it forever)

I wanted a really quick sew, so I decided to use the 'Jelly Roll Jam II" pattern from The Fat Quarter Shop. Check out the youtube tutorial here.

So in between making fun of the American accents on the tutorial (ha ha you should hear my husband) and going to my brothers wedding, this quilt came together so so quickly.

IMG_1610

I love it sooo much!! (can i just point out the blossoms on that tree? YAY! SPRING!!)

Out of all the quilts I have ever made, this quilt is the most well made. It is dead square. For some reason my quilts are never 100% square. But this one is.
Also all of my seams are perfect! (if I do say so myself).
I finally figured out why its so important to press seams in opposite directions so the seams 'nest' together! (slow learner)


IMG_1611

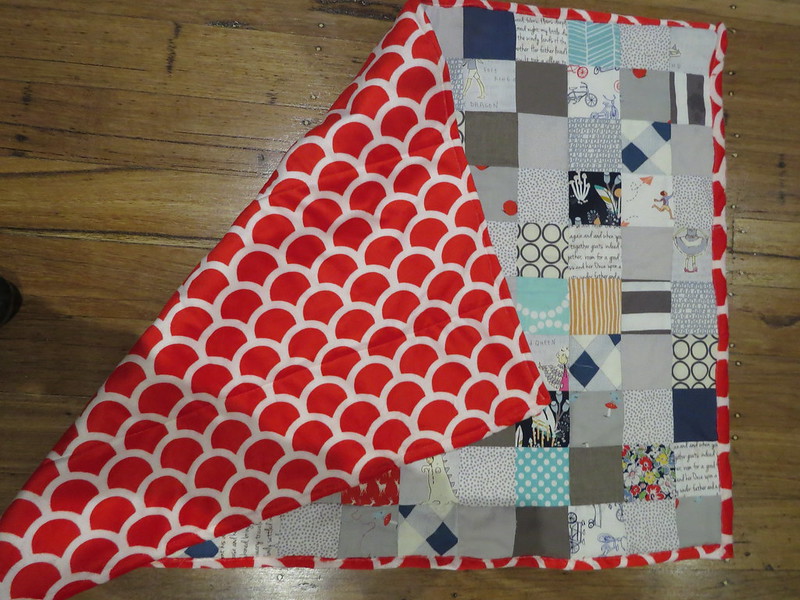
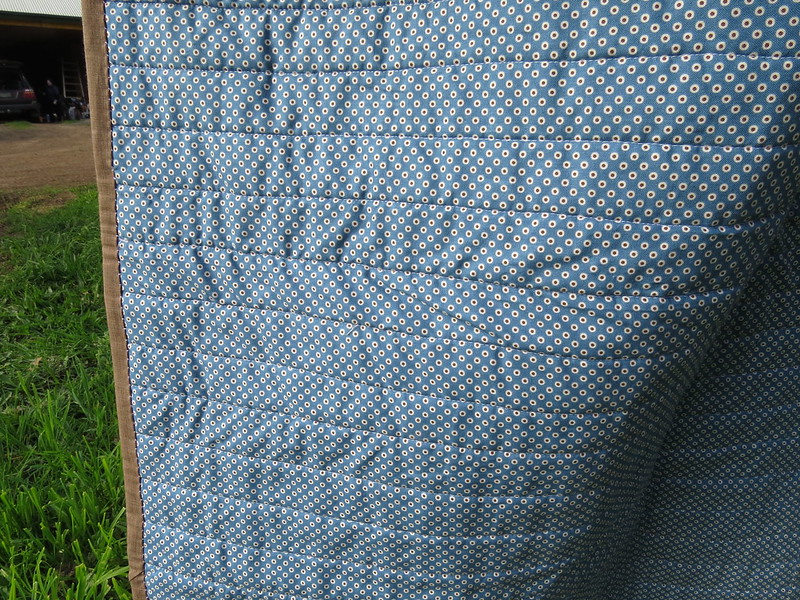
The back I managed to scrounge out of the backing left-overs from the triangle quilt I made recently.
It took a while to cut all the trimmings into usable strips but I'm so glad I did. Its much better for the bank, and its a great scrap-buster!

IMG_1615

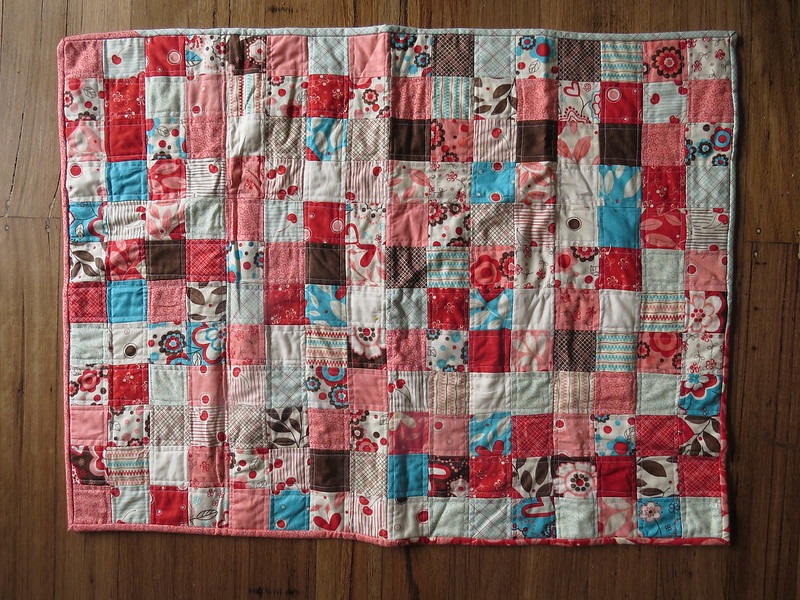
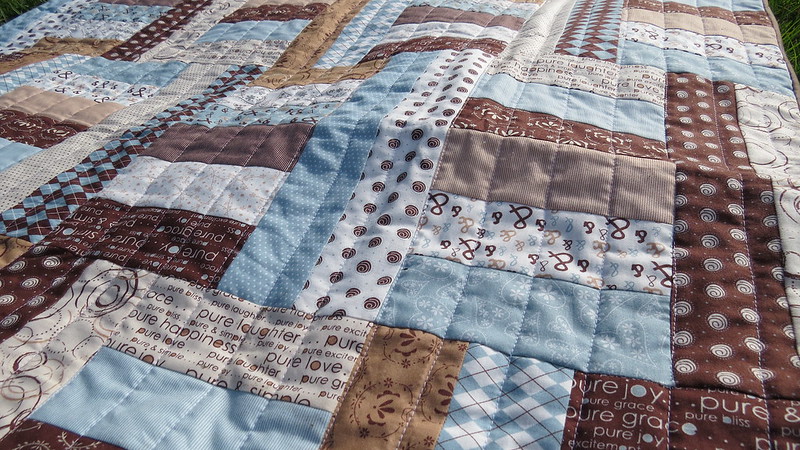
To quilt it I decided just to use straight lines. I love it so much!! Its adds so much lovely texture!!
Another score with this quilt is that there are absolutely NO puckers on the back!! YES!! I think I may finally figured out how not to get puckers!! (we'll see how I go with the next quilt!)

IMG_1613
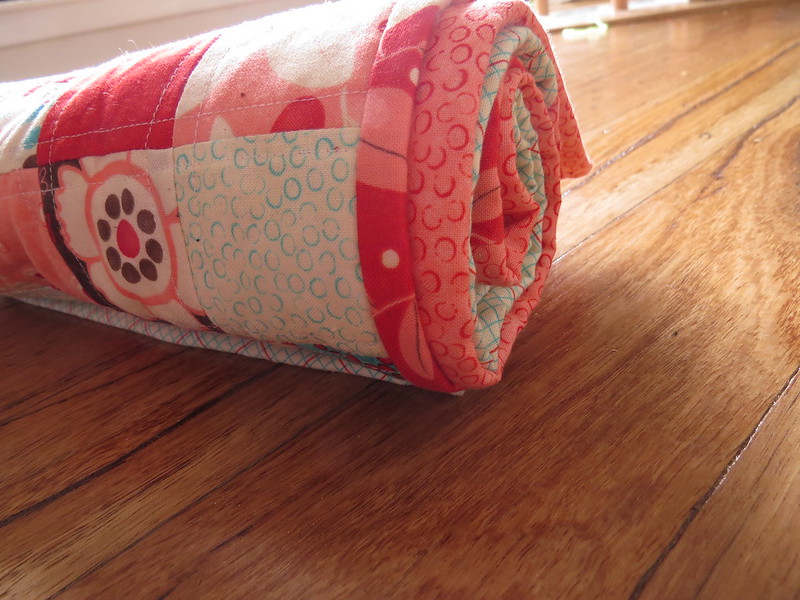
The binding is a lovely linen look cotton that I picked up from my local craft store.

I love this quilt so much!! I've really noticed how much Ive improved at sewing when I look at this quilt...and especially when I compare it so some of my earlier ones.

Well, I'm going to chuck it in the mail today and it will soon be keeping a baby warm in sunny Cairns where my sister lives.  (or maybe it will be used as a floor quilt!! Ha ha its rather hot in Cairns!)

Jessica

Monday, 31 August 2015

The Nappy Bag NOT from heaven: :

This bag was definitely not from heaven (I'll leave it up to you to figure out where its from).  Although I must say the finished result is pretty heavenly!

One of my good friends is having a baby this October. She is also a sewer (seamstress?) and so of course she is churning out lots of goodies in anticipation of number 5 (!).
Everything I decided to make for her, she's already making! Seriously! My first thought was a quilt (no surprises there) but I think she is currently onto quilt number five at the moment. Then I thought a stool...yup she's made one of those too, and the list goes on.

So I thought I was getting out of it easy when I volunteered to put her nappy bag together.

I was wrong!

This sucker was sooo thick I broke at least 6 needles!! Yes, yes, some of you may question my needle choice, they were just universal needles...and maybe a few quilting needles (What? I was getting desperate!), but the craft store isn't open Mondays, and well, today being Monday....you see my problem?

Anyway, lets look at some photos


IMG_1509 

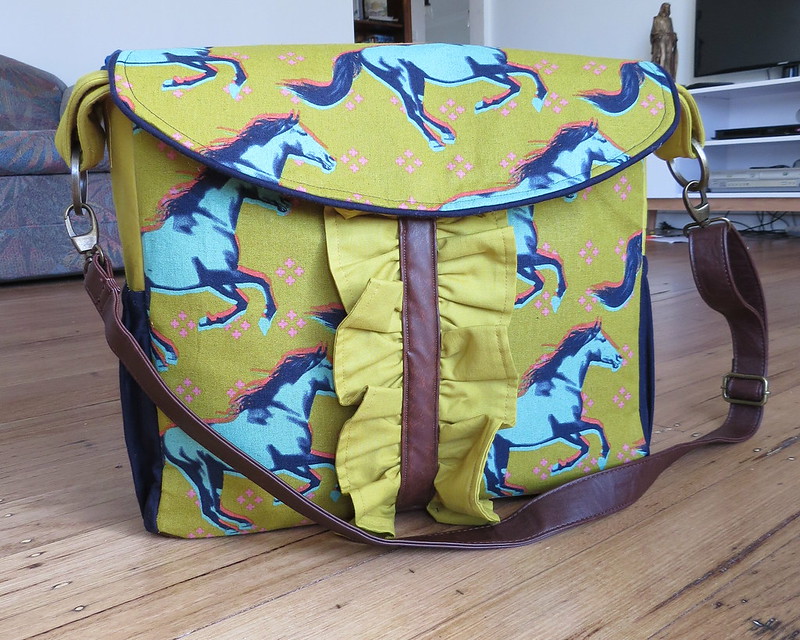
The fabric is all from fabric.com, and is mostly Cotton and steel. The outer, horse fabric is canvas, with some fake leather accents on the bottom and in the middle of the ruffle. My friend picked the pattern, and to be honest I'm not 100% sold on the ruffle and I was tempted to leave it off, but I reminded myself that its not my bag and put it on there.
Its probably one of the things she loves most about the pattern :)


IMG_1513


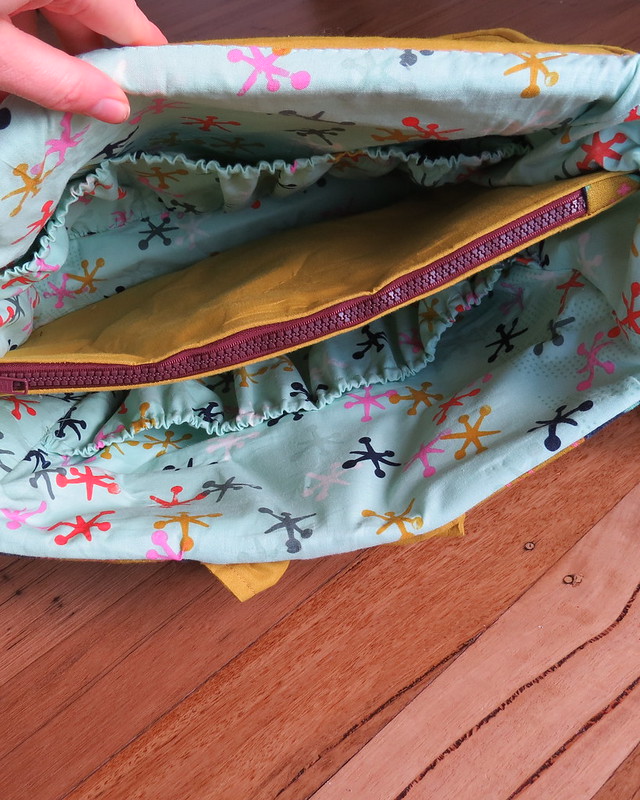
It has loads of storage, as every good nappy bag should.

IMG_1516


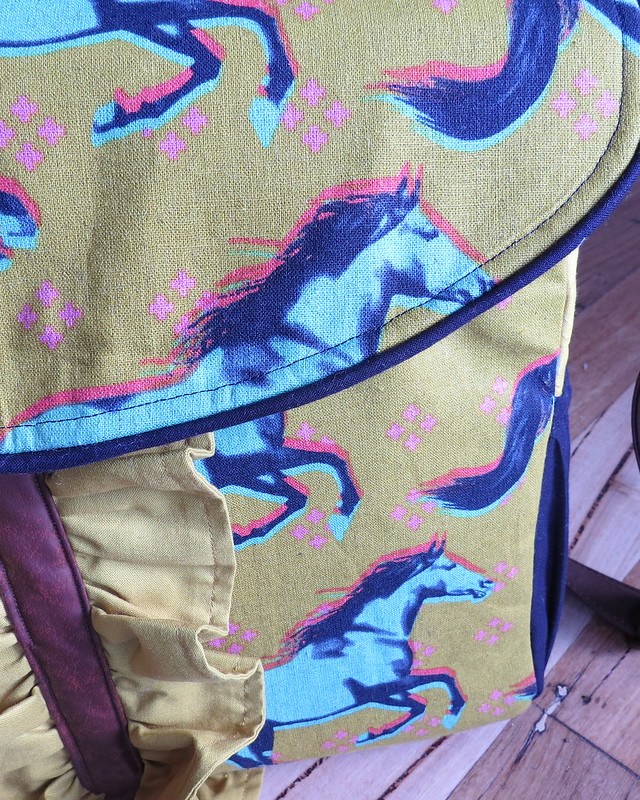
I added the blue pipping around the lid.


IMG_1518


 (See that baby block? That's me styling! Yeah! I'm doing it!)...that's me being sarcastic if you couldn't tell.
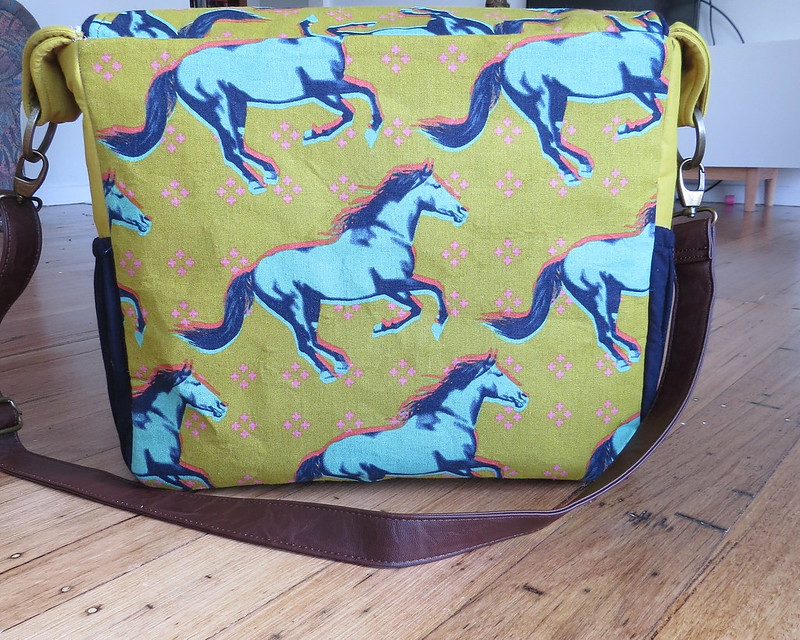
When I was cutting the bag I really stewed over pattern placement, especially on the lid. I knew I wanted a whole horse on the lid, but didn't want it to be smack-bang in the centre. I could've fit two horses on the lid but it looked silly, so after lots of internal debating, I settled on one horse off-centre.

I also *tried* to match up the pattern on the lid with the front of the bag, but it didn't turn out too well, so lets just pretend that I didn't and it just happened like that.

IMG_1511


The last step in the pattern was to top stitch all around the top of the bag. I tried...I really did, but I came to the conclusion that its physically impossible without an industrial sewing machine, so I unpicked my poor, poor effort and left it.  (I don't think I'll mention that to my friend either).

The pattern is called 'The Lola Bea Diaper Bag', Im *pretty* sure it came from Etsy. Check it out if you like it.
You may notice that I omitted the strap and went for a pre-made leather strap from a previous bag. The side ring-holders (don't know what they're called!) were made by me and my ingenious brain! (and therefore are not part of the original pattern.)

Its always hard to sew for a fellow sewer, as they can pick mistakes, but all in all I'm pretty happy with how it turned out!

Next time though...I think I'll just stick to quilts :)

Jessica

Wednesday, 19 August 2015

Baby Boy Quilt : :

You remember how I posted that I made 3 baby girl quilts here?

One for my friend, one for my sister-in-law and one for my neighbour?  Well, I had given two out (to my friend and SIL), and still had the last one to give to my neighbour. I hadn't actually met her baby yet, but I wrapped it up and sent hubby over there to give it to her.

The whole reason I thought she'd had a girl was because Mr handsome told me that he'd seen her with a pink-coloured blanket. Anyway, as your probably guessing by now, when he gave it to her he found out that she'd actually had a boy!!

She said she loved it sooo much though that she was happy to keep it. She even came over to thank me, and tell me how beautiful it was.

I however was frantically whipping up a quilt for a boy so I could swap it with her.


IMG_1430


Honestly, I finished this quilt in RECORD time!! My friend had actually given me the top sewn together to make myself a baby quilt for Little Miss S....but to be honest, I knew I wasn't going to use it for her as to me its more "boy", and I already have a lovely quilt planned for her!
I had to unstitch and resew some of it to make it more of the shape I wanted, then pin and quilt it to the back. I flipped over the back, which is a lovely soft minky, and used it for the binding as well.


IMG_1431 
I think it turned out really cute!

If she loved the first quilt, she a.d.o.r.e.d this one!!


Jessica

P.S. sorry about the photos! They were super quick snaps taken on my living room floor before I rushed out the door!

Monday, 3 August 2015

3 Moda Giddy Mini Quilts (+ tutorial) : :

There are so many of my friends and family who are having babies at the moment! Really! There must be something in the water.....or maybe they all took one look at Little Miss S and got clucky *wink*

Anyway...because there are so many babies that have either just been born, or are currently cooking, I've decided to make them smaller gifts. (I just did a quick count and there are 6 babies!!)

3 of the 6 bubs are girls, and I had a moda "giddy' jelly roll sitting in my cupboard just calling out to be used.

I wasn't ready to commit to cot quilts for each of them (not because I don't love making them, I just really don't have the time...and if I'm being honest, the motivation), but I decided a smaller pram/bassinet quilt would be perfect, especially since its sooooo cold at the moment here in Australia.


IMG_1424


I wanted to keep it simple. No triangles or flying geese...just strips. So I opened my jelly roll (am I the only one who loves opening a new jelly roll?) and selected a good range of colours.....really no need to over think this part....just reach and grab.
When I had a good handful of strips I cut them in half...again no need to measure, I just eye-balled it...and started sewing the strips together into runs of 4. I just kept grabbing more strips and adding them in as needed.
Then once I had a smallish pile of 4 strips sewn together, I cut them into 2 1/2 inch strips. (I didn't take any photos...but its not that hard to imagine)


IMG_1425


After that I just sewed all the strips together and voila! Baby quilt!
I continued this until I had 3 quilt tops.

Then it was a simple matter of pinning to the wadding, quilting the top (just 1/4 inch from every seam), then I pinned it to the back and just run down a seam every 5 inches or so.


IMG_1427


These were the first quilts that I have backed with fleece. They turned out so soft and warm, but not too heavy like minky can be. I think its the perfect back for newborns.
I ran out on the last one however to I threw in a strip of tilda farbic in the middle. It still turned out cute.
I then used left over jelly roll for my binding. 

Two of these quilts have already been gifted and are currently keeping a couple of baby girls warm. This one will be going to its new home tonight.

If your looking for a quick make...I can definitely recommend. They were quick and easy...but look fab!

Jessica

Oh, I should add they measure roughly 32 1/2 inches by 24 1/2 inches for those interested.

Monday, 29 June 2015

Cute Baby Shoes : :

Last year when Little Miss E & I where at kinder their kinder teacher was really worried about their lack of clear speech and how they would cope at school.
Going back to when they were bubs they didn't talk much (well...they didn't talk much english! They were always babbling to each other), and as a result they were behind the eight ball with their alphabet and numbers when starting school this year.

They are now half way through the year and they know their numbers up to, and backwards from 20, their alphabet and are even reading now!!
Their teacher has been so great! She loves to teach and gets excited when her students learn something new. She's a fantastic teacher.

Anyway, the point of all this is she has been so excited that her first grandchild was born, a girl called Isla, and I wanted to make her something smallish for the new bub.

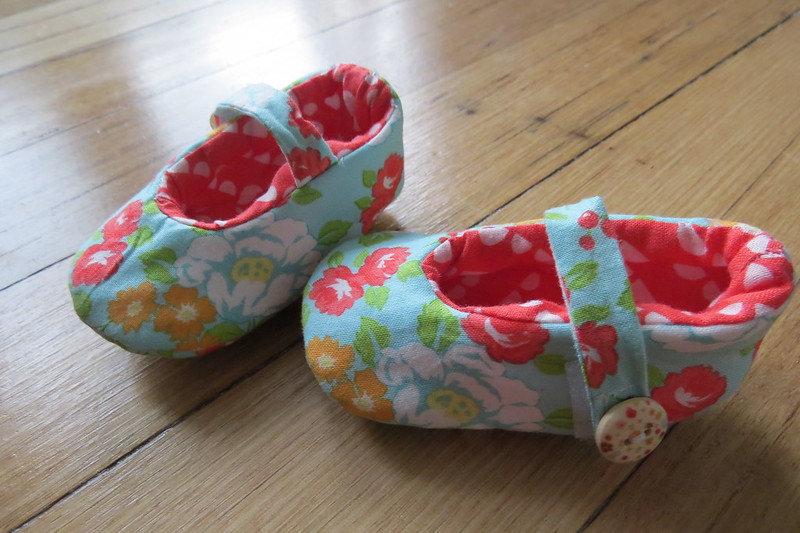
I decided to try and make some baby shoes...


IMG_1323


EEP! Aren't they just sooo cute!!

These went together super quick, although some parts where a bit fiddly. I was planning on making them a bit bigger, about a 3-6 month size, but they ended up smaller than I intended, pretty much for 0-3 months, which was fine because the baby is only about 1 week old, I'll just have to remember for next time to make them bigger.


IMG_1324


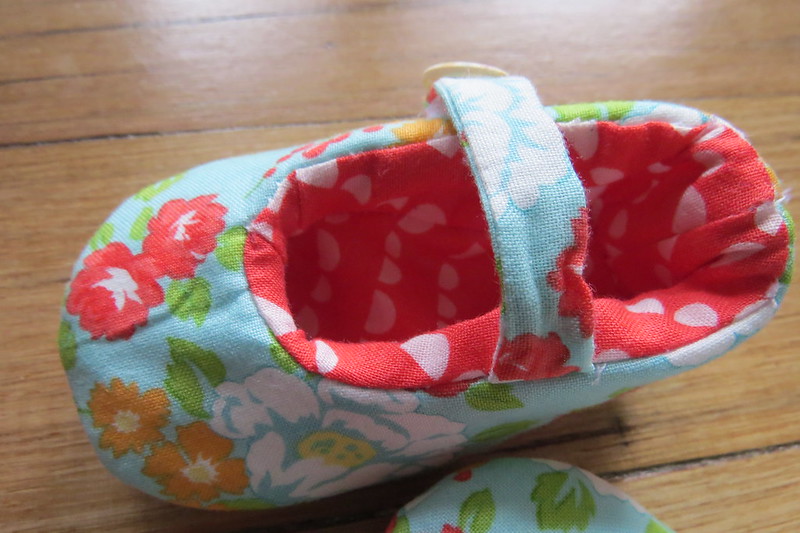
I think they turned out really sweet!! I'm going to make Little Miss S a few pairs to wear for church!


IMG_1322


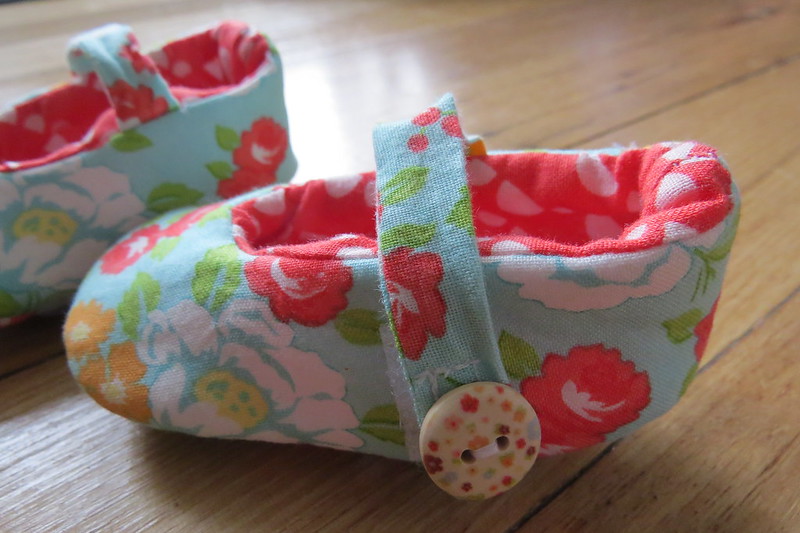
I sewed a button onto the top of each closure using these little wooden buttons I got from a craft show a few years ago. If I was making these shoes for an older baby, one who is putting things in their mouth, I would definitely leave this off, just in case they managed to find their way into little mouths.


IMG_1321


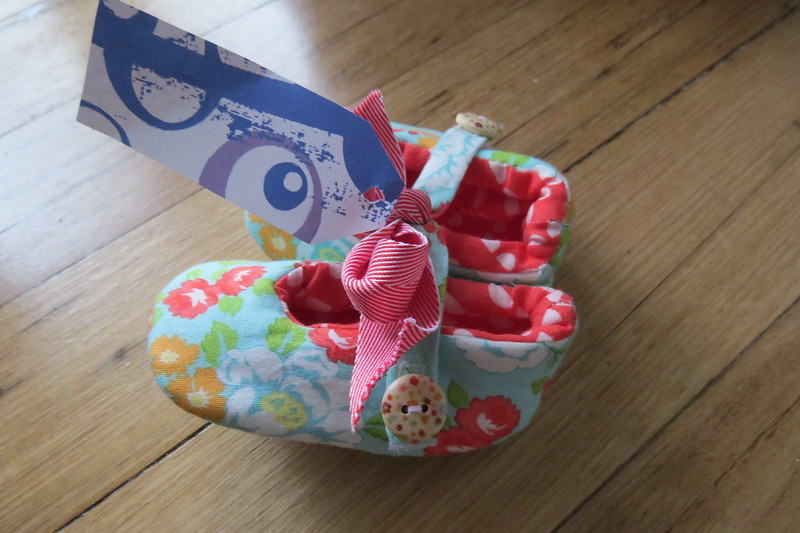
The fabric I used was "Happy go lucky" (Love it!), and I put some thick fusible fleece lining on the insides to keep those little toes toasty during winter!

These shoes have already been given and hopefully they are getting loads of wear!

Jessica

Thursday, 18 June 2015

Baby Play Gym : :

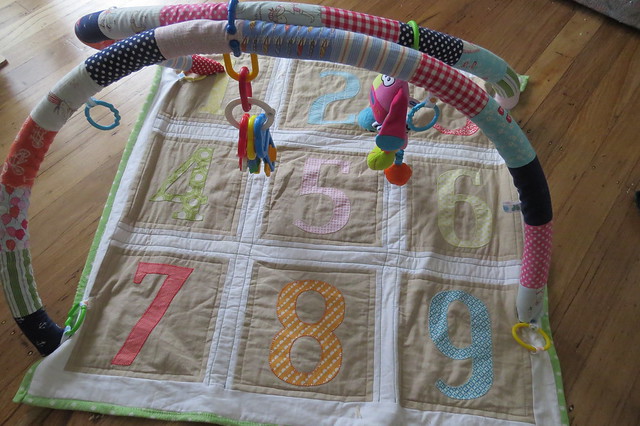
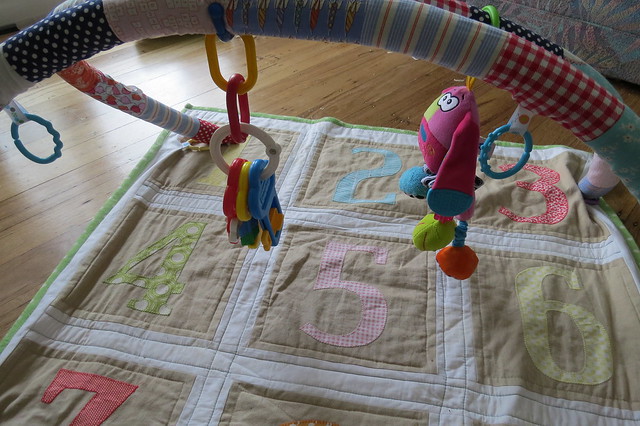
I wanted to make Little Miss S something to play with as she is now just about 4 months old (where did that time go?). She is just hitting that really fun stage where everything looks tasty and it all goes straight into her mouth!

I decided to make a baby gym for her as I've never owned one, but I did lend one from a friend and know how much babies like them.  I used the pattern from the book "Sew Modern Baby" by Angela Yosten, which I picked it up on a whim at spotlight ages ago.

However...if I had a crystal ball and could have known how much trouble it was going to give me, I definitely wouldn't of bothered!! 

I'll get to that bit later....first onto the quilt part, the mat!

I appliquéd!!!......AND I didn't hate it!! 
I honestly think this is the first quilt I have ever appliquéd something that looks half decent. 


IMG_1309

(Let me just cut in here to say...i did it on my Bernina...not by hand. That's a hurdle for anther day!)


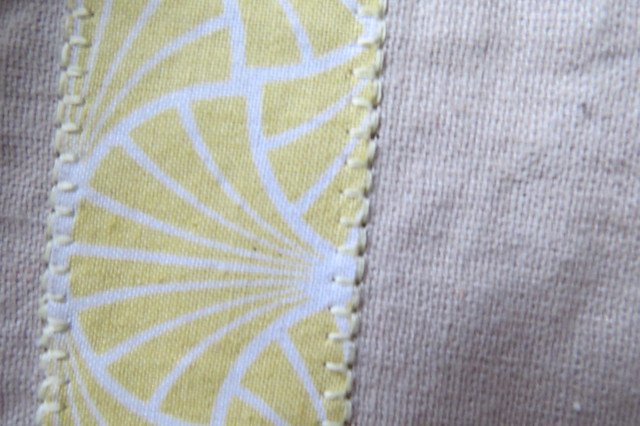
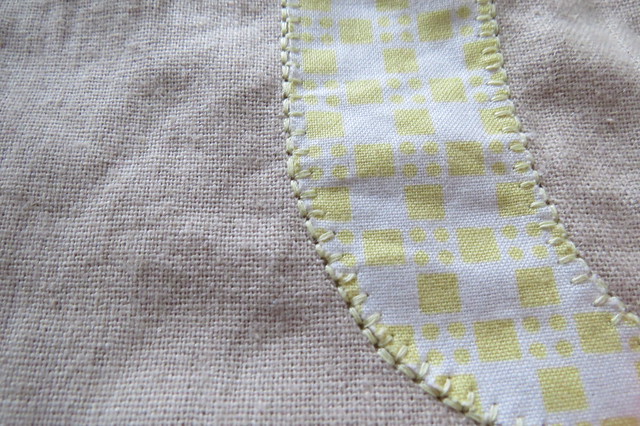
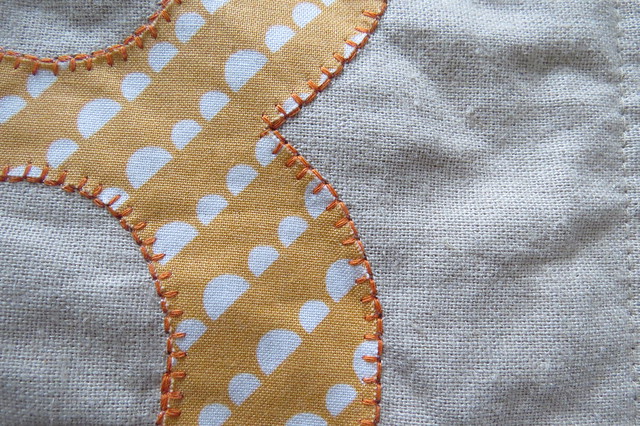
There are two types of blanket stitches on my Bernina 440QE (number 45 and 46 for those who want to know).

They are both the same, but 46 is double thickness. I decided to the thicker stitch, and while it definitely ate through my thread stash quicker than I would've liked, it looks so much better than the thinner one!! 

I mean, just look at that stitching!!


IMG_1311


And again...


IMG_1308

 
And again....


IMG_1307


Yup, I think I can definitely say I'm more than a little proud of myself!!

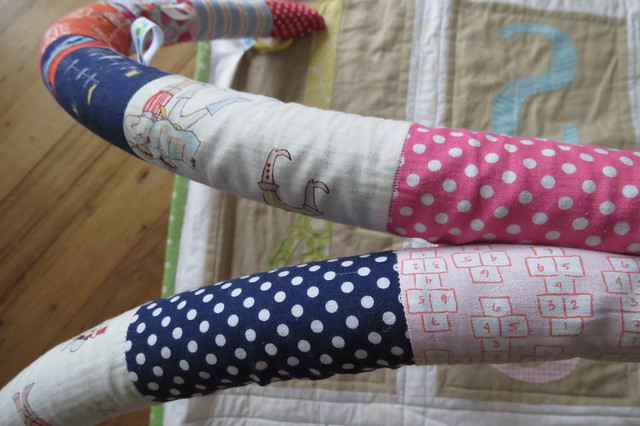
Now onto the stuff that seriously gave me nightmares! The arches!! *shudder*
I sewed up the 'tubes' of fabric from my Sarah Jane stash (which is seeming never ending at the moment!! No matter how much I use, there is still just sooo much!).


IMG_1310  

That part was simple enough, but threading the black pipe insulation through the tubes took me hours and hours and hours!! 
Then after I finally had them threaded and sewn together I connected it to the quilt with baby links (like the patterns states) the whole thing just flopped over. (que me chucking a bit of a tantrum and refusing to look at it again for about a week!)

If anyone is planning on making this project take note...this book is American..so the materials listed aren't exactly the same as the materials I found in the hardware store here in Australia!!

After leaving it all in a corner for a few days, I decided to give it one more go and got my husband to go to my parents farm and get me a few lengths on fencing wire. 
I then cut them to length and wrapped the sharp ends in duct tape so they wouldn't poke through my fabric. 

After unpicking, threading then re-sewing, I can finally say that it works!! *happy dance*

And the best bit? Little miss S Loves it...which I guess makes it worth it in the end!! 


IMG_1312

She is seriously happy under this thing. I love how I can change up her toys as well so she gets a bit of spice in her baby-life.

Jessica


Monday, 20 April 2015

Nappy (Diaper) Bag : :

When I was pregnant with Little Miss S (she's 7 weeks old now), I was on the hunt for that perfect nappy bag. One that would be big enough to carry everything I needed, be happy to carry around for the next year or so AND that didn't cost the earth. Asking much? Apparently I was!!

I couldn't find one anywhere that I liked, except for a couple of really cute leather ones that were way too expensive. (Seriously, for a $700 nappy bay I could pay someone else to carry the nappies!)

My friend had a few bag books that I borrowed and I found the perfect nappy bag pattern in this book...


This book has some really cute bag patterns, but to be honest, the only ones I would be tempted to make would be the nappy bag pattern (the one I made) and perhaps that cute bike bag on the front page. But that's probably more of a refection on me, who doesn't need or even want a bag for every occasion, than the book.
 Ha Ha, just give me one big bag that I can use for everything and Ill be fine!

Like this one....


Let me just say that I.LOVE.THIS.BAG!!! Really love it. The pattern called for laminated cotton, but after searching high and low for a print that I liked (and not finding one), I decided to make it out of canvas and linen.

Believe it or not but I had the grey linen and blue canvas hidden away in my cupboard, and I'd completely forgotten about them! Both were purchased from a craft show several years ago. The canvas (by birch) was going to be used for a pillow, and the linen, a quilt.

The only two things I had to purchase was a little bit of fabric for the lining and the metal O-rings.
I'm really loving not buying fabric...did I just say that? Shopping in my stash is really satisfying!!

I was going to make the strap from fabric as well (as the pattern says to) but I found this awesome leather strap that I'd saved from a bag (that's long dead).I found that in the depths of my wardrobe during some spring autumn (?) cleaning, and it was a perfect match for my bag!

The thing I love most about this bag (apart from its superior good looks and *ahem* quality sewing) is all the pockets!!


Seriously, this baby has a space for everything!! If I need to carry it...there's a pocket for it!


Of course that doesn't mean that I don't just throw everything in when I'm in a rush in the mornings.....but if I *wanted* to be organised, I could be. That's what important right? Right!


My favourite pockets on the bag is the two on the front with the valcro flaps. It makes finding my keys, wallet and phone sooo much easier because I just keep all three in one of those. The other one I use for a small packet of baby wipes, mostly for my 2 year old son, and cleaning faces as the twins get out of the car for school in the morning (honestly, some mornings they have everything from toothpaste around their mouths to Milo on their foreheads).

I honestly will never buy another nappy bag again. When this one wears out, I will just make another. Its that good!!
(Did I mention that I love it?)

Jessica


Tuesday, 14 April 2015

Another Baby Quilt : :

This is a project that I completed last year before sewing became un-enjoyable (for some reason it felt like such a chore while pregnant!!).
My brother and sister-in-law had a lovely little girl so I decided to make her a quilt!! (Like I do every time someone has a baby!)

Here is my labour of love (aka the quilt)...


Ha ha this photo makes me laugh! I had my 6'3'' husband hold up this quilt and told him to crouch down. Poor guy was so uncomfortable trying to keep his head out of the picture! The whole time he kept asking me to hurry up and take the photo. What I put that poor man through! Love him!

This pattern was from one of Camille Roskelly's books I have previously mentioned here, here and here (and probably half a dozen other places that I cant be bothered linking to right now!)

 I used the Riley Blake fabric line 'The simple life', which is pretty old now but I've been hoarding it for baby girl quilts!
I also threw in some Kona solid fabric for the boarders, background and binding, and backed it with some Tilda fabric I got from my local craft store. 
 I used my machine to attempten a loopy-type stitch using the BSR. Not too bad for a first go hey?
Of course the BSR helps immensely!


 I've really got to work on my free motion quilting...but practice makes perfect I guess. Overall, I'm pretty happy with it (although I know its a far cry from perfect!).


I've also started being 'good' and labelling my quilts!! I think this is the first quilt I have actually labelled! I know some people like to include information about the quilt and what-not on the label..but hey at least its a start!! 


I liked this pattern so much I started making a boy version. Its still sitting unfinished in my cupboard (of course), but I know as soon as someone has a boy, that will be the kick up the bum I need to whip it out and finish that one too!!


Jessica
Thursday, 9 April 2015

New Baby and Baby Mobile : :

To see my balloons in the 'parade', click here http://craftschmaft.com/2015/04/09/the-balloonalong-parade/

Well after a crazy 9 months I'm back!!
Little Miss S made her entry to the world on Feb 24th 2015 (10 days overdue!!). She weighed just over 4 kgs (or 9lbs in old money).

She is now 6 weeks old and everyone loves her to bits. She's a really good baby, and after a little scare during the first week she is home and settling into the family routine (if you can call it that!)

One of my favourite things is when all 4 of them are happy and getting along with each other. I love watching the others sing to and play with their little sister!!  When Little Miss S starts crying, Little miss I is usually straight there singing her a song and talking to her. So cute!

So....onto what I've made! One of the first things I have made for Little Miss S is a baby mobile! This pattern is from Craft Schmaft (love that name) and you can get your own copy here.

I have wanted to make this pattern for a VERY long time but as we didn't know whether bubs was a pink or blue one I held out so everything she owned wouldn't be gender neutral.

Here it is... (please excuse my open wardrobe!!)


This pattern was so fun to make!! I loved everything from choosing the fabric to sewing those cute little baskets and clouds together. 

It was also a really quick make, which is important at the moment as my sewing time is limited to teeny-tiny snatches here and there, especially with Little Miss E and I on school holidays at the moment (yes they started school this year..where has the last 5 years gone? *sob*)


The fabric I used was pulled from my still-very-large stash!! (Still overflowing even though I haven't added to it since beginning my stash diet a loooong time ago...) Its really satisfying making things from my stash.....I really do have a lot of nice fabric in there...it just takes the time to dig it out and match it up.


I have to admit I love everything about this mobile, and it seems Little Miss S does too. Its really handy when I have a shower or go to the loo as it will give me 5-10 mins to myself *bliss!*

Nothing worse than a screaming child when your on the toilet...and yes I have been known to take her with me...and I'm sure I'm not the first mother to do it either!! (well I'd better not be!)

In keeping with my spend-no-money (or as least as possible) moto (which I'm carrying on into this year by the way), I found some sticks from my garden and spent the afternoon sanding them back until they were lovely and smooth instead of buying some dowel. I used them to hang the balloons from and I admit I love the look of it. I have decided to incorporate as much 'natural' material as possible into my kids rooms. Just adds that little bit of texture and nature!


Well I'm off. I have a kitchen to clean that I neglected last night (woops)!

Jessica
Saturday, 27 September 2014

Newest Addition!! : :

I haven't posted for quite a while...mostly because I haven't been sewing!!
But that's not to say that I haven't been making something special.......


If you would all kindly turn your heads to the side...you may see something that resembles a BABY!!

This was my scan from 10 weeks I think.....I'm 20 weeks today!!
Still waiting for my 20 weeks scan.....and still deciding if Mr Handsome and I want to find out the sex...but we are both so excited to be having number 4!

It hit us last night that we will actually have 4 children.....ha ha couldn't stop laughing!!

So I'm due on Valentines Day (Feb 14th) 2015....I cant say how much I'm NOT looking forward to being huge in the hot hot summer...but it will be nice to have birthdays in the summer when we can parties outside!

I'm so looking forward to having cuddles with a newborn!! There is nothing in the world like your own newborn baby!

Jessica xx

Monday, 30 September 2013

Vintage Baby Quilt

My Sister had her first baby back in February last year. So of course I wanted to make her a quilt. My sister back then was really into pastels and muted colours. So I decided to make her a bright quilt. (Being the eldest of 6 children, its my birth-right to know what my brothers and sisters need, and dish it out accordingly!)

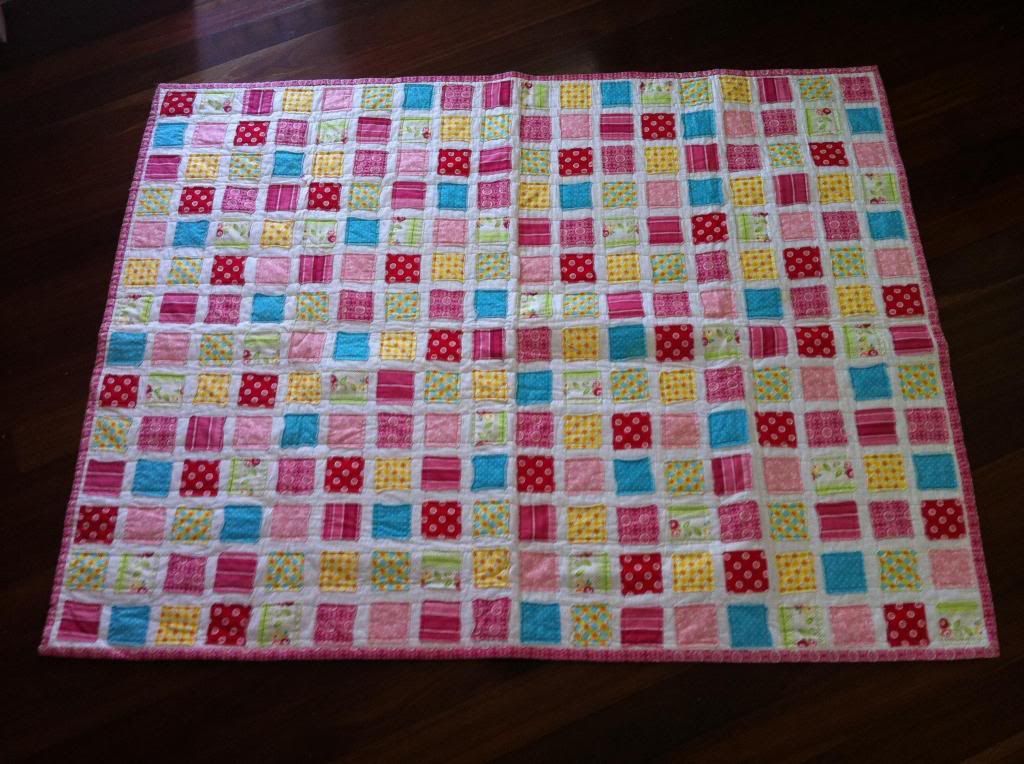
After much searching I settled on this Vintage Baby Quilt pattern. Its really really cute. The squares are not pieced into the quilt, but are sewn on top, so the edges get a lovely vintage ruffled feel.


I ordered a kit from a fabric store on Etsy called Quilt Taffy. They were so helpful. They sent me numerous photos of different bundles of fabric so I could pick which ones I wanted. They also cut all the squares for me, which was awesome! The price was really good too! (which is always important)

I thought this quilt would go together quickly, but it was an effort!! Getting each square to sit straight on the fabric and then sewing it was hard.    


I made this quilt bigger than the pattern, as I want it to get lots and lots of use. (The quality of the photos aren't that great because this quilt is actually in Queensland, and I had to ask my sister to send me some photos of it.) 


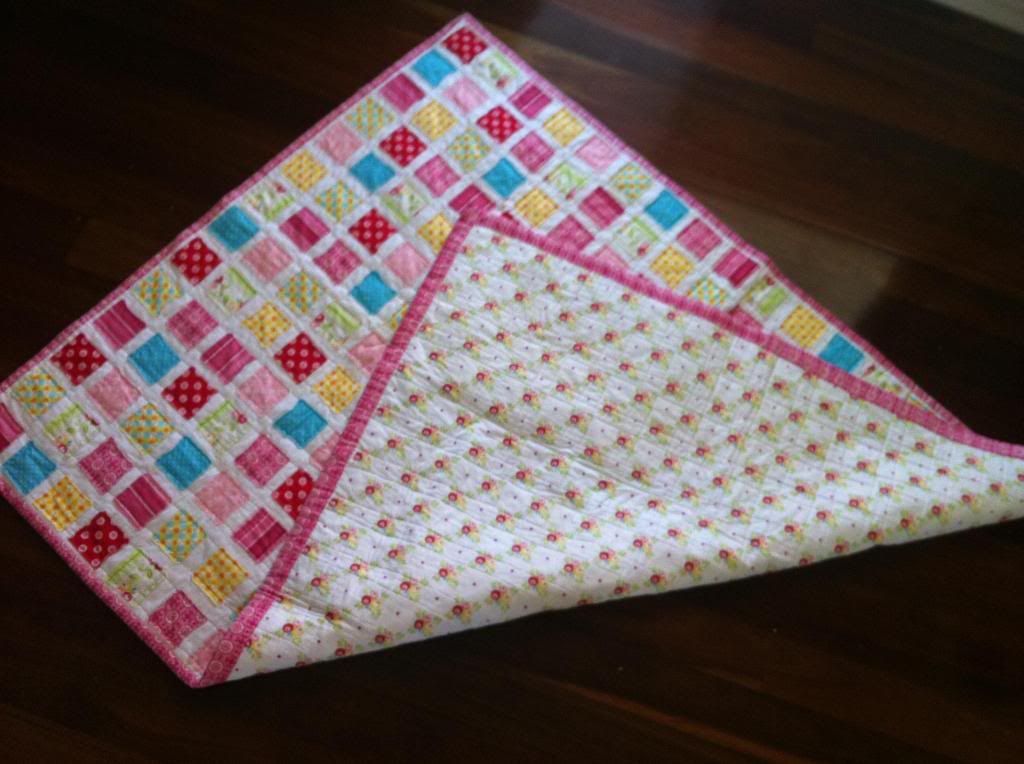
I love the back of this quilt! Its hard to see, but its such a sweet print, especially for my gorgeous little niece! 

I will definitely use this pattern again! Such a simple design, but it looks so lovely. I have actually been dying to make a baby girl quilt, but boys seem to be the trend amongst all my friends lately!


My sister is actually having her second child in about 4 weeks, (yep, a boy) and I'm going to make her another quilt. Cant have my handsome little nephew using a pink quilt!


Toodles!

Jessica

Wednesday, 25 September 2013

Monster Play Quilt

When Little Mr Z was smaller, and learning how to sit up (*sob* who stole my baby and replaced him with this cheeky toddler?), I wanted my make a thick quilt that he could use on the floor so he wouldn't keep banging his head every time he toppled over.

So I gathered up my fabrics and started cutting. I cut the fabric into strips, 4'' wide, 3'' inches wide and 2'' wide. Once I had all the stripes I just sewed them all together to make the quilt top. 

I decided after that that I wanted to make the quilt tactile, and add some little ribbon tags, as Little Mr Z loved to suck tags. I also thought it would be a good way to secure toys to the quilt so when he dropped them, he didn't loose them. 

So I went and purchased some red and blue ribbon, and unpicked small sections of my quilt to add on the tags.

I really like the tags on the quilt, and Little Mr Z does too!


I have this pattern, from the Australian designer 'Don't look now!' 


She has some amazing designs, and I really love them all! 

I decided to appliqué a monster onto the quilt.
Now I have to be honest, I don't like appliqué. My type of sewing is bang it threw my machine as fast as possible. Appliqué just seams like way too much effort, and it reminds me a lot of 'Nana quilts'. Yep, you know the ones I'm talking about. Country colours with appliqué flowers all over it (not that there is anything wrong with those quilts, its just not what I like for my home).

So I was super surprised when I actually really enjoyed making this monster! Seriously! I was considering appliquéing more of the monsters all over it!


 After my quilt top was completed, I pinned it to two layers of cotton wadding, and the back. I thought the extra layer might of made pinning and quilting difficult, but it didn't. I hardly even noticed it while sewing. 

I decided to be adventurous with my quilting, and did a whole lot of different patterns as you can see below. 


I then bound it in a great green circle print fabric (cant remember who it was from), and there you have it. One perfect floor play quilt!


This quilt has had tones of use, as during winter I also have used it in his cot when its been cold. 


Here is the back


I love making quilts!

Jessica

Saturday, 31 August 2013

Sew Nesting!

Last year in July, I was heavily pregnant with Little Mr Z. As my due date loomed near, everyone kept telling me that I would soon start nesting.

So I kept waiting and waiting for the time when I would have so much energy and motivation to make my house really sparkle before the baby arrived.

IT NEVER CAME!

I was so so disappointed. I really wanted to make my home perfect, but it was such a chore! But then what did happen was I woke up with an overwhelming desire.......to sew!!

I remember I took over the whole kitchen table with my sewing machine, cutting board and fabrics! When I woke up, the first thing I did was sew. I pretty much sewed solid for the last 2 weeks of my pregnancy :)


I wanted to make my baby a quilt, so after searching high and low i decided that I wanted to use Moda pure by Sweetwater.

But do you think I could find it anywhere?!  It was an older line of fabric, and no where to be found!
Just when I was about to give up on finding any, someone listed a charm pack on Ebay. Just what I was after :) I bid like crazy and WON! (and paid a lot more than I normally would for a charm pack!)

Because this fabric has really relaxing earthy colours, I wanted to keep the pattern nice a simple too. I decided to cut 2 1/2 inch strips of my background fabric (that I found at my local craft store), and just surround each charm square.


You cant really see it in the photos, but the background is a lovely polka-dot fabric :)


Don't you just love the crinkled soft look/feel a quilt gets after its been washed several times?


I bound it with a solid dark brown, and backing it in a blue fabric. I wanted to keep the quilting fairly simple as well, so I just echoed each seam with 1/4 inch quilting. It was such a relaxing lovely quilt to make! 
Just don't look too closely at my wonky stitching :)


This was also the first quilt I used bamboo wadding instead of cotton, and I LOVE it! So much easier to use, with the added benefit of being hypo-allergenic and eco-friendly too! I found that the bamboo wadding didn't slide around like cotton does when its in the 'quilt sandwitch' (the top, wadding, and backing all basted together).


 And here's an adorable photo of Little Mr Z enjoying his quilt today in the sunshine! (Last day of winter!! YAY!)

Take it easy!

Jessica