Saturday 9 July 2016

Quilt-a-long Geese : :

Quick update on my last post,  I have finished my flying geese for the Happy Quilting quilt-a-long.

IMG_2216

I'm really loving the fabric that I've chosen. I cant wait to sew it all together!!

I have to work this afternoon, so I have a couple of hours with the kids. I might see if i can finalise my fabric choices for the quilt!

Jessica

Thursday 7 July 2016

Happy Quilting Quilt Along # 3: :


Well, the tumble weeds have been blowing in around here.
There has been lots of sewing going on, but unfortunately not much blogging.

Ill try to catch up on that later, but for the minute, I am joining in again with Happy Quilting's quilt-a-long. YAY! This will be my third happy quilting quilt, and they are always lots of fun. (Check out my first and my second) You can check it out here if your interested in joining in on the fun! 

I wanted to make a big quilt. A 4 by 4 layout, in king size. I seriously spent hours last night pulling fabric from my stash. I honestly pulled nearly all of it out, and I'm just not feeling it. I just cant seen to get the right combination of fabric!!

It was doing my head it, so I crammed it all back in my cupboard (folding is for the weak!) and I decided to at least start with a cushion!

I'm making a single block, in the smallest size (20 x 20 inches). Something is better than nothing right?  And it lets me still quilt-a-long while i figure out what I'm doing with the quilt.


IMG_2215

The blue/grey upholstery fabric, and the brown velvet are actually left overs from an Amy Butler ottoman I recently made, more about that later.

The navy floral is from happy-go-lucky, Moda, and the others are just randoms from my stash (I think the script is from Michael Miller).

So that's the cutting done!

Cant wait to put it all together! (and figure out my quilt!)

Jessica

Monday 21 March 2016

Pattern Runway : Kimono Dress

I have had my eyes on the Kimono Dress pattern by Pattern Runway for a while now.
I was just waiting for fabric-inspiration to strike.

Then Tessuti announced on their blog that they were running a competition, with silk crepe-de-chine!!! As soon as I saw this autumn inspired print, I was sold! (and there's still some left at the discounted price!!)

It arrived only 2 days after I ordered it, all wrapped up like Christmas present in an old pattern and tied with a sting. I know it shouldn't matter how its packaged, but to me it totally does!

I unwrapped it eagerly and got sewing! This dress is relatively easy to make, but it took me a looooong time! Many hours went into sewing this dress.


IMG_2108 

To make it special I wanted to make sure it was finished as professionally inside, as it was outside.

Pattern Alterations: I lengthened the bodice by 3 inches. I originally thought I wanted a nice, big "pouf" over the elastic waist, but after I had sewn it, it was way too much pouf. Yes there is such a thing. It gave me a boxy, really unflattering silhouette. So I painstakingly unpicked the elastic waste and my french seam (believe me silk hates unpicking as much as I do!), and shortened the bodice by 1.25 inches. (so overall my bodice was lengthened by 1.75 inches).


IMG_2103


I also lengthened the skirt by 5 inches as I wanted it to hit my knee, and still have a deep hem.

I used french seams where I could, and Hong Kong seams where I couldn't, and to finish off the edges of my facings.

IMG_2116

(Just incase you were wondering, yes I'm wearing it inside out, just to show of how nice the innards are!)

I made it up in a size M, grading out to a L at the hips (pear shape). I would definitely recommend grading up a size if your in between or just over sizes at the hips as its quite a slim fit.


I also did a blind hem (by hand I might add!!), and finished it all off with a fabric covered button.

IMG_2119

I L.O.V.E. this dress!! x a million!

It feels sooo fancy. I cant wait for someone to have a wedding because I know what I'm wearing!!

This dress contained a few 'firsts' for me. First time Ive hand stitched a hem. First fabric covered button (not hard) and first time doing Hong Kong seams!!

I'm so proud of it! I feel like I'm wearing something from a super expensive designer boutique!

I'm definitely going to use this pattern again. I also want to eliminate the skirt and make a kimono top!

Jessica

Monday 29 February 2016

Desmond Backpack: :

There's a new bag in-town. A handsome, stylish, and completely practical bag. His name is Desmond!

If you haven't seen Taylor Tailor's new backpack popping up allover the place, then head yourself on over to his site here.

As my dear husband has now started is university degree (mech engineering), he was in obvious need of a bag. A backpack to be precise.

So I hunted through online patterns to find the right bag for my man. And Voila! And new bag was born.


IMG_2072 

A thousand apologies for the off-focus photo. He was holding a squirmy Little Miss S, who was more than ready to go to bed, so it was hard to get a good shot of the bag (and of course I couldn't wait till she was asleep).

But anyway, you get the idea. This bag is FANTASTIC! and not only does it look great, it holds heaps, has loaads to reinforcing in all the right places, and is really comfortable to wear. Seriously, I want one!

To begin with I was a little worried that it wouldn't be big enough, but I decided to just go with it after reading some other reviews on other blogs. I'm so glad I didn't change the size, as its perfect.

The material was Kaufmann Linen in Indigo, which I picked up for a steal on ebay. I lined the bag with the same fabric, as sometimes the innards can be seen peeking though the roll top (if its not rolled properly), and I think its nice to have the same fabric.

IMG_2067

Mr Handsome has already been using this bag (which is why its a little crumpled) and he gives it two thumbs up!
It holds a surprising large amount, and he says its nice and comfortable on his shoulders.

Pattern Alterations:
This pattern is made exactly to the instructions, with a few small exceptions. I put some nice cushy quilting batting (iron-on) in the straps to make them nice and soft, and I lined the lining fabric with medium weight interfacing.

I didn't want to go too-heavy a interfacing, because I wanted to avoid a really stiff, but I did want it to hold a little bit of its shape.

I do want to order some otter wax sometime in the future to make this bag water proof as well. Ill update if and when I do that. 

I also ordered all of the hardware from Taylor Tailor, and its top notch. I'm really happy with the quality. Its probably the best I have ever used!


IMG_2068

And that's it! I know this bag is going to get plenty of use, and with the amount of reinforcing I did, its going to last a very loooong time!

Jessica

Tuesday 16 February 2016

One For Me : :

I have decided a few things of late.

The first being that I'm going to participate in the "Splendid Sampler".  If you haven't heard of it, I'd highly recommend a look.

I love that its slow place, and I'm also enjoying the surprise.

Instead of picking specific fabric for this quilt, I'm just going to use what takes my fancy at the time. No theme, colour scheme, or anything! (I'm not even going to use all quilting cotton!)

My fabric scraps are also going to be my first port-of-call when looking for fabric.

Ive actually found that I have memories associated with my fabric scraps. Weird right?  I remember what I made from them, and some of things that were going on while I was using that fabric.

While the dresses, bags and other things that I made may have long since worn out (or been donated or gifted), I still remember those things with the scraps that I've collected.

So this quilt is purely for me. For fun. To make a quilt that may or may not be pretty, but will incorporate those memories.

Im putting no limitations on myself. I simply will select the fabric that takes my fancy for the day, and make the block.


IMG_2021

So for the first block, it was these fabrics. The toadstools was from a backpack I made Little Miss I when she started 3 year old kinder. The blue/gray dots, and mustard solid where I dress I made her when I was pattern testing for "sewing in no mans land", and the red polka dot a left over from two baby quilts I've made, one for my sister, and one for my sister in law.

So all those memories have now been captured in this block.

IMG_2022


I'll share my progress on this quilt with updates through out the year. Im interested to see where it takes me.

The second thing I have decided is that I'm no longer going to feel like I 'have to' sew things for others, esspecially when I dont want to.

Ive made so so many things for family and friends. Quilts for babies, bags, costumes, mending, big quilts, you name it, I've most likely sewn it and given it away. 

Some times I enjoy it, most often not so much. So this year, Im not doing it anymore. If someone has a baby, and I dont want to, or have the time to make a quilt, Im not going to feel like i have to.
I can be completely ok with buying baby stuff for gifts, same as everyone else.

Im also not doing anyones mending (seriously, I hate doing my own), nor any other type of sewing that i dont want to.

This has kind of come around because Ive been so busy making things for everyone else that I never even made Little Miss S a baby quilt, and she is turning one next week.

So hears to a year when I only use MY hobby, for things that I want to use it for!!

Jessica


Saturday 6 February 2016

Penguin Backpack : :

Little Mr I started 3 year old kindergarten this week! (seriously will you *please* stop growing!) So, obviously, he needed a backpack to commemorate the occasion!

I own the book "Oliver + S Little things to sew", and if you have read my blog at all, you would probably have noticed I have a slight, ahem, obsession, LOVE for anything Oliver + S!

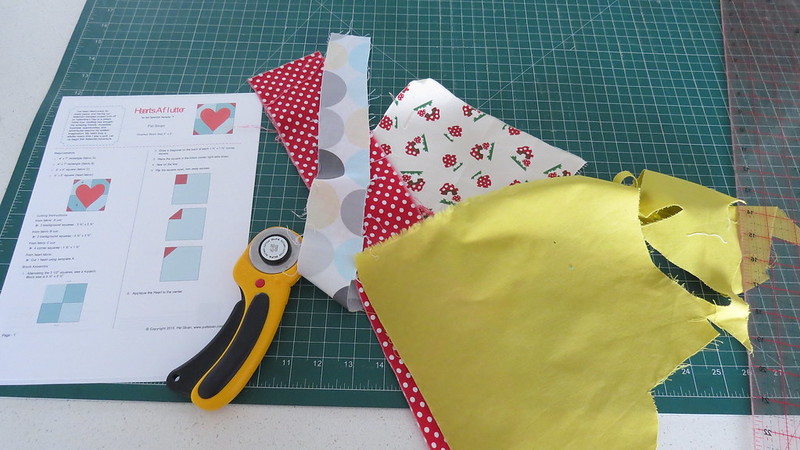
So it was a no-brainer for me to use the backpack pattern found in this book!
Now, just so you know I'm not completely bias, I have made kids backpacks before, and while those patterns where OK, this one is great!!

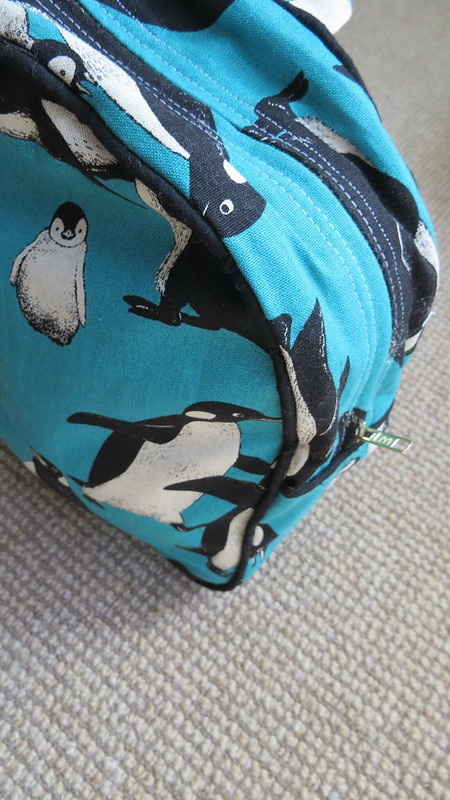
Whenever I sew with Oliver + S, I follow the instructions to the tee, because I'm always bound to learn something.For this pattern it was the zipper insertion method! I wasn't entirely sure what I was meant to be doing, but I just follow the pattern and it always turns out great!

Internal Dialog: "why would i want to do that? It looks like your adding a whole load more steps onto something that should be easy liesl!!

Then it clicks why I had to do all those seemingly annoying steps, Que me calling my husband over "come and look at how amazing my sewing is!!"


IMG_2016 

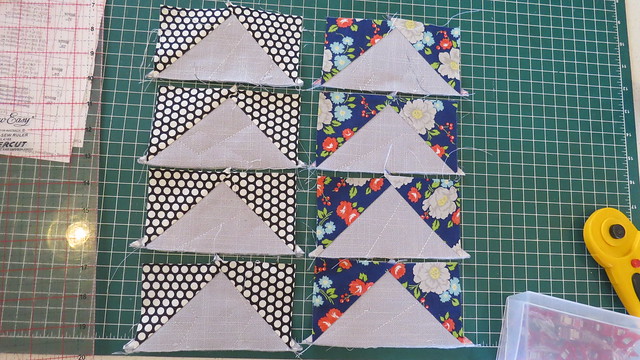
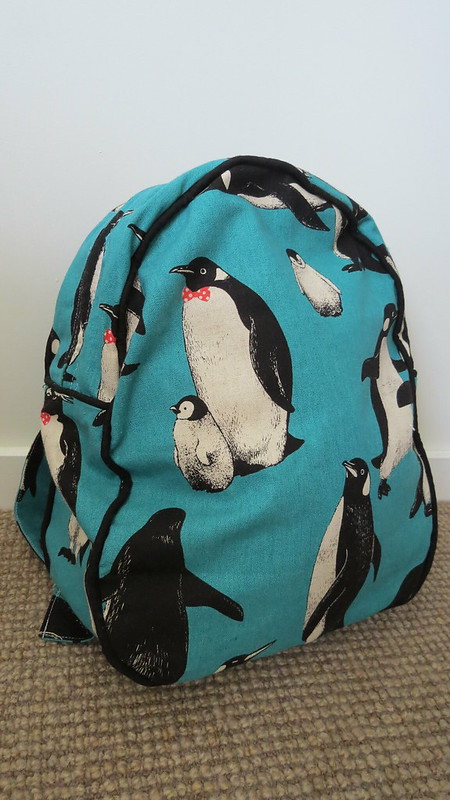
How cute are those penguins?! 

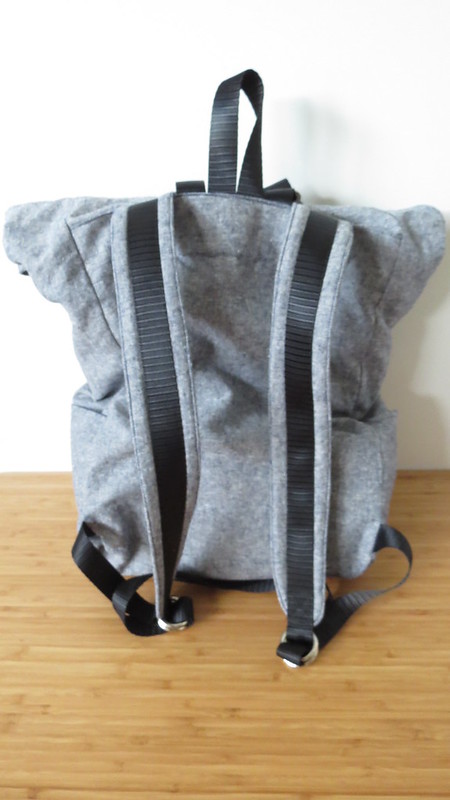
After I finished the outside of the bag, I noticed it was quite floppy. I wanted the bag to hold its shape, and it did cross my mind to put some heavy weight interfacing in it to really stiffen it up, but I decided to go for more of a softer feel and put in some fusible fleece interfacing instead. 
It helps it hold its shape, but also keeps that lovely soft feel as well, which I love.


IMG_2017 

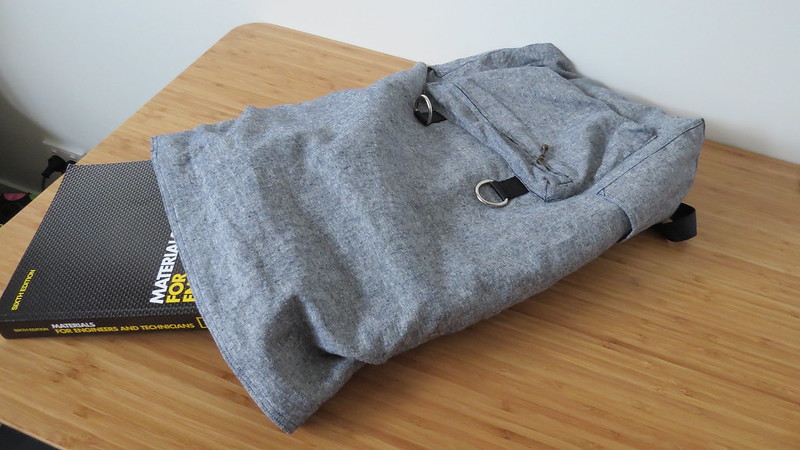
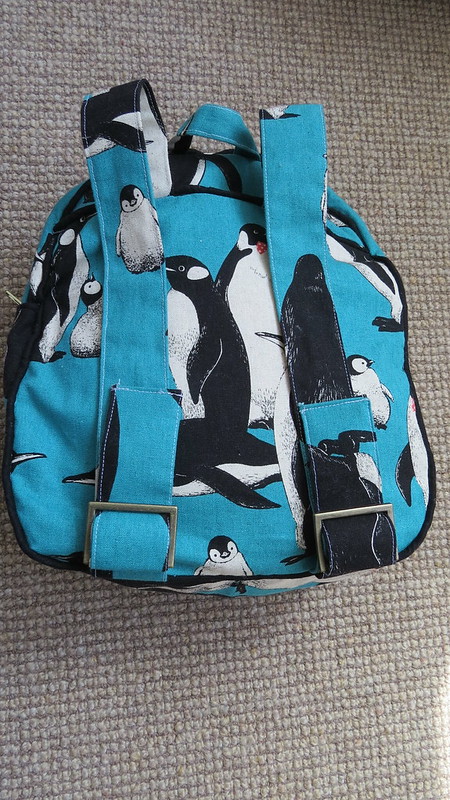
 Other changes I made to the pattern: I make some black pipping and added it on all the seams of the backpack except on the straps. I think it just gives the back a bit more definition, especially as I was using the same fabric for the whole bag.  (I also just love pipping on a bag and will add it whenever I can!)


IMG_2018


I added two rows of top stitching along the zipper as you can see above (pattern calls for one). Don't really have a reason for that change, other than it took my fancy at the time!


And lastly, I also obviously omitted turning the backpack into a penguin (the pattern adds beaks and wings etc to make a penguin backpack). I really wanted to just let the fabric shine without all the extra embellishments, so I simply skipped over the bits I didn't want and just used the basic backpack pattern.


IMG_2020

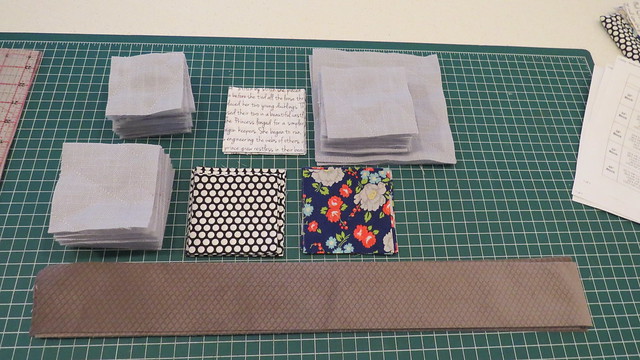
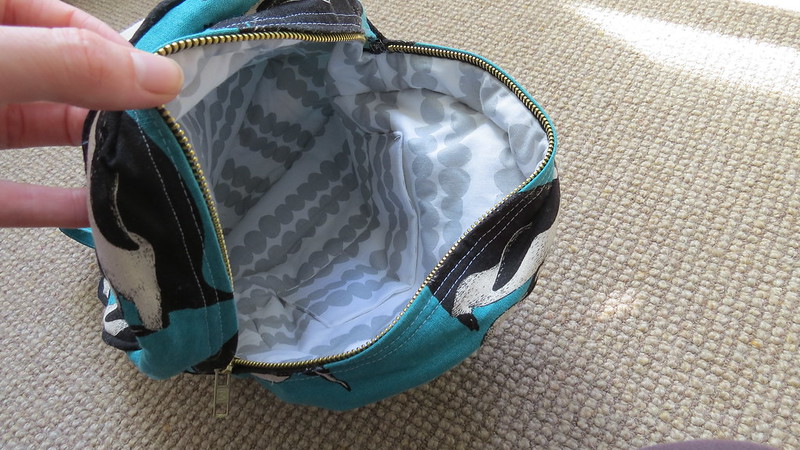
The insides are from lotta jansdotter, I didn't want it to be too busy in there, so I picked a lovely basic fabric. There is also a small pocket inside. Its quite small. I'm not quite sure what its there for, but I added it anyway as I'd already cut it out.

So there you have it! Mr I has been carrying it around on his back constantly since I finished it! The teacher tried to get him to put it in the locker when we got to kinder,  he wasn't too impressed with that, and did so reluctantly! I guess there's no better compliment he could give me really.

Just for an update, because its been 5 ish months since I last blogged. Lots of things have been going on, I didn't plan on having a long break, but life just happens I guess. Mr handsome has got accepted into University studying Mechanical Engineering and starts in 16 days!! We're really excited about that, but also a bit nervous! Its a 4 year degree and while I know were in for the hard slog, I just feel so excited and blessed that he has this amazing opportunity.

The twins, miss E and miss I are back at school as of last week. We had a lovely summer holiday with them, and even managed to get away to Eden for 10 days camping. (Its a beautiful part of Australia right on gorgeous beaches if you ever get the chance to go!)

AND Little miss S, (who is turning 1 later on in the month), started crawling today!! Shes been up on her knees rocking and trying to crawl for a week or two now, but she saw my embroidery thread box, and crawled to it!!  (girl after my own heart!)

I have loads of projects to catch up on, so keep an eye out for them!!

Jessica