Monday, 29 June 2015

Cute Baby Shoes : :

Last year when Little Miss E & I where at kinder their kinder teacher was really worried about their lack of clear speech and how they would cope at school.
Going back to when they were bubs they didn't talk much (well...they didn't talk much english! They were always babbling to each other), and as a result they were behind the eight ball with their alphabet and numbers when starting school this year.

They are now half way through the year and they know their numbers up to, and backwards from 20, their alphabet and are even reading now!!
Their teacher has been so great! She loves to teach and gets excited when her students learn something new. She's a fantastic teacher.

Anyway, the point of all this is she has been so excited that her first grandchild was born, a girl called Isla, and I wanted to make her something smallish for the new bub.

I decided to try and make some baby shoes...

IMG_1323


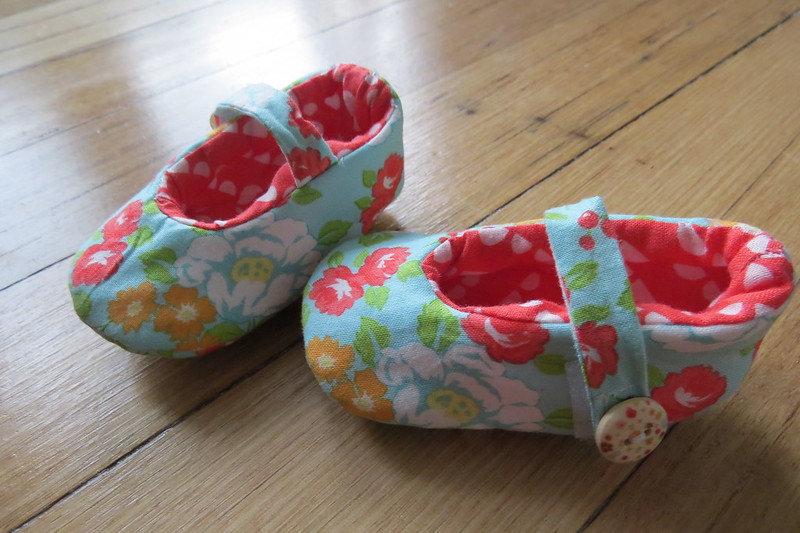
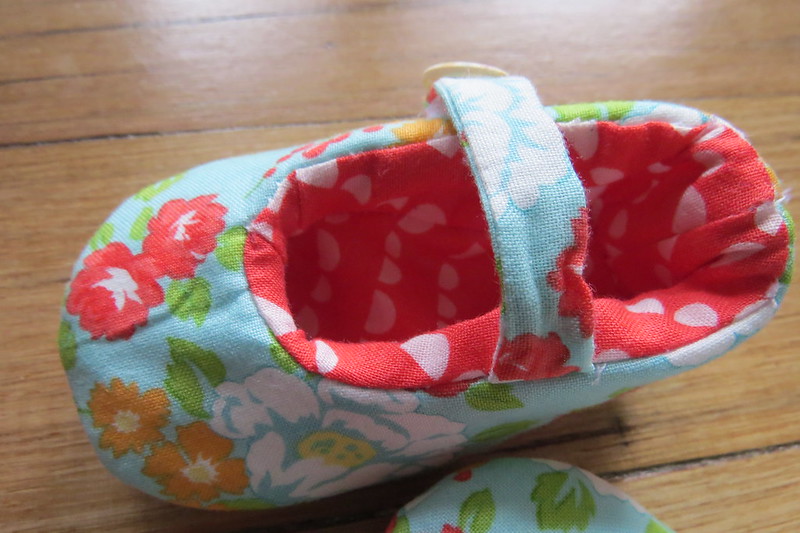
EEP! Aren't they just sooo cute!!

These went together super quick, although some parts where a bit fiddly. I was planning on making them a bit bigger, about a 3-6 month size, but they ended up smaller than I intended, pretty much for 0-3 months, which was fine because the baby is only about 1 week old, I'll just have to remember for next time to make them bigger.

IMG_1324


I think they turned out really sweet!! I'm going to make Little Miss S a few pairs to wear for church!


IMG_1322


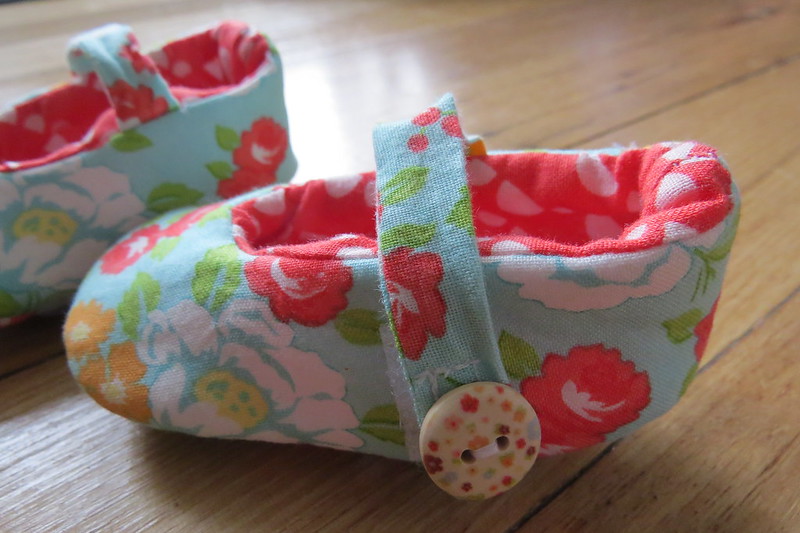
I sewed a button onto the top of each closure using these little wooden buttons I got from a craft show a few years ago. If I was making these shoes for an older baby, one who is putting things in their mouth, I would definitely leave this off, just in case they managed to find their way into little mouths.


IMG_1321


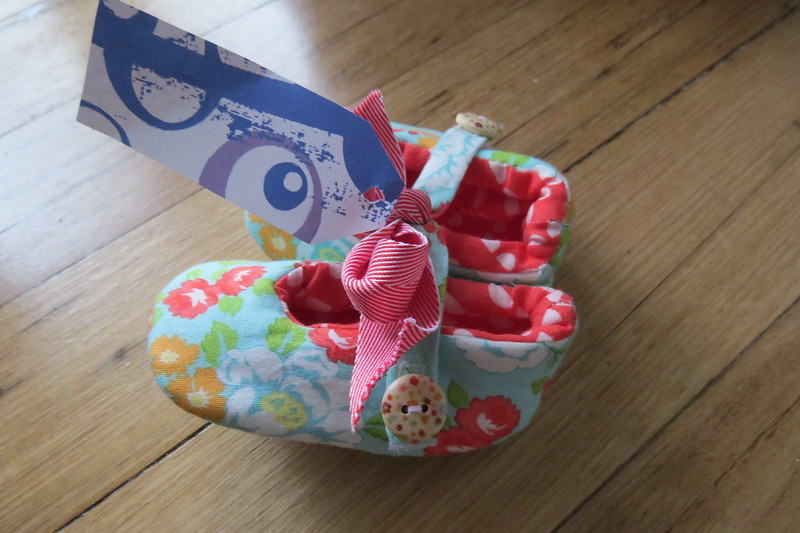
The fabric I used was "Happy go lucky" (Love it!), and I put some thick fusible fleece lining on the insides to keep those little toes toasty during winter!

These shoes have already been given and hopefully they are getting loads of wear!

Jessica

Saturday, 27 June 2015

Hot Water Bottles : :

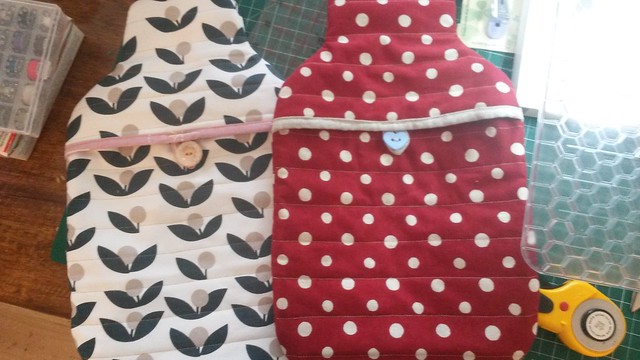
For mothers day I made two hot water bottle covers. One for my mum, and one for my mother-in-law.

20150508_132708


To be honest the fabric I used isn't really to my taste, but hey....trying to get my mum to like anything nice is near impossible (love you mum ha ha!)

The one for my mum is the country red coloured one on the right. I wasn't really sure what to make for my MIL, so I used some 'Glimmer' canvas (that I accidentally ordered instead of the cotton-oops!!) because I though it was a pretty safe option. 

I then wrapped them up with a hot water bottle each (a necessity when giving a hot water bottle cover) and VIOLA! Mothers day presents!

The pattern I used was borrowed from a friend. Its called "hot water bottle cover" by Amy Kallissa. If you want, you can find it on Etsy, or just make up your own.

Jessica

Thursday, 18 June 2015

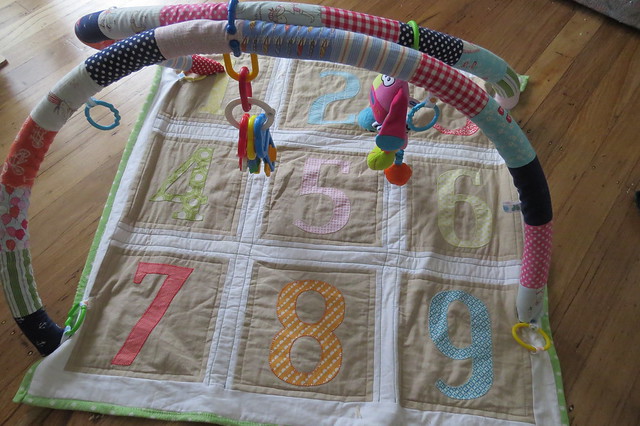
Baby Play Gym : :

I wanted to make Little Miss S something to play with as she is now just about 4 months old (where did that time go?). She is just hitting that really fun stage where everything looks tasty and it all goes straight into her mouth!

I decided to make a baby gym for her as I've never owned one, but I did lend one from a friend and know how much babies like them.  I used the pattern from the book "Sew Modern Baby" by Angela Yosten, which I picked it up on a whim at spotlight ages ago.

However...if I had a crystal ball and could have known how much trouble it was going to give me, I definitely wouldn't of bothered!! 

I'll get to that bit later....first onto the quilt part, the mat!

I appliquéd!!!......AND I didn't hate it!! 
I honestly think this is the first quilt I have ever appliquéd something that looks half decent. 


IMG_1309

(Let me just cut in here to say...i did it on my Bernina...not by hand. That's a hurdle for anther day!)


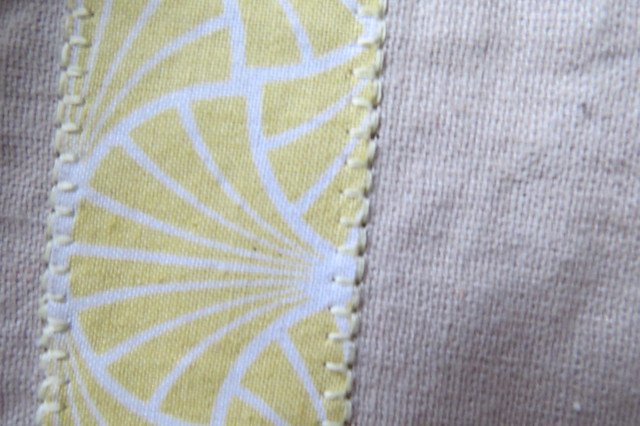
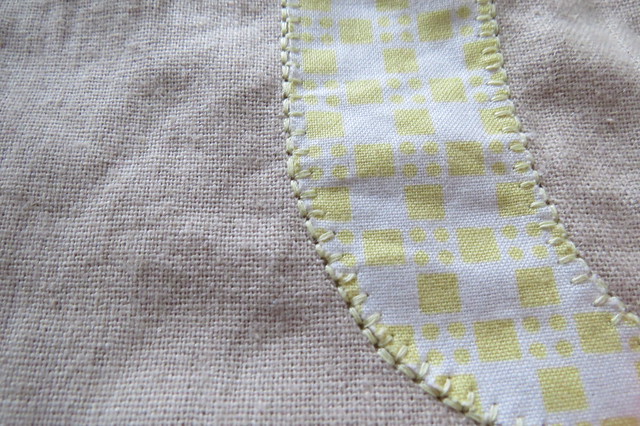
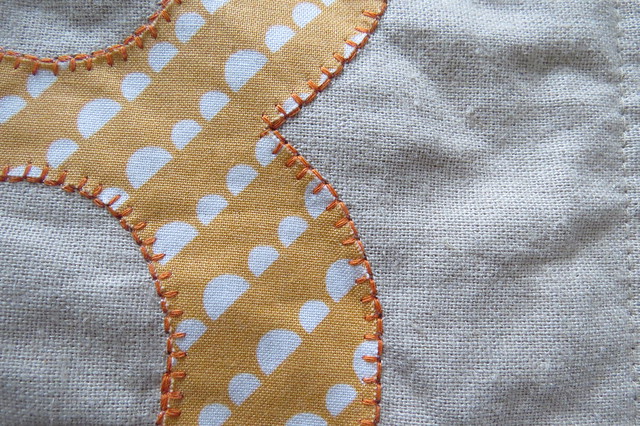
There are two types of blanket stitches on my Bernina 440QE (number 45 and 46 for those who want to know).

They are both the same, but 46 is double thickness. I decided to the thicker stitch, and while it definitely ate through my thread stash quicker than I would've liked, it looks so much better than the thinner one!! 

I mean, just look at that stitching!!


IMG_1311


And again...


IMG_1308

 
And again....


IMG_1307


Yup, I think I can definitely say I'm more than a little proud of myself!!

Now onto the stuff that seriously gave me nightmares! The arches!! *shudder*
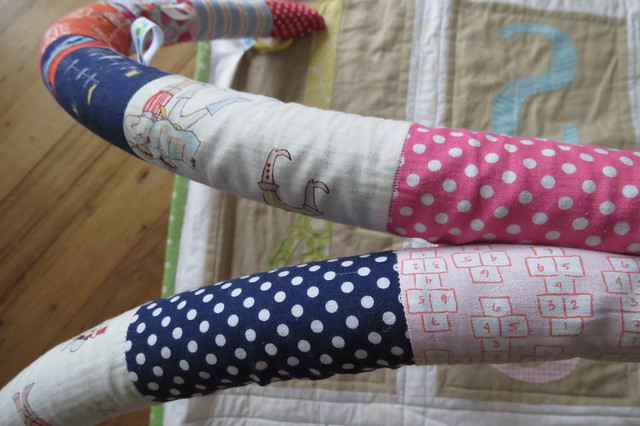
I sewed up the 'tubes' of fabric from my Sarah Jane stash (which is seeming never ending at the moment!! No matter how much I use, there is still just sooo much!).


IMG_1310  

That part was simple enough, but threading the black pipe insulation through the tubes took me hours and hours and hours!! 
Then after I finally had them threaded and sewn together I connected it to the quilt with baby links (like the patterns states) the whole thing just flopped over. (que me chucking a bit of a tantrum and refusing to look at it again for about a week!)

If anyone is planning on making this project take note...this book is American..so the materials listed aren't exactly the same as the materials I found in the hardware store here in Australia!!

After leaving it all in a corner for a few days, I decided to give it one more go and got my husband to go to my parents farm and get me a few lengths on fencing wire. 
I then cut them to length and wrapped the sharp ends in duct tape so they wouldn't poke through my fabric. 

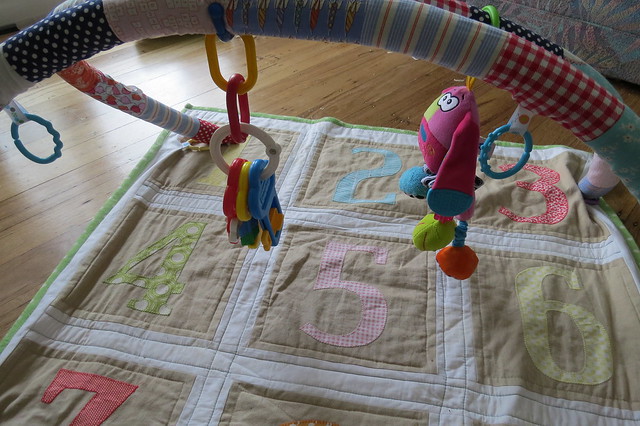
After unpicking, threading then re-sewing, I can finally say that it works!! *happy dance*

And the best bit? Little miss S Loves it...which I guess makes it worth it in the end!! 


IMG_1312

She is seriously happy under this thing. I love how I can change up her toys as well so she gets a bit of spice in her baby-life.

Jessica


Tuesday, 16 June 2015

Beautiful Bow Quilt : :

Have you ever had a project that you just wanted to be perfect?
Most times when I quilt I do try for perfection..perfect seams, perfect quilting but I don't get too carried away if things are a teeny-tiny bit off.
But for my kids I wanted to make them all a special quilt each. The type that they can give to their children when they're all grown up (not yet please!)

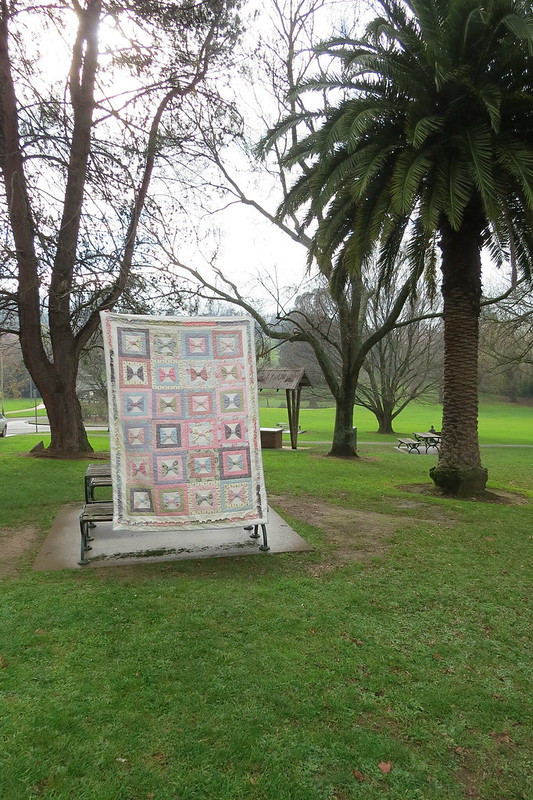
Well I FINALLY finished the first one. I wont tell you how long I've been working on this quilt (but I will say it would be measured in years, not months!). Its for Little Miss I. I chose the fabric randomly, instead of using fabrics from one line of fabric (which is what I usually do), and I think its perfect for a little girl!!

I wanted it to be a little bit vintage (and one or two of the fabrics I used are definitely vintage as they were given to me from an older lady who had had them for years and years!)

I also didn't go with all quilting cotton, I threw in a bit of eyelet fabric for added texture and to make it look more vintage-like, as obviously quilts were originally made of left overs and the 'good bits' of worn through items.

This is without a doubt my all-time favourite quilt.


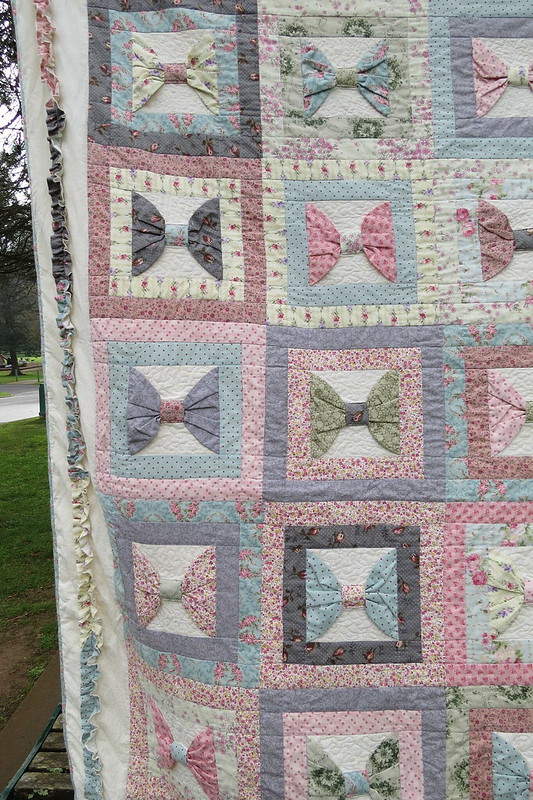
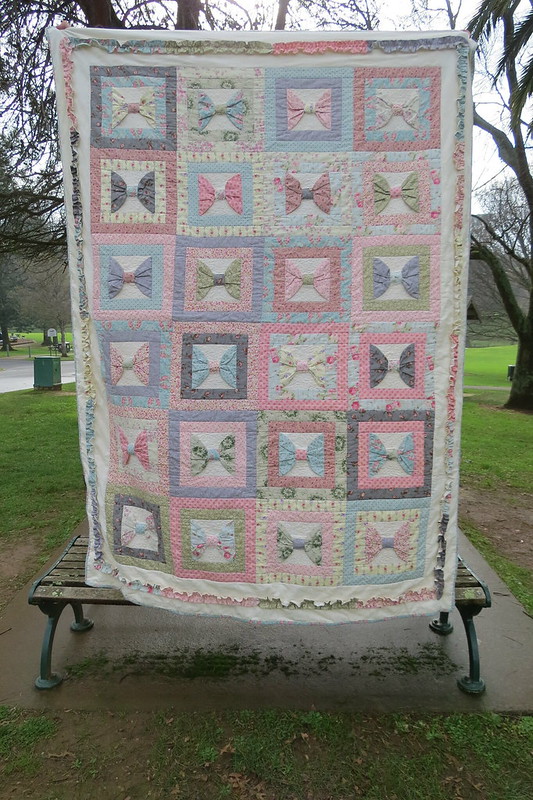
IMG_1299  

 I. love. this. quilt!!

When I was looking for fabric, I pretty much just picked anything that was floral and pretty. I also tried not to introduce too many clashing colours, but at the same time tried to keeping them miss-matched enough that it looked vintage.

I nailed it :)

IMG_1300


All the way around the edge is a super cute ruffle. I've never added any type of 3D accent to my quilts, but I'm really loving how it turned out.
The bows are 'free' as well, and by that I mean that they can move. They are obviously sewn into the seams on the edges but the rest has been fed through the middle square that was sewn onto the cream fabric.


IMG_1302

Its just so pretty. 


IMG_1300

 To quilt it I stippled in the cream background behind the bow, then stitched in the ditch along the seams, continuing from one block to another. The pattern is supposed to be quilt-as-you-go (QAYG), and I have made a QAYG quilt before, but I used a different method last time, and the way the pattern tried to explain it I just found it too complicated and fiddly (which probably says more about me than it does the pattern), so I just sewed all the front together and quilted it like normal. I find that the extra throat space with my Bernina really does help when quilting quilts this size.

I used some lovely floral blue fabric for the binding. I usually cut my binding 2 1/2 inches, but I decided to make a wider binding for this quilt. Its not too much wider than normal, I cut 2 3/4'' strips, but I do like just that little bit extra thickness around the edges.

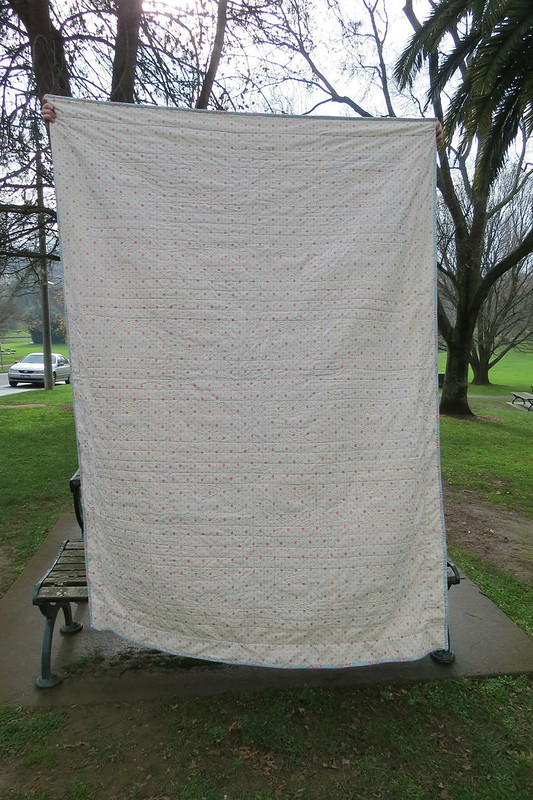
For the back I used some strawberry-print cotton that I've been hoarding for years in anticipation of finishing this quilt!


IMG_1303  

I think it goes really well. You can also see the quilting easier in this photo.

 For some reason I've never really been into the whole pieced quilt backs (maybe I'll join that party extremely late...like I do with pretty much all trends!). For now I prefer to have a nice uniform back! I also pinned this quilt extra carefully and it really paid off....look!! No puckers!!

Quilt Details:
Pattern: Beautiful Bows by MoonShine Designs
Fabric: Random finds from about 3 different stores, and some old vintage fabric
Size: 60'' x 84'' (or 152cm by 215cm)
Blocks: 24

Little Miss I adores this quilt! She has been waiting and waiting for me to finish it for quilt some time (only about half her life!!).

Now that its finally done I can move onto something else!! Little Miss E (Little Miss I and E are twins) of course wants one...but I'm thinking of designing my own quilt this time!! She wants princesses..but I'm thinking strawberries? 
I'm thinking about making a matching quilt with the same fabric, and same block size, but different pattern. 

We'll see :)

Jessica