Friday, 6 December 2013

Pencil Cases : :

Being a twin must be great sometimes, but other times not so great.
They have to share EVERYTHING...well everything except beds pretty much.
They share clothes, toys, a bedroom, friends at kinder...you get the idea.

So every now and then I try to get them something that is just theirs. Something they don't have to share.
When I was shopping the other day, I decided to get the girls some new pencils and markers. They needed some new ones as their old ones had the led broken inside and only a few colours left.
I got them a packet of pencils and markers each. They were so happy, Little miss E esspcially. She kept asking 'I don't have to share?'
Since they were both so excited about having their own pencils I decided they needed their own pencil cases.
So I let them pick some fabric from my cupboard (which they LOVE doing), and I made some!
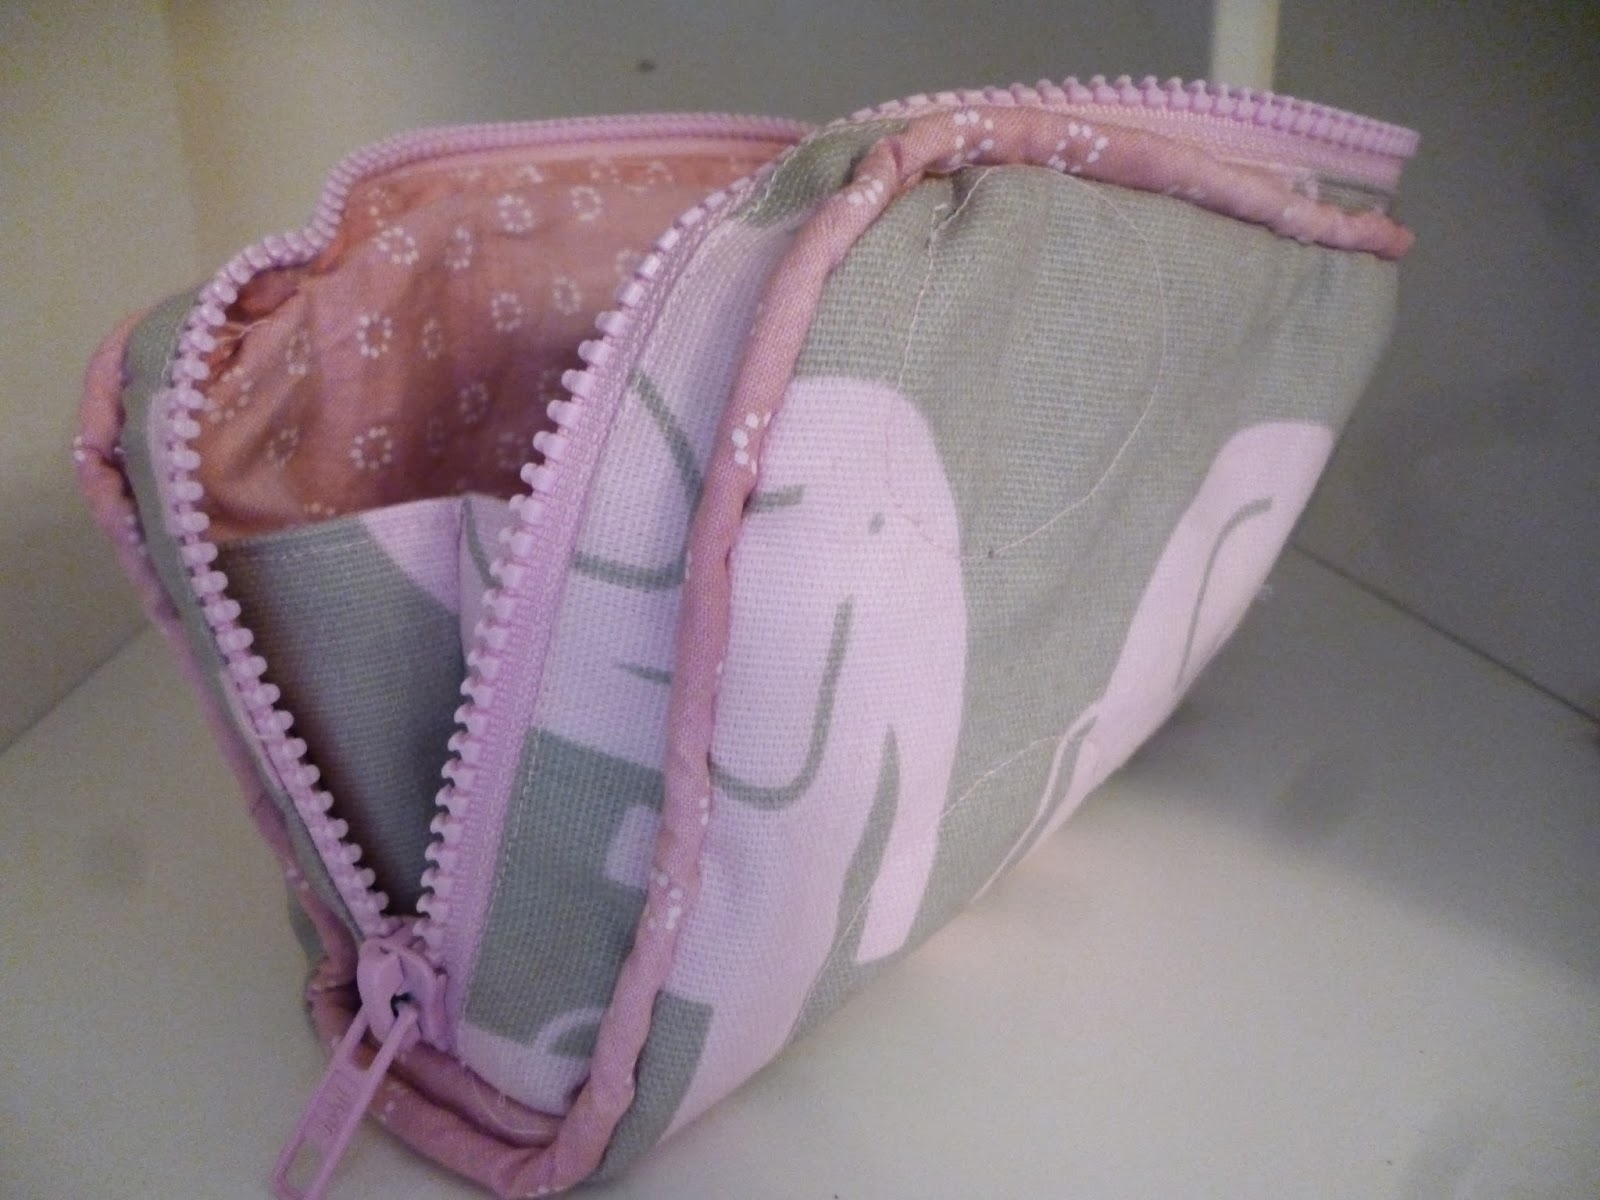


Little Miss I chose this premier prints pink elephant fabric. I coordinated it with a pink fabric from my stash for the piping and lining.
If you look closely at the photo below, you can see quilted circles on the pencil case. (Yes the elephants are up-side down on one side). I free-motion quilted that! First time I have used it, and not unpicked it! It was actually kinda fun too! I may have to use it more often....


I really like how it has a large zipper opening. This took me a little while to make because it was just so fiddly! But it will last longer than the rubbish plastic ones that you get from the store, and it looks better too.


 It didn't turn out quite as well as I hoped, but its still cute, and I'm sure I'll get better at it, because I still have to make another one for Little Miss E, who has been pestering me to make a yellow one for her.


I used a free tutorial from HERE. Its quite a good pattern, although hers is much neater than mine. But that could be because i used a zipper that was too long, then i trimmed it too short. Oops! I also omitted the muslin step, because i didn't have any, so mine is probably not as stiff as it should be.

Jessica


Tuesday, 3 December 2013

A Vintage Quilt : :

Mr Handsome loves his mum. He treats her like a queen! (Which is one the the things that I really love about him, because that's how he treats me too).

He wants to give her something special for Christmas this year, so he asked me if I would make her a quilt.

He had a look though my quilting patterns and magazines, and we picked one out of my currently-favorite book, 'Simply Retro'.

I have made two quilts from this book so far, and I just love the patterns!


We decided to use the pattern 'Vintage'. This pattern makes a quilt that is big enough for a twin bed! I didn't have that much time (or fabric), so I decided to scale it down. I naively thought that I could just decrease every measurement by 1 1/2 inches to make the quilt smaller. Erm.....WRONG!!

That plan soooo did not work! After getting frustrated, I had to sit down with a pen, paper, and calculator and figure it all out.
It took some work, but I effectively turned the pattern into a jelly roll quilt!
I don't know if that means I can pass this pattern off as my own now...(probably not)....but I'm really happy with it! I am getting a little bit tired of really large blocks, so it was a refreshing change to make some 'normal' sized ones.

Enough chit, chat....here is my quilt!


I used the fabric line 'Winters Lane', from Moda. Its supposed to be Christmas fabric, but I think its non-christmasy enough to use all year round. I really like the mix of blue, red and grey.


The background fabric is Kona Snow, which I think matches perfectly with winters lane.
I backed it in a vintage-looking cotton that I got from spotlight, and bound it in a solid red.


Once I got over the measurement/planning stage, this quilt was really fun to put together (although, I wont lie, it DID take me a long time).

All that's left is to label the quilt, then wrap it up for Christmas morning. I hope my mother-in-law likes it!


(This is me trying to be artistic at a park near the beach! I really liked the rope and I wanted to get a photo with it!)

We are spending Christmas is Mr Handsome's family this year, which we do every other year. He has so many Aunts, Uncles and cousins, that even after 5 1/2 years of being married, I still haven't met everyone! (and I have NO CHANCE of remembering names), but it should be a lot of fun, and I'm glad my kids will have a zillion cousins to play with!

Jessica


Friday, 22 November 2013

A Christmas Wreath Tutorial : :

I have always admired pretty Christmas wreaths on front doors.
I decided that this Christmas I would make one. When I envisioned it in my head I imagined Christmas balls, tinsel, and lots of other Christmas-y things on it, but when I was in spotlight, I thought some red flowers would be nice. 
However when I saw the pink and white ones, I changed my mind, and got them instead! 
You can really let your imagination go wild when decorating your wreath, but this is mine....


(If someone knows how to get rid of smudges from a camera lens, please let me know! I've tried lint-free wipes and other things but nothing seems to work!)

To make this wreath you will need:

  • A Wreath 
  • Decorations (I used fake flowers and some hessian material)
  • A hot glue gun
  • Some clear sealing spray (Optional)


To start with, I decided that I wanted to put some sealing spray stuff onto my wreath. Our front door is under a verandah, and never really gets wet, but I didn't want it to get damaged by the weather, or start to go mouldy. 
So this step is completely optional. You could even paint your wreath a colour, which would offer protection, and look awesome too. 

1. Following the directions on the can, spray your wreath. 


This is the spray I used. It has been in my shed for years and years, so I don't know if you can even get it anymore, but I am SURE that there will be something similar at your local paint or hardware store.


I started off spraying the wreath on some newspaper, but then I couldn't spray the back of it, so I found hanging the wreath on the bush worked really well for me. I gave my wreath two coats, then left it to dry completely for 2 days. As I mentioned before, this step is completely optional, and I'm sure it would work just as well using this wreath without anything on it. 


2. The next step is the fun part! Decorating your wreath! You can do this however you want, with whatever you want. For mine I threaded the flower stems through the wreath until I had an arrangement that I was happy with.


Basically just keep adding and experimenting until you have something that looks good. 


I also had some hessian fabric that i wanted to make into a sweet bow, so I used my handy-dandy overlocker, to overlock the sides of my fabric. When I was overlocking, I tapered in the middle section of the bow so there wasn't a big bulky knot when I tied it (sorry I didn't take a photo of that part, but it shouldn't be too hard to figure out).


3. Once you have everything the way you like it, get your hot-glue gun and glue it into place. I used heaps of glue on mine, as I didn't want curious fingers to be able to pluck flowers from it once it was hanging. 


4. Then using some scissors you don't care if you wreak, or a pair of wire cutting scissors, trim all the stems, putting more hot glue where needed. 

5. Put a small screw, nail or whatever takes your fancy into your front door and hang your wreath!


6. Finally, take one step backward and admire your handiwork! 

I really like this wreath. It was so much fun making it too! I may leave it up all year! It doesn't really look as Christmas-y as I was planning, but hey, its a wreath and I love it, Mr Handsome thinks its OK too, so it stays!

Jessica

(Step 7. Clean ones camera so photos don't look all smudgy....seriously, any tips would be most welcome!)


Thursday, 21 November 2013

The Newest Member Of The Family : :

Here she is, my new Bernina 1150mda overlocker.


I now consider myself the proud mother of four, my 3 kids, and a Bernina!


I have been thinking about getting an overlocker for a while. Up until now when ever I make clothes, to finish the seams I run a zigzag stitch over them, which is fine, but nothing really compares to the professional look that you can get from an overlocker.
A while back my grandmother gave me her old Janome  603 overlocker. I finally decided to get it fixed, so I took it to the repair man and he had a look over it for me. Sadly it was a bit rusted inside, and needed a fair amount of work to get her sewing nicely again. He offered to sell me an old brother overlocker for the same amount as fixing the Janome, but the Brother was a 4 thread. I was just going to do that, until I realised I could get a more user-friendly, newer overlocker for the same amount.


 I started looking at reviews and what was available on eBay and gumtree. I decided that I would like either a Janome 644d or a Bernina 800dl. To be honest, I never though I would get a Bernina as they are just too expensive!! To cut a VERY VERY long story short, I ended up buying a Janome 644d for a good price. Pretty much the day I picked it up, someone posted on gumtree a new Bernina 1150mda, for a very reasonable price (still out of my price range however).
I gave her a call, and she was so so nice! We talked for a bit, and I asked her how negotiable her price was. She asked me what I could afford, and I told her (which was quite a bit lower than what she was asking!), and because she liked me (and because she has twin granddaughter's and I have twin daughters), she sold it to me!! I love bonding over twins! Anyone who has never had twins just really doesn't know what hard is! (Hats off to those of you who have had triplets!)
So my mum purchased the Janome from me, and I ended up with this super-fantastic BERNINA!

I only just got it two days ago, but Ive threaded it (and it was so so easy), read the manual and checked it out!
I now understand all the hype about Bernina's! This thing could sew my finger off its so powerful! (Not that I'm planning on doing that anytime soon!)


 It also has the micro thread tension control knob, and a whole ton of other really amazing features!


I have ordered some new Oliver and S patterns, so when they get here, I'm going to put this machine to the test!
After sewing on this machine for a while, when I went back to sewing on my Janome sewing machine (which I DO love), it was like going from a really nice Porsche, to a beat up old Ford! I will eventually upgrade my sewing machine, but I'm in no rush. I've never really been one of those people who always *need* the biggest and best, and my Janome and I will continue to get along for quite a while yet! In saying that however, if anyone has a Bernina 750 they would like a good home for, I'm sure I could accommodate :)


After I have sewn a few items with this baby, I will do a proper review for anyone who is perhaps thinking of buying an overlocker.

Till then

Jessica

Saturday, 2 November 2013

A New Quilt For A New Baby!

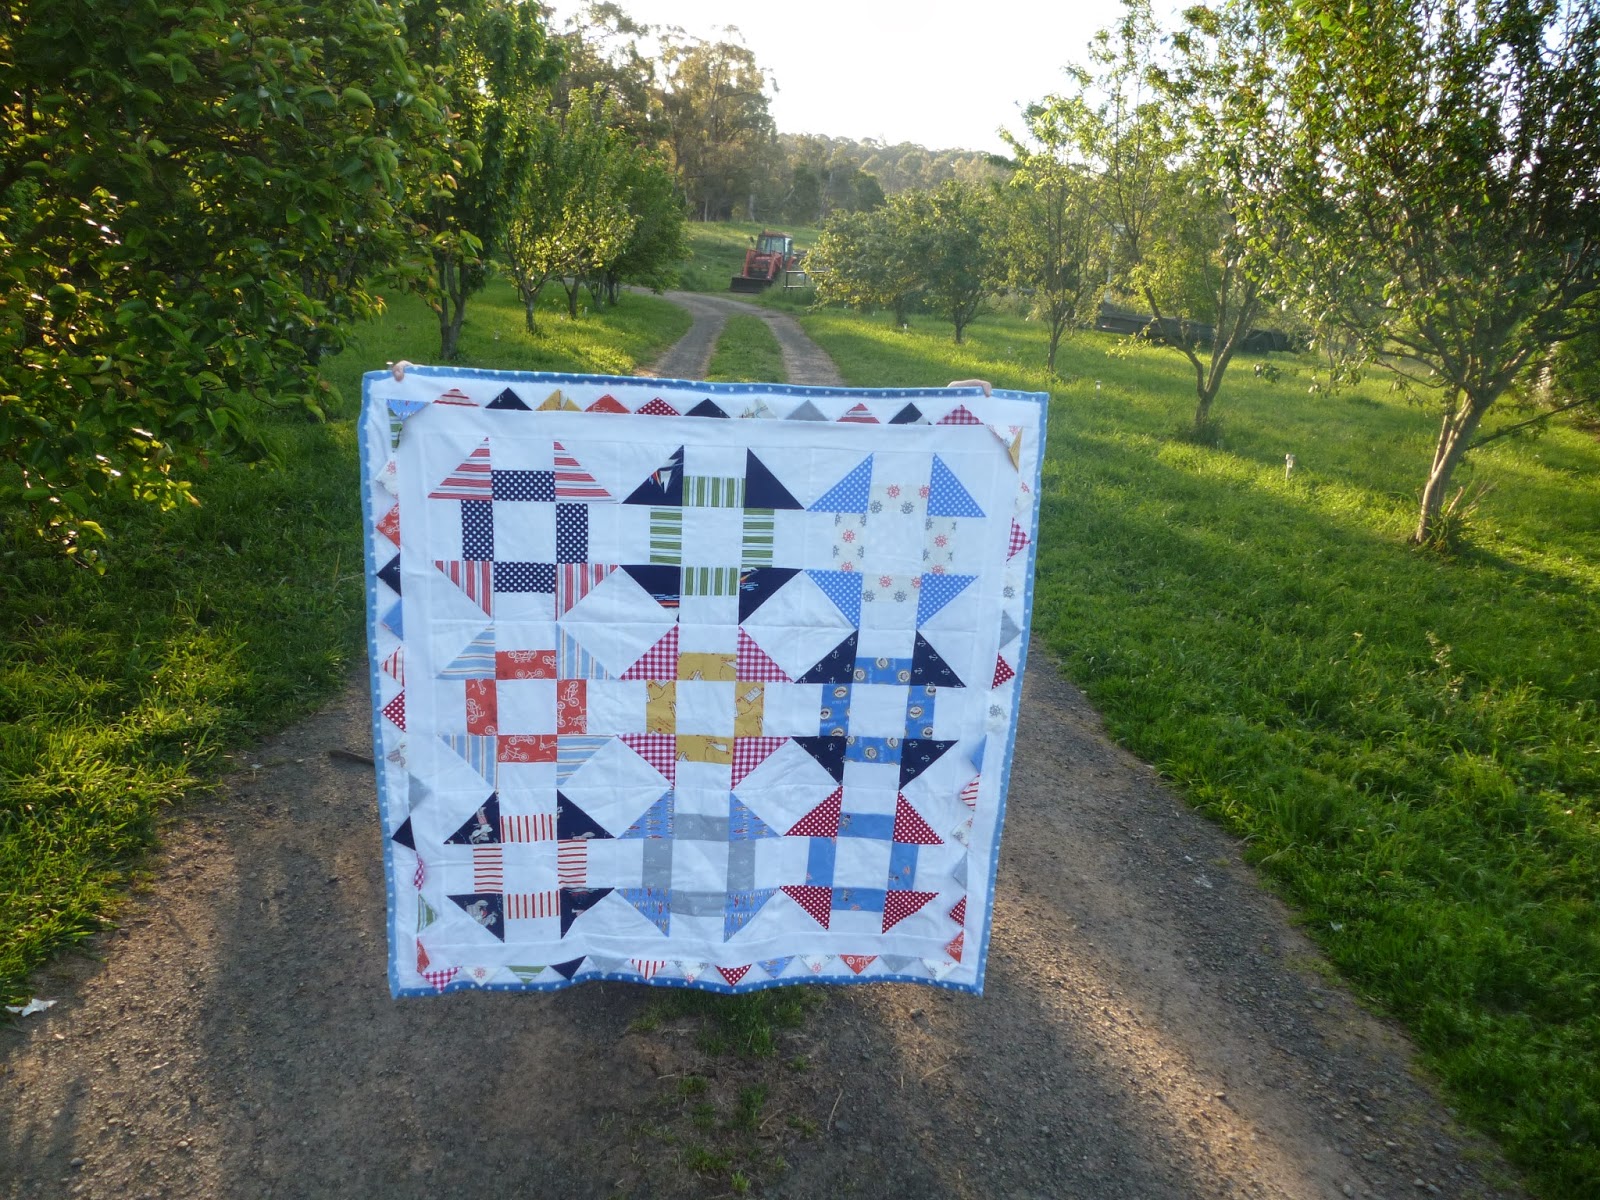
My Sister had her second baby last Friday!! A darling little boy! I am now the proud Auntie to one niece and 5 nephews!!So of course I wanted to make her a quilt........Drum Roll.......


 TA DAA!! 
(Yes, I am crouching uncomfortably behind the quilt for the photo!)

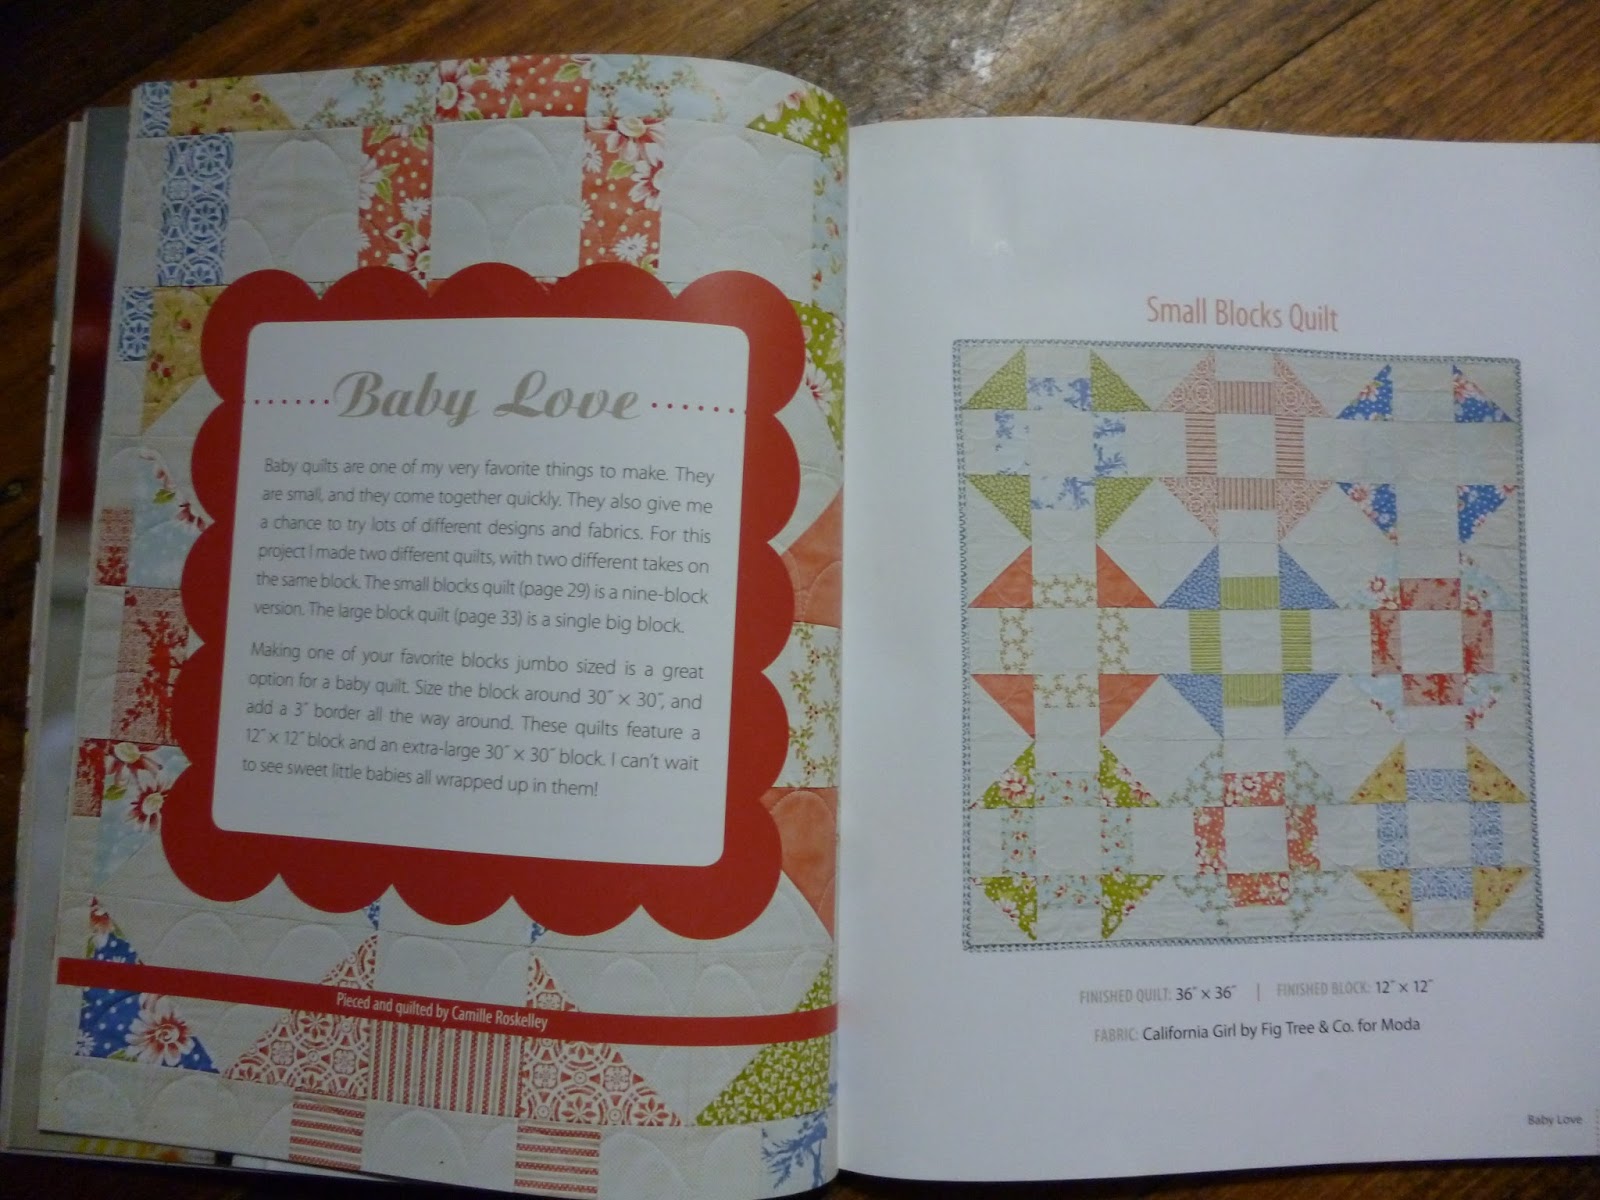
I just want to say how much I L.O.V.E. this quilt! It turned out better than expected and I adore it! I used the pattern, Baby Love, from Camille Roskelly's Simply Retro. Yes I know, I have used this pattern before, but its such a beautiful baby pattern I just couldn't resist! (The fact that it whips up super quick, and I accidentally cut enough for this quilt when making this one has absolutely nothing to do with it!)


I have a quilting rule. NEVER make the same quilt twice! So for this quilt instead of just binding off my blocks, I added an additional white boarder, then my row of 'flags' (which were oh-so-easy, and look GREAT) then another white boarder. I really love how the 'flags' are free to wave about, and I'm sure will give my new nephew something tactile to play with and hold onto. 


I used two of my all-time-favourite fabric lines, Sarah Jane's Children at Play, and Out to Sea for the quilt top. There is just something about the little rockets, pirates, and paper air planes that just makes it absolutely perfect for a boys quilt (especially my handsome little nephew!).


I backed it in a minky dot fabric to make it perfect for newborn snuggles. Its super soft and matched so perfectly with the colours in the quilt top that I decided to flip it over and turn it into the binding as well. I have never sewn with minky before, but it wasn't too hard. I spray basted this quilt, which I have also never done, then just stitched in the ditch to join the three quilting layers together. 
I chose a decorative stitch on my sewing machine to stitch the binding down, machine binding being another first as well. 


 The decorative stitch kind of got lost in the minky fluff, but I was still happy with the result.
For a lot of 'firsts' on this quilt, I am super happy with how it turned out! 


 I cant wait to meet my newest nephew and get lots of baby cuddles! 


Toodles!

Jessica